Introduction
PromptBase apps allow you to build small, powerful AI applications using text prompts. You can create apps to build anything from stylised profile picture generators, TikTok video creators, video games makers and more.
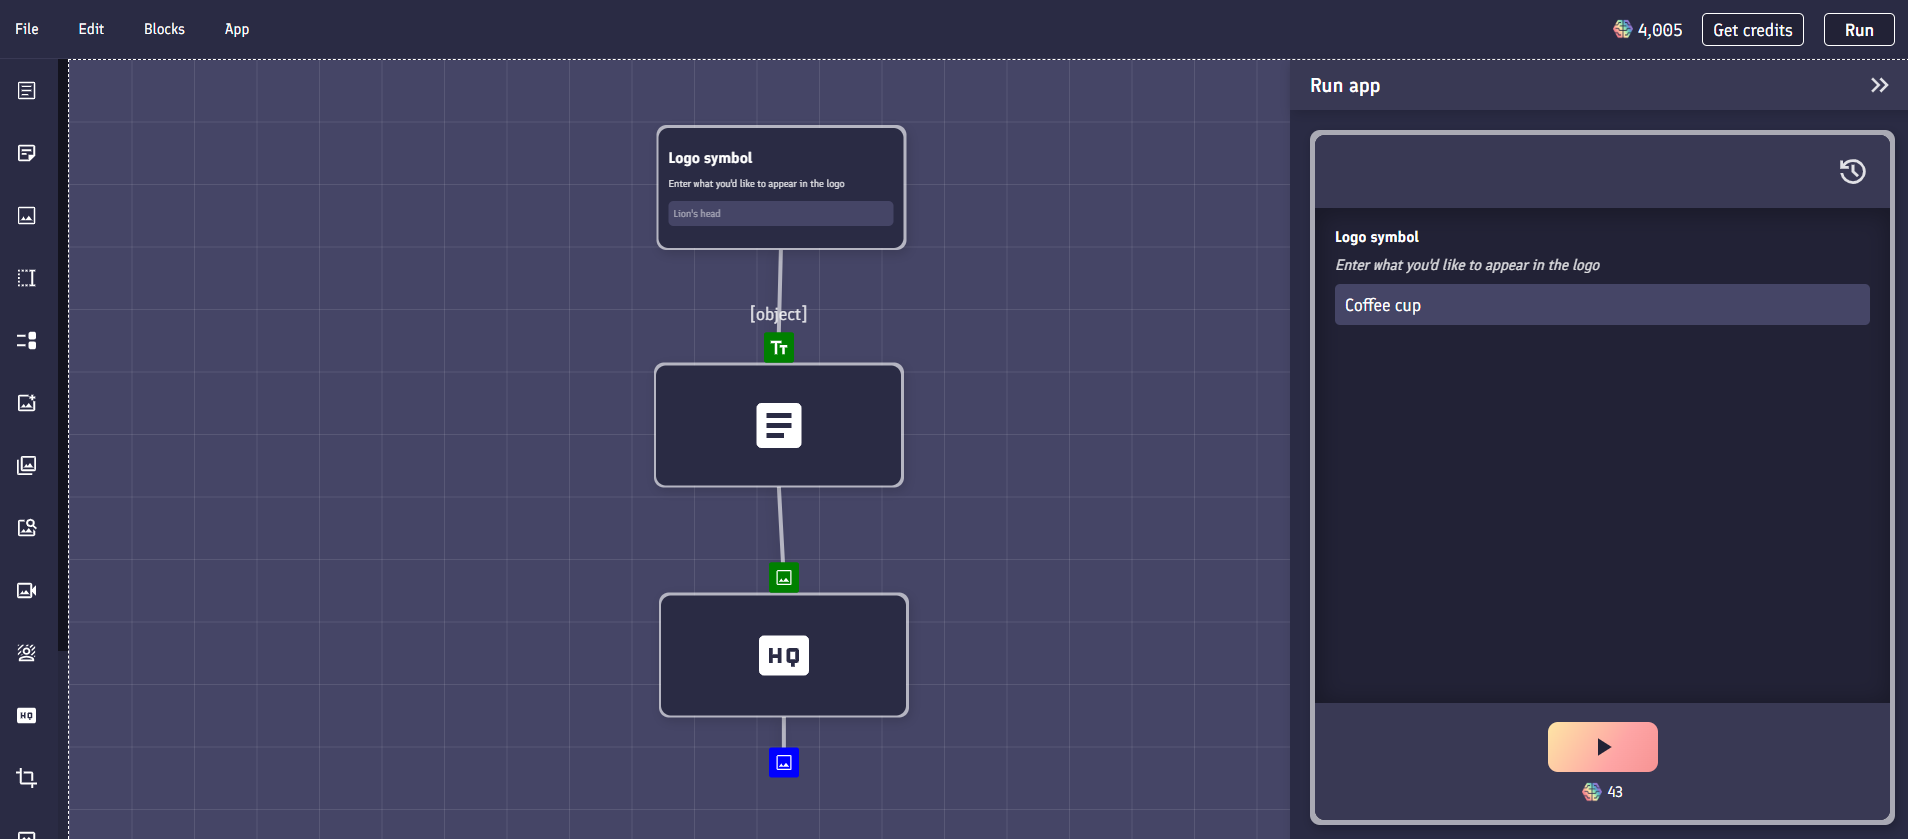
Apps are created in the app builder by combining together app blocks. For example, an image prompt that generates modern logos could exist as a single app block within your app. You could attach a text field block to let a user choose what logo they want to generate, and an image upscaler block to ensure that the produced logo is of a high enough quality to be used in a real world project.
Apps can be run privately within the app builder, or you can publish them for anyone to use on the PromptBase marketplace.
Whenever an app is used, the creator of the app earns revenue. If an app contains a prompt purchased from the PromptBase marketplace, the creator of the prompt will also earn too.
App builder
The app builder is where all apps are created. It is recommended to use the app builder in a desktop environment for the best experience.
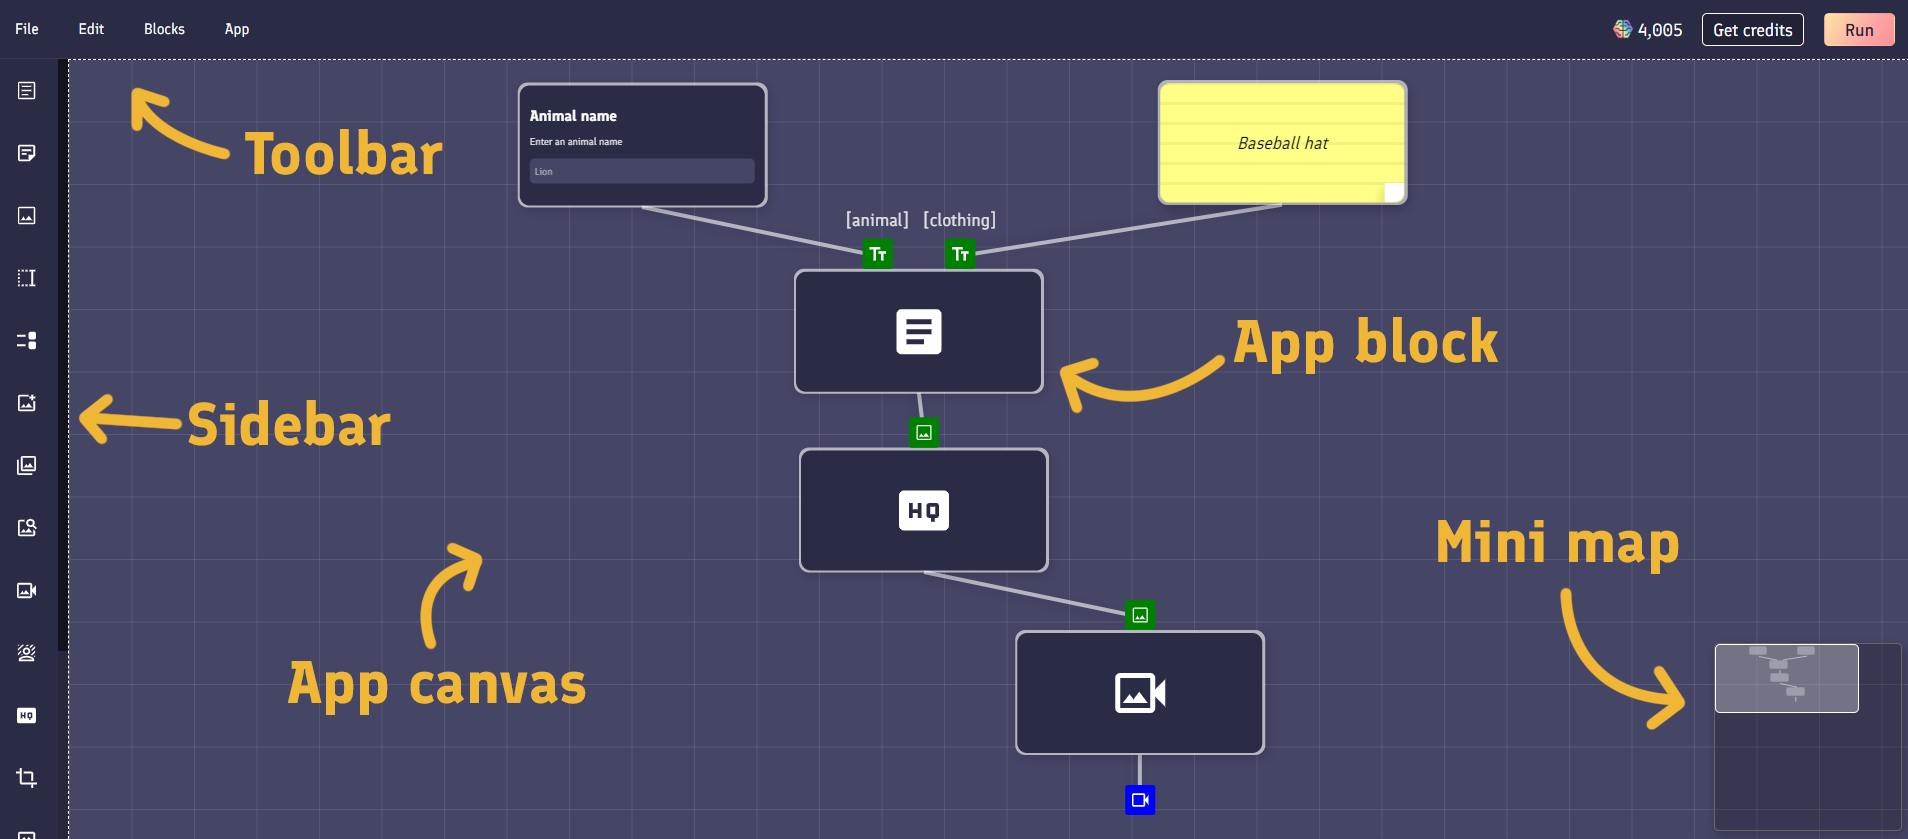
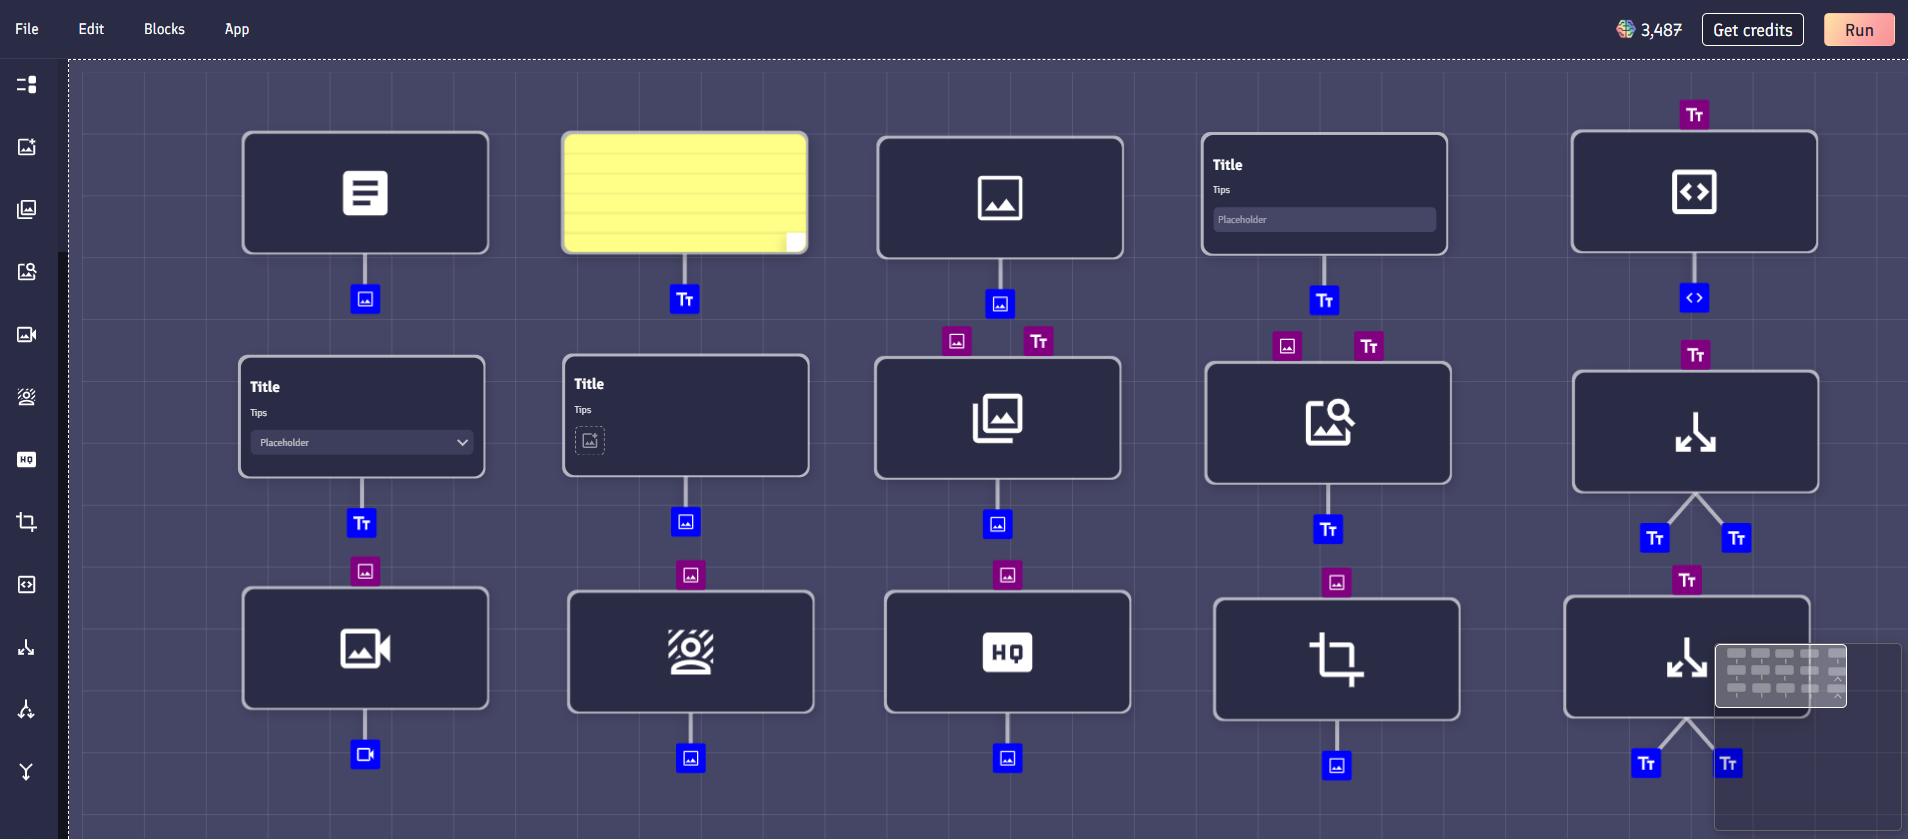
Most of the screen space within the builder is taken up by the app builder canvas, which lets you add app blocks and connect them together to create your app.
App blocks can be added using the sidebar menu, or via the menus in the top toolbar. When you click to add an app block, it will automatically appear on the canvas. You can move app blocks around by clicking and dragging them.
The app canvas itself can be zoomed in and out, and also panned by clicking and dragging. There is a mini-map in the bottom right hand corner of the app builder which can also be dragged to move around the canvas.
In the top toolbar, you'll find options for creating, saving, deleting and opening your app projects within the app builder. You'll also find options for running and publishing your app.
Apps
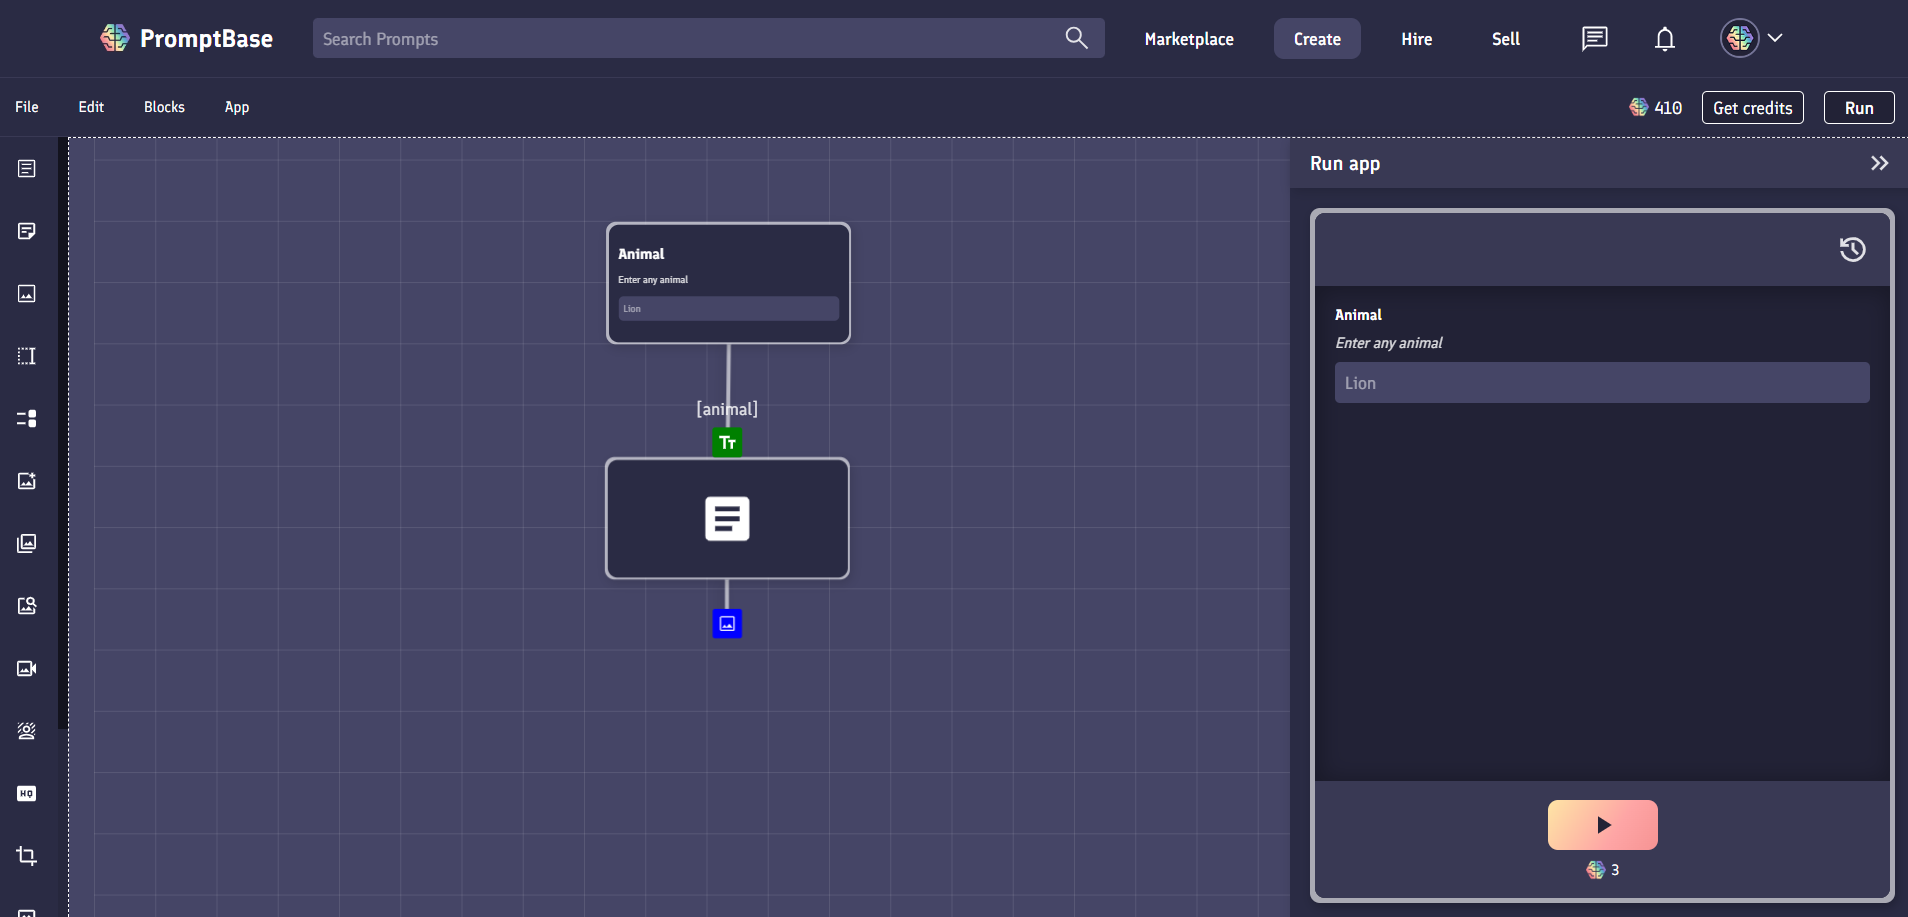
In the top right of the toolbar menu within the app builder you'll see a "Run" button. Clicking this opens the runnable version of your app, also known as the app layout.
If you intend to publish your app for other users on the marketplace, then the app layout is what they will be interacting with. Users will not be able to see how your app works behind the scenes, or the prompts used within it.
App layouts are simple interfaces that allow a user to interact with your app. Within the app builder, you can add input fields, such as text inputs, image upload inputs, and dropdown select options that allow a user to enter data into your app so they can use it for their own needs.
For example, if your app generates modern logo designs in a specific style, you might add a text input field to let a user choose what object they'd like to include within their logo.
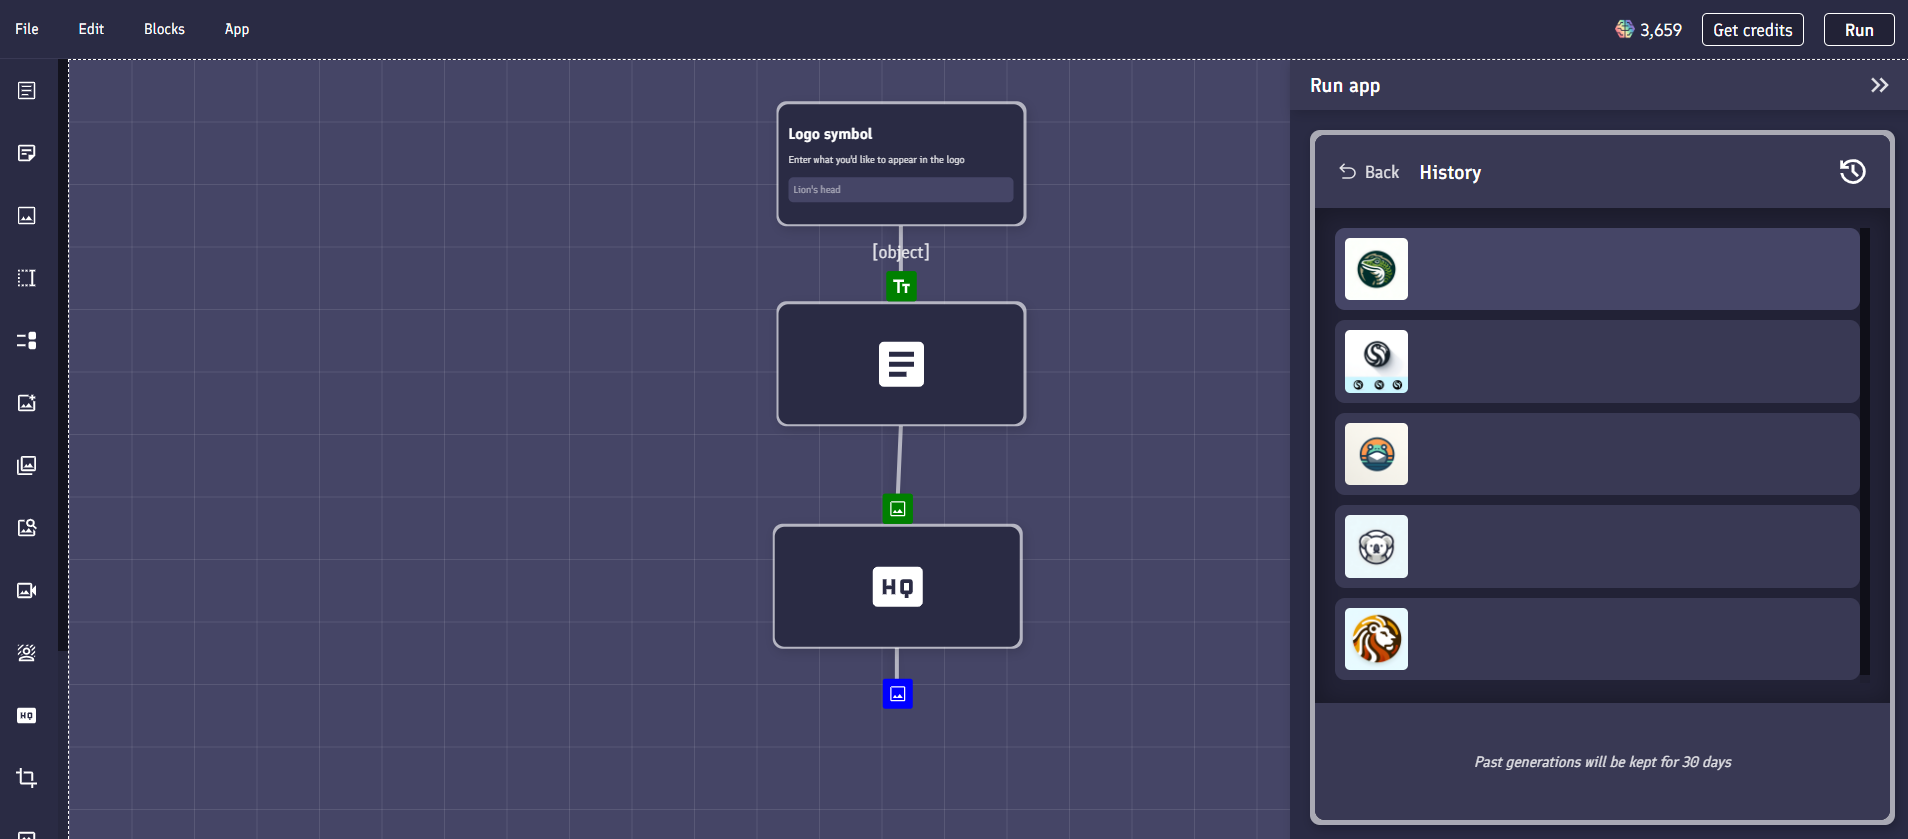
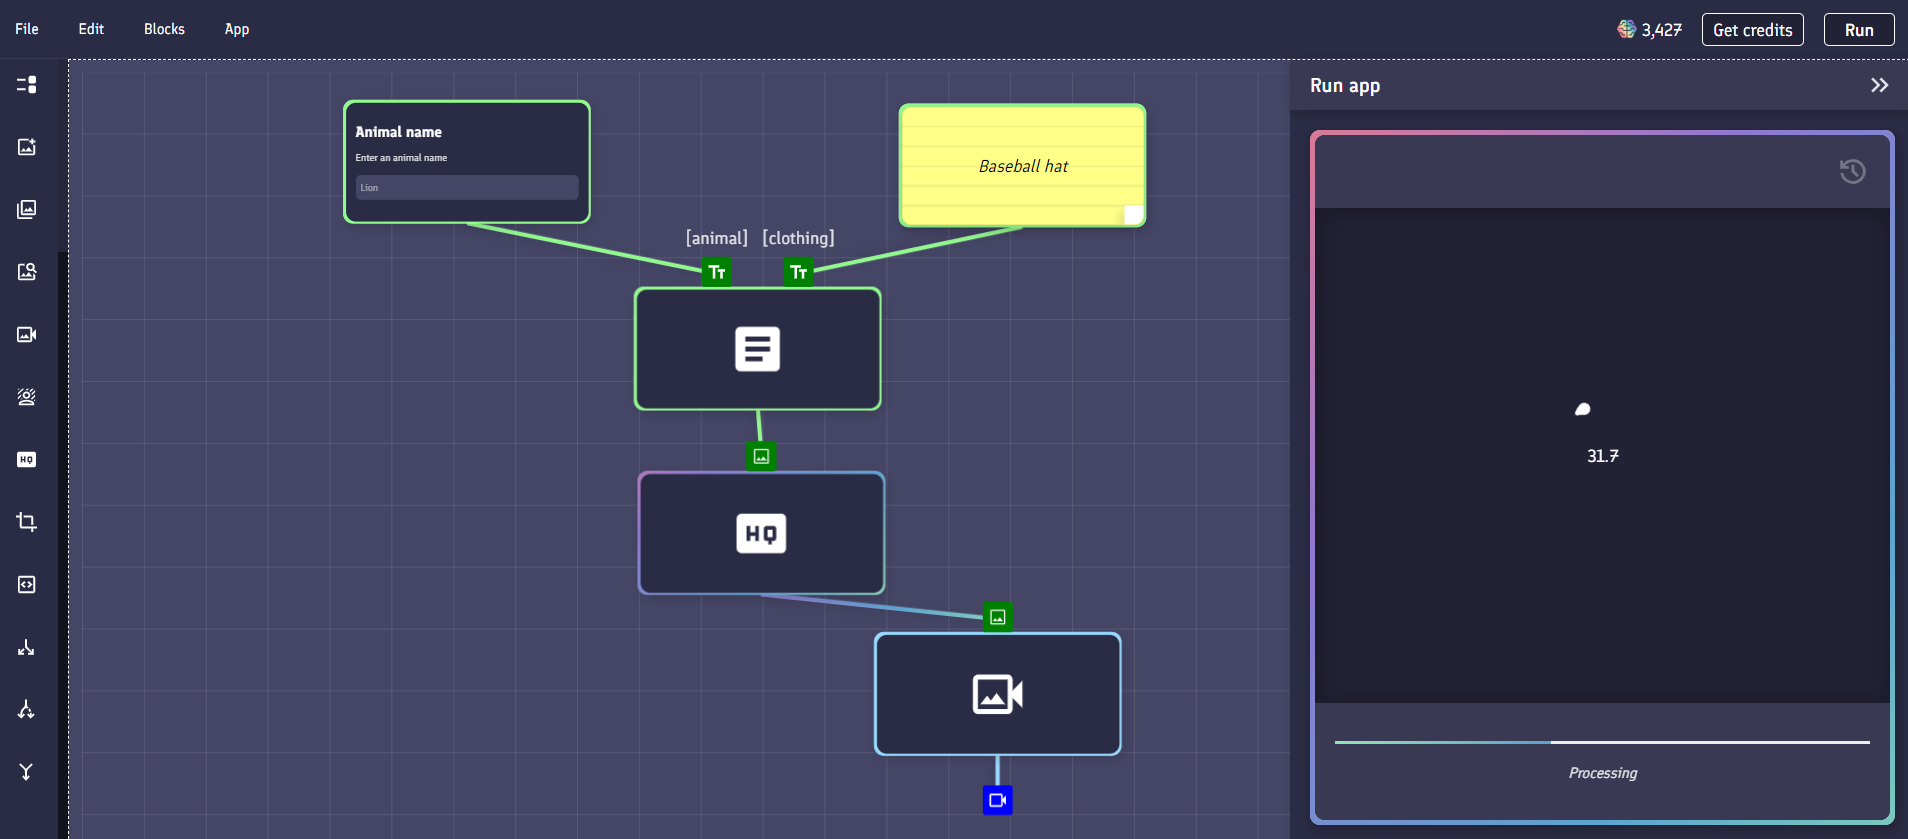
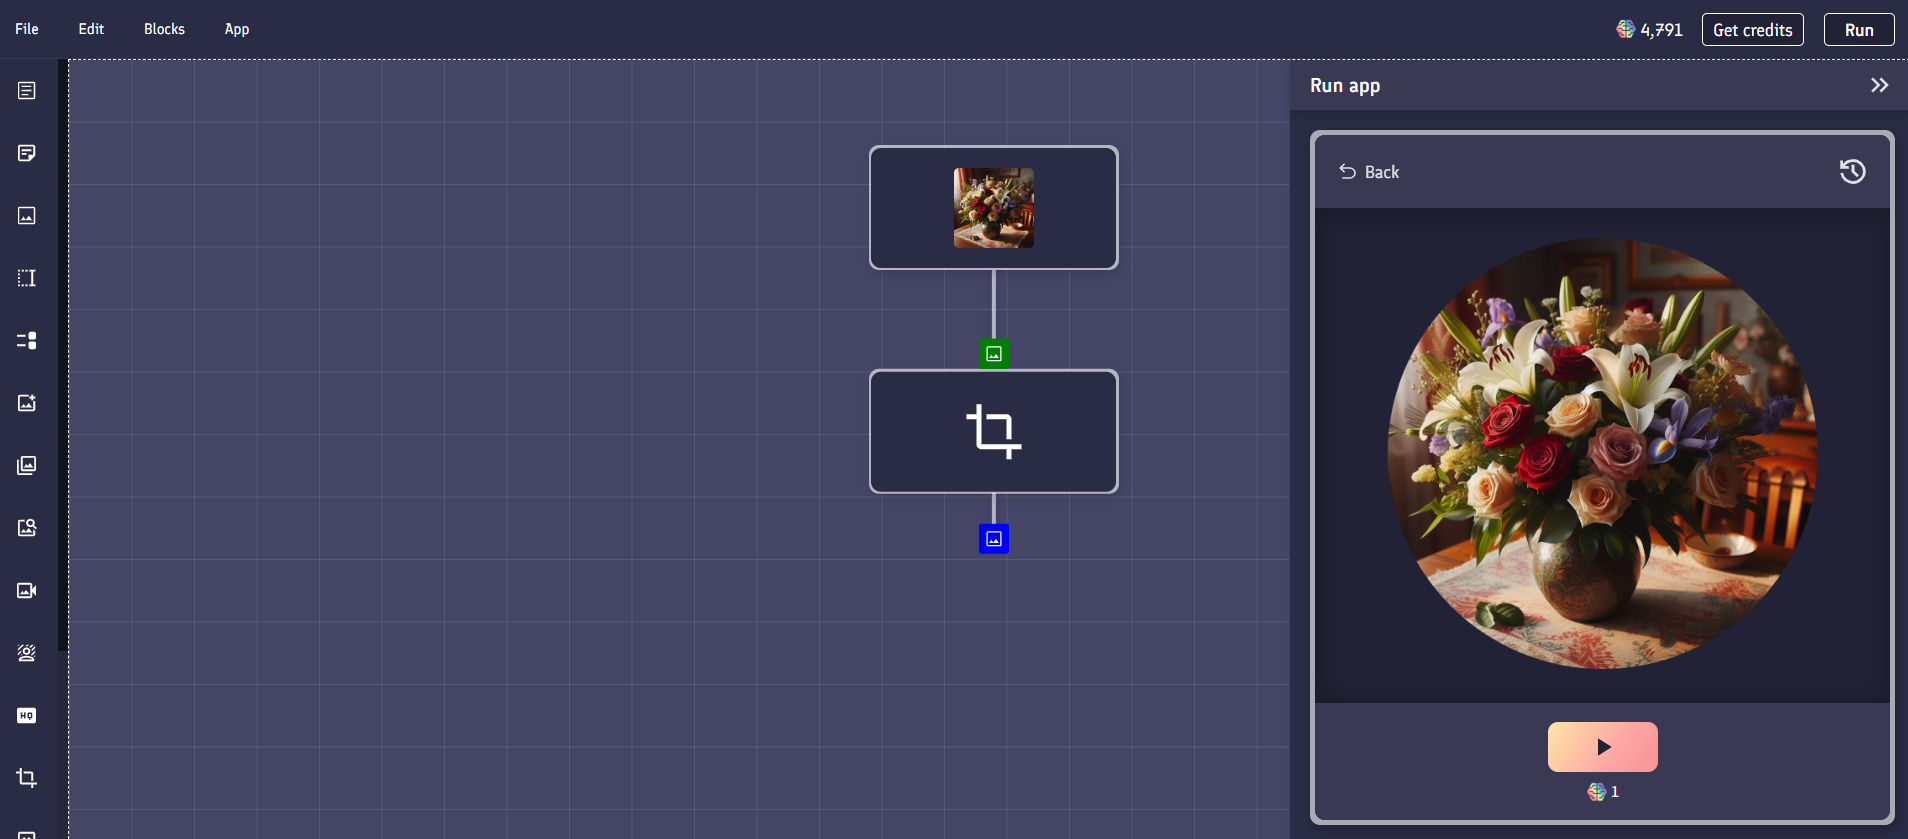
To run an app, click the play button at the bottom of the layout. The app will then begin generating. Whilst this is happening, you'll be able to see the progress of the generation in the loading bar. The time it takes for your app to generate its output depends on the type and number of blocks within your app.

Once your app has finished generating, the output will be displayed along with a number of actions. For example, if your app generates images, you have the option to download the image.
All your generations within a specific app will appear in the app history section of the app, which is accessible by clicking the history icon in the top right hand corner of the app layout. Generations will only remain in your history for a maximum of 7 days, so make sure to download your generations if you'd like to keep them for longer.
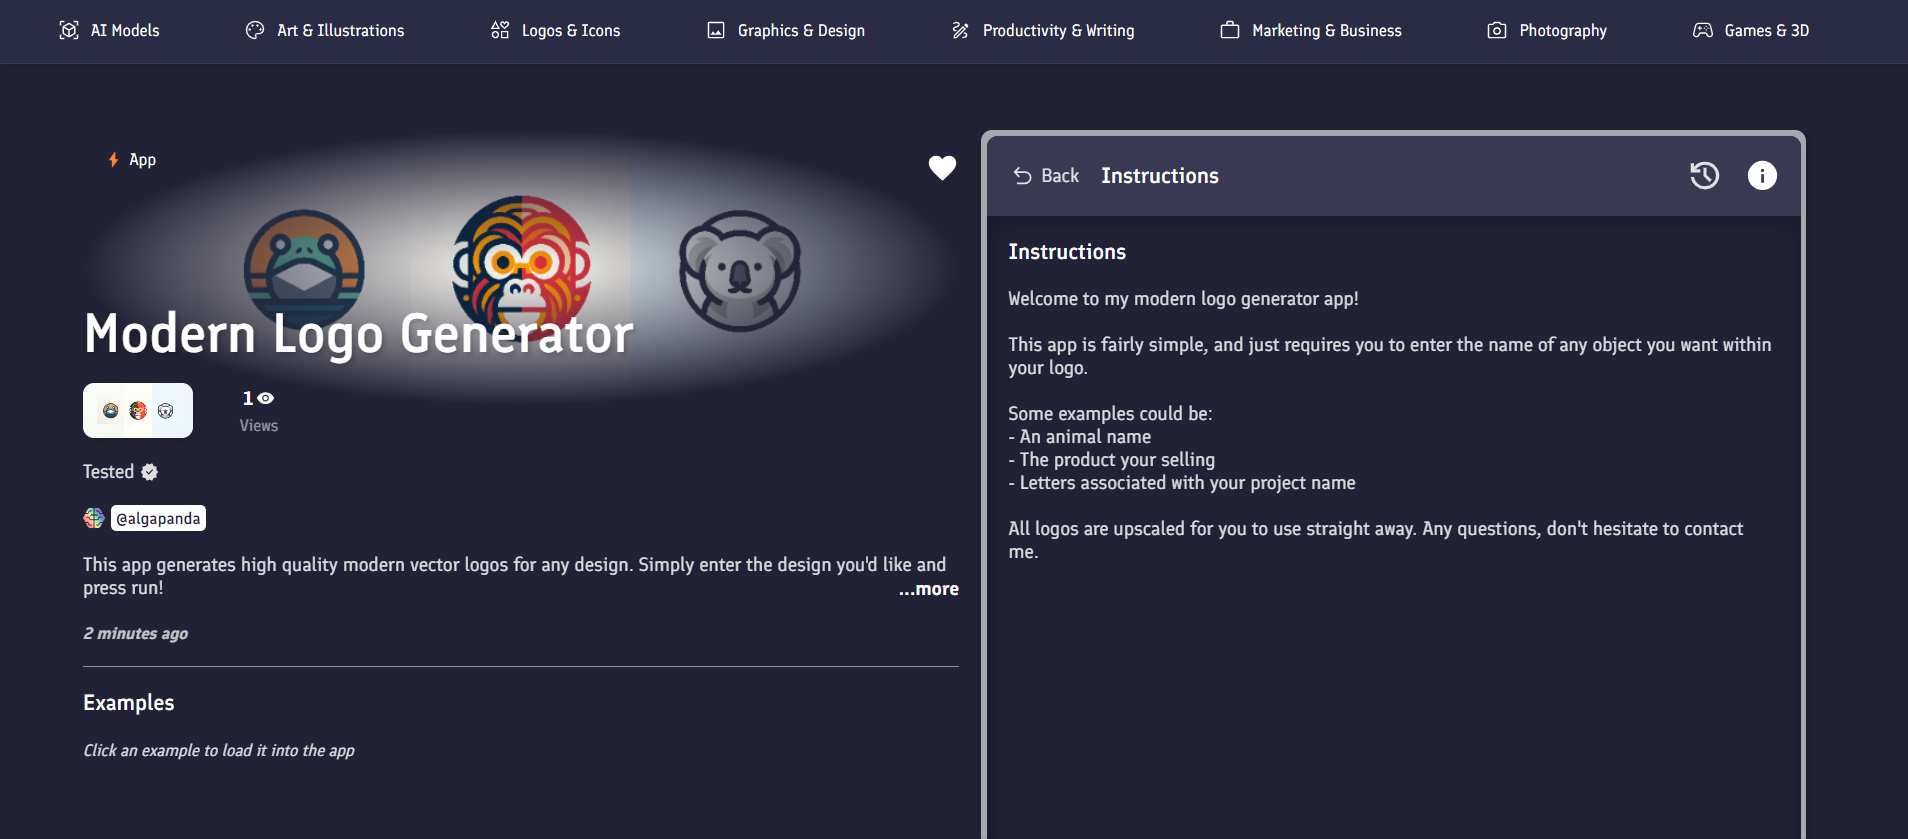
When you publish an app on the marketplace, you can provide a guide on how to use the app. Users will be able to view this guide by clicking the info icon that appears in the top right hand corner of the app.
App projects
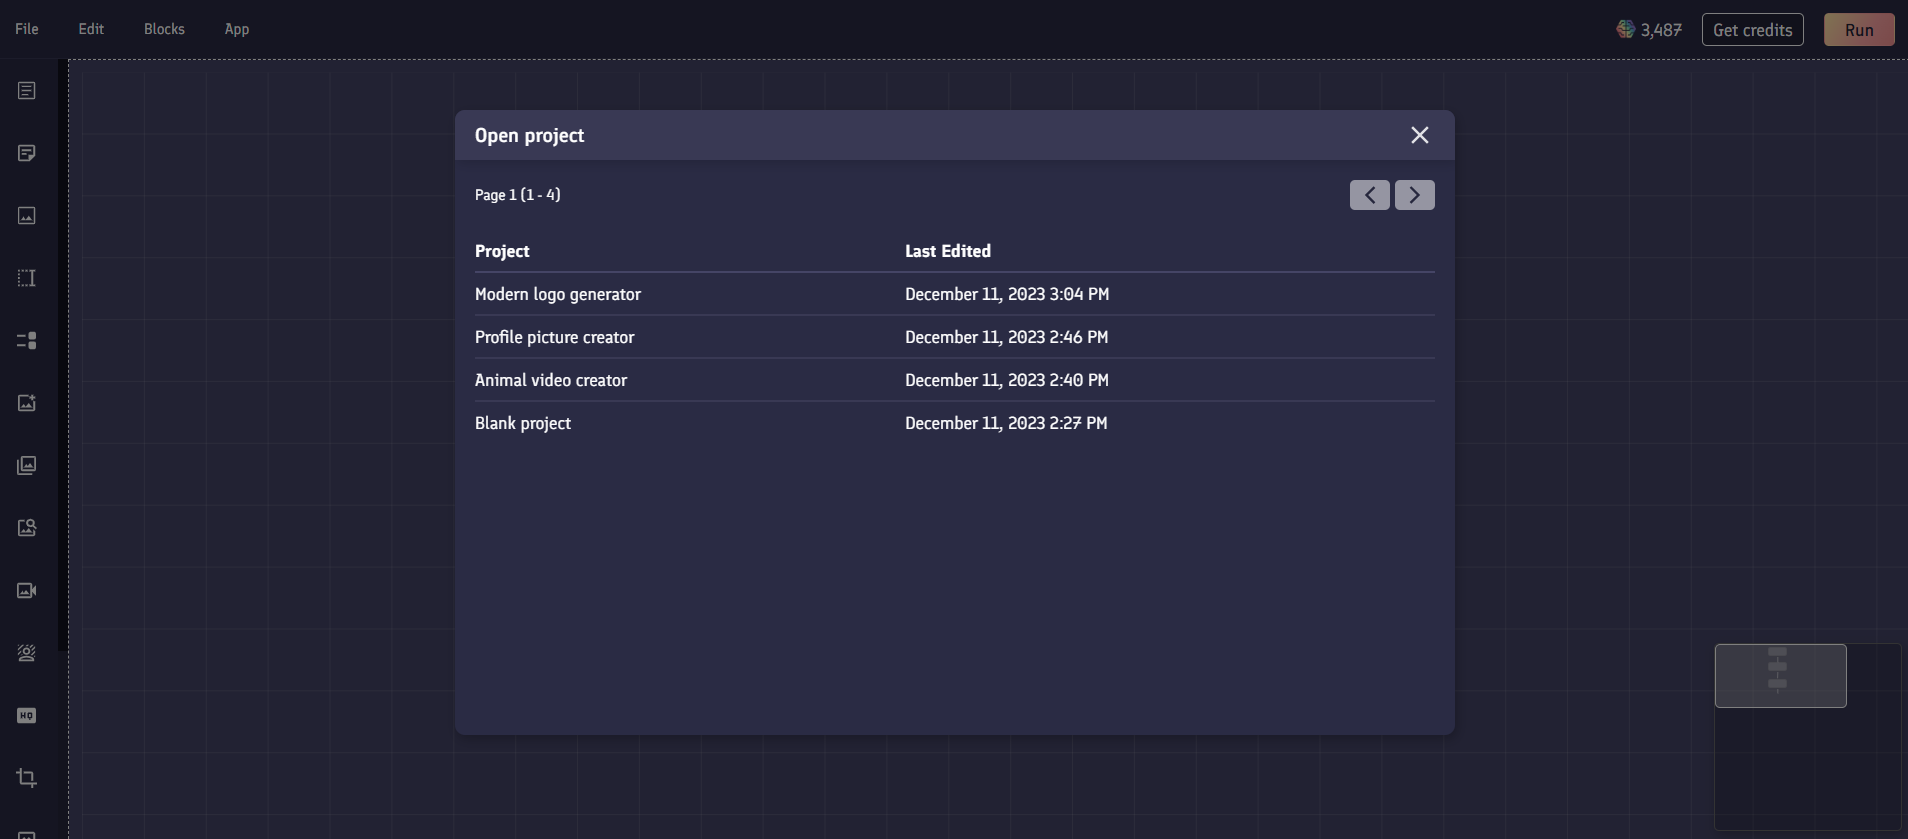
App projects are the files that contain all your app blocks and the links between them. You can start a new app project by clicking File > New project in the top toolbar menu.
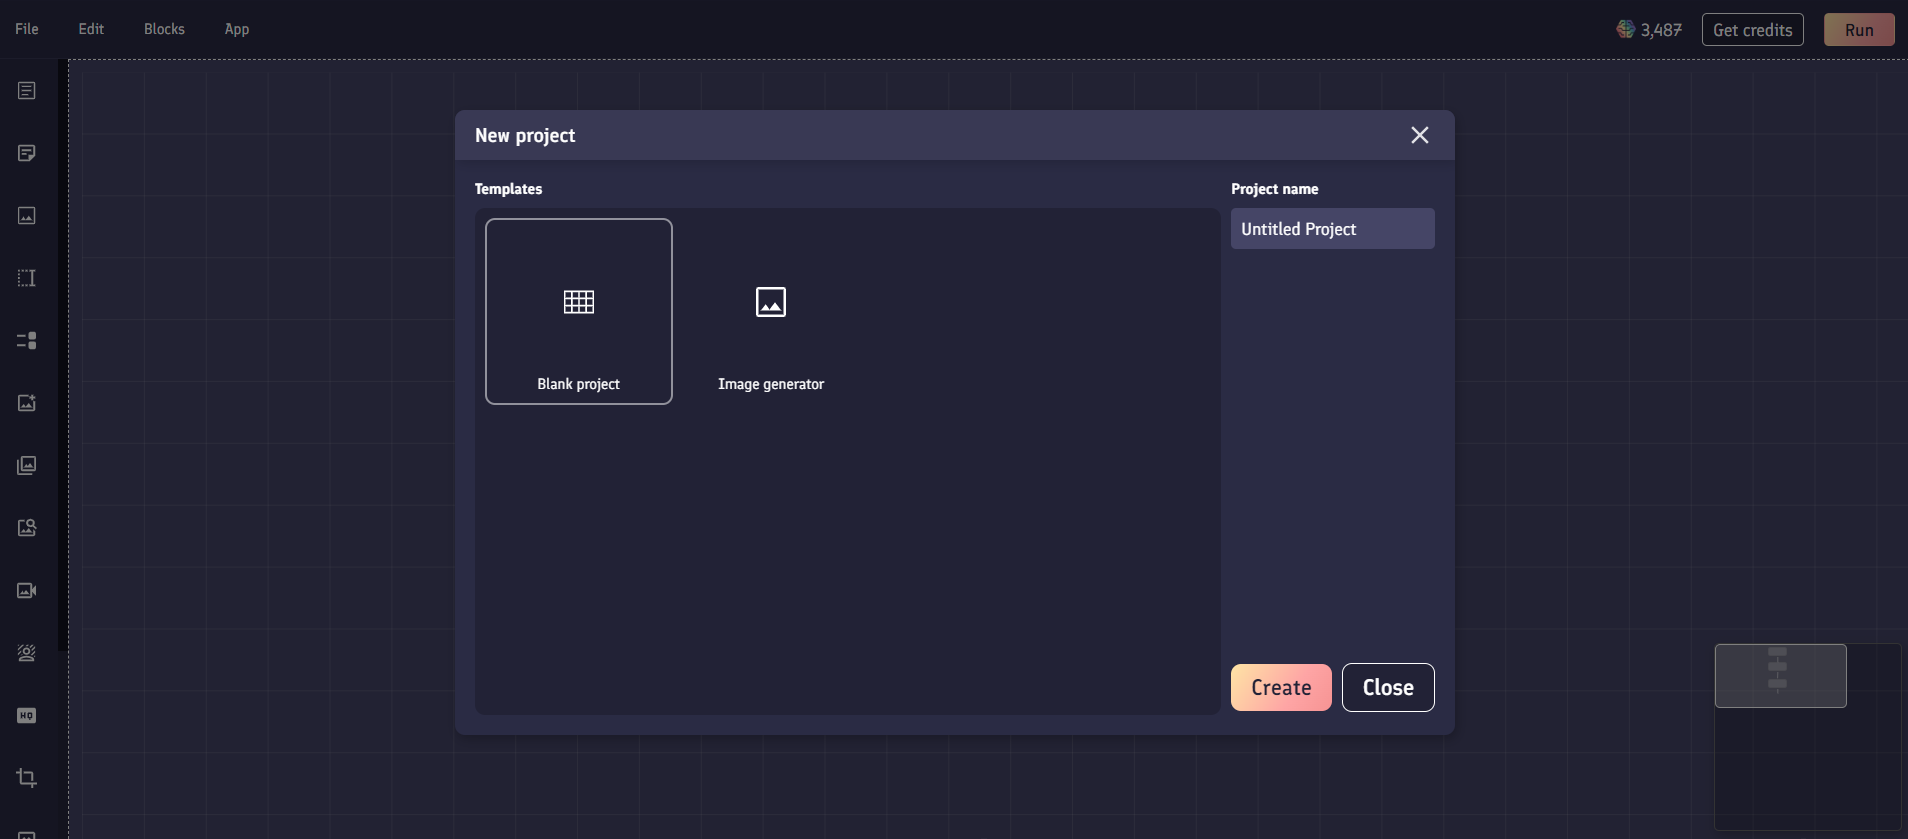
When starting a new app project, you can choose to start from a blank canvas template, or select from a premade template that you can adapt for your needs. You'll need to give your project a unique name when creating your project, however you can change this as any time by selecting File > Rename project.
You can save your file by selecting File > Save, or with the keyboard shortcut Ctrl + Shift + S. You file will save automatically before running or publishing your app.
If you publish an app from your app project, the published app that it's linked to will appear as a shortcut link in the center of the top toolbar.
You can delete your app project by selecting File > Delete. Deleting a project cannot be reversed. If your app project is linked to a published app, then you are currently unable to delete the project.
App blocks
App blocks are the building blocks of apps. Every block has a specific job, whether its blocks that accept user input, prompt blocks that generate images, or blocks that convert images to videos. By combining these blocks together in unique ways with well written prompts, you can create almost any app imaginable.
You can add app blocks to your app by either selecting them from the Blocks menu in the toolbar, or by using the icons in the side menu.
There are currently 6 different category of blocks:
- Prompt blocks allow you to use models like ChatGPT, DALL-E and Stable Diffusion to generate text or images.
- Fixed inputs allow you to provide fixed non-editable data into your app, like images and pieces of text.
- User inputs allow you to create inputs into your app that anyone can use to provide their own data.
- Image transformers perform actions on images, such as removing backgrounds, upscaling, or converting them to video.
- Text transforms converts text into other text-based data like HTML code.
- Flow blocks allow you to route and control the flow of data through the app blocks within your app.
App blocks will perform their specific action, and then pass their outputs to any connected app blocks. The action that an app block is carrying out will affect how long it takes for the app block to complete generating. For example, an image to video block takes longer than a text to image prompt.
If you are running your app in the app builder, you'll be able to see the status of each app block working as data flows through your app. This is indicated by the color around the app block:
- Blue outline: App block is waiting to begin work.
- Multi-colored outline: App block is working.
- Green outline: App block has completed work.
- Red outline: App block generation has failed.
Hovering over an app block will reveal options to interact with the app block:
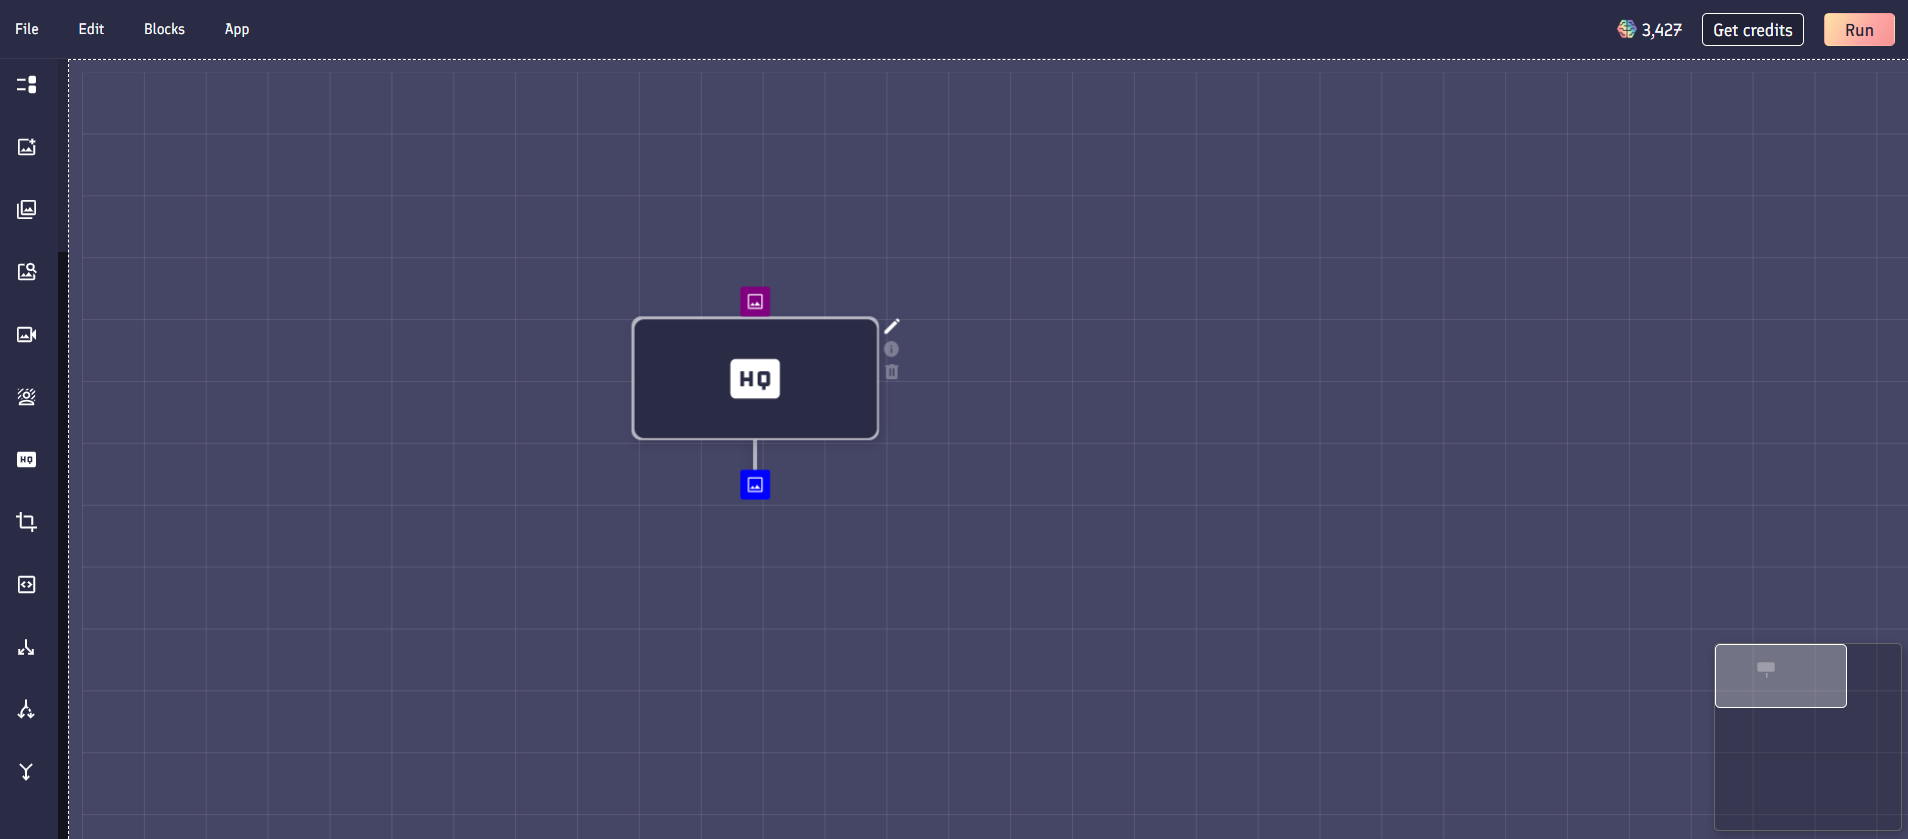
- Edit (pencil icon): Opens up the edit menu for the app block.
- Info: Opens up the information panel detailing how the app block works.
- Delete (trash icon): Deletes the block from the app project, breaking any connections to it.
Inputs and outputs
Each app block has a number of connections going into it and outputs leaving it, these are known as an app block's inputs and outputs. When all of the values going into an app block's inputs are ready, it will begin work and propagate the result to all of its outputs.
The type of data that can flow through a connection to an app block is indicated by the symbol on the square node at the end of a connection. You can only connect an output to another block's input if they use the same type of data, for example you can only connect an image output of one block to an image input of another block.
You can connect two blocks together by clicking and dragging the connection of one block and moving it over the input connection of another block. If the connection can be made, then both connection nodes will turn yellow.
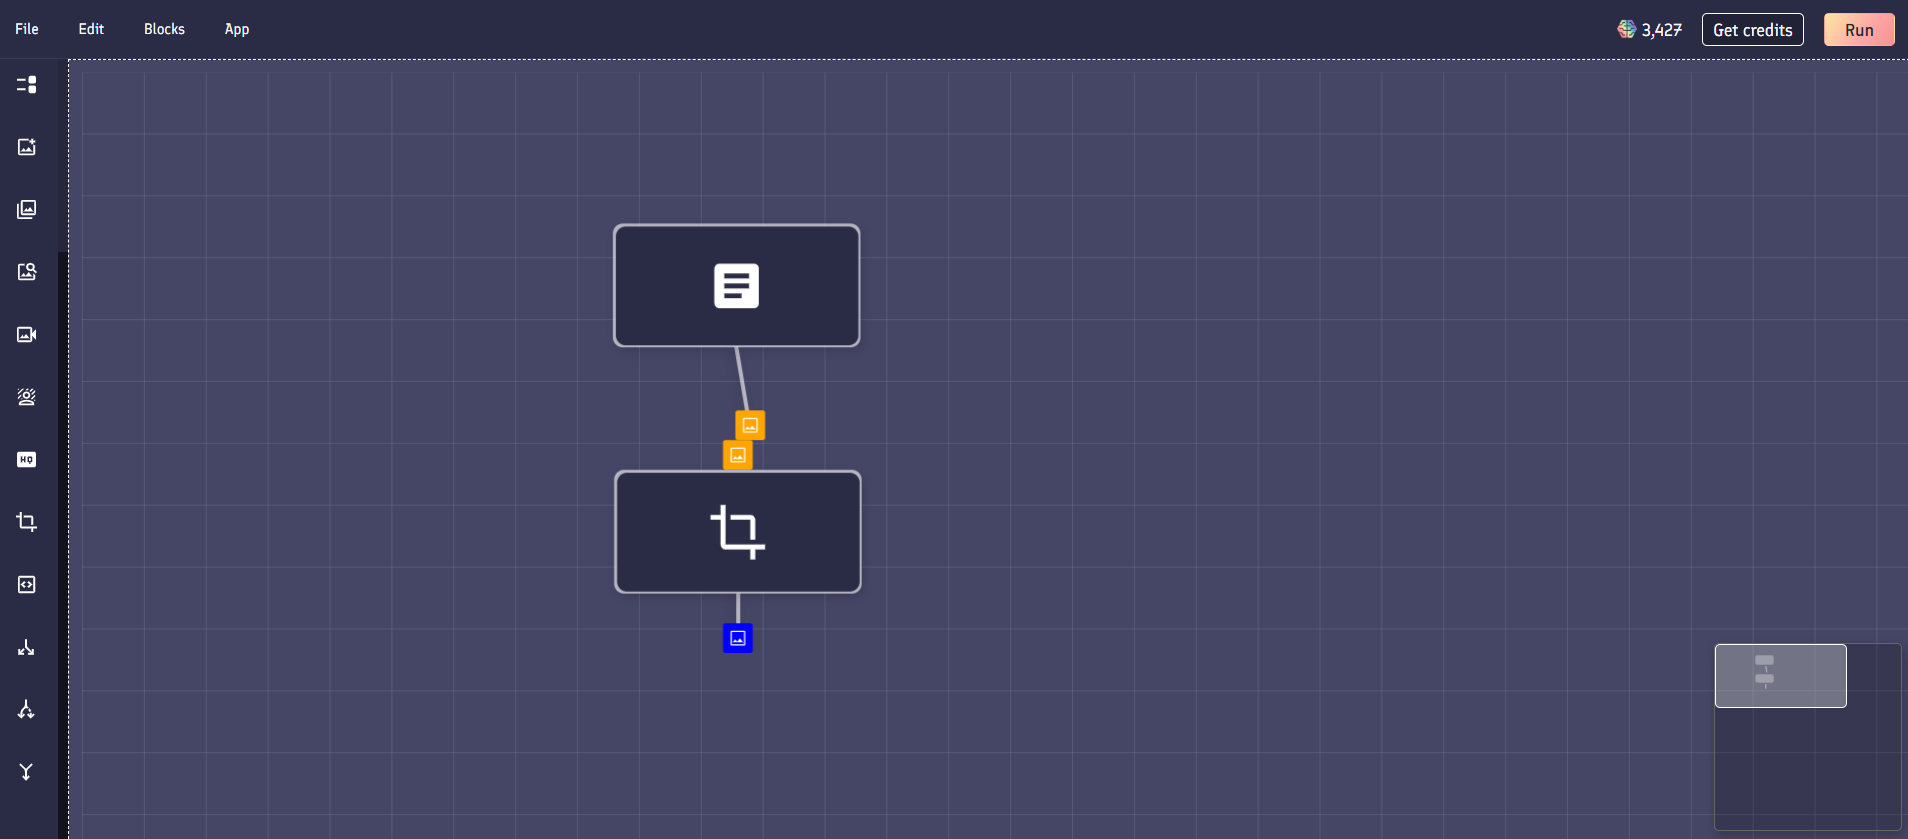
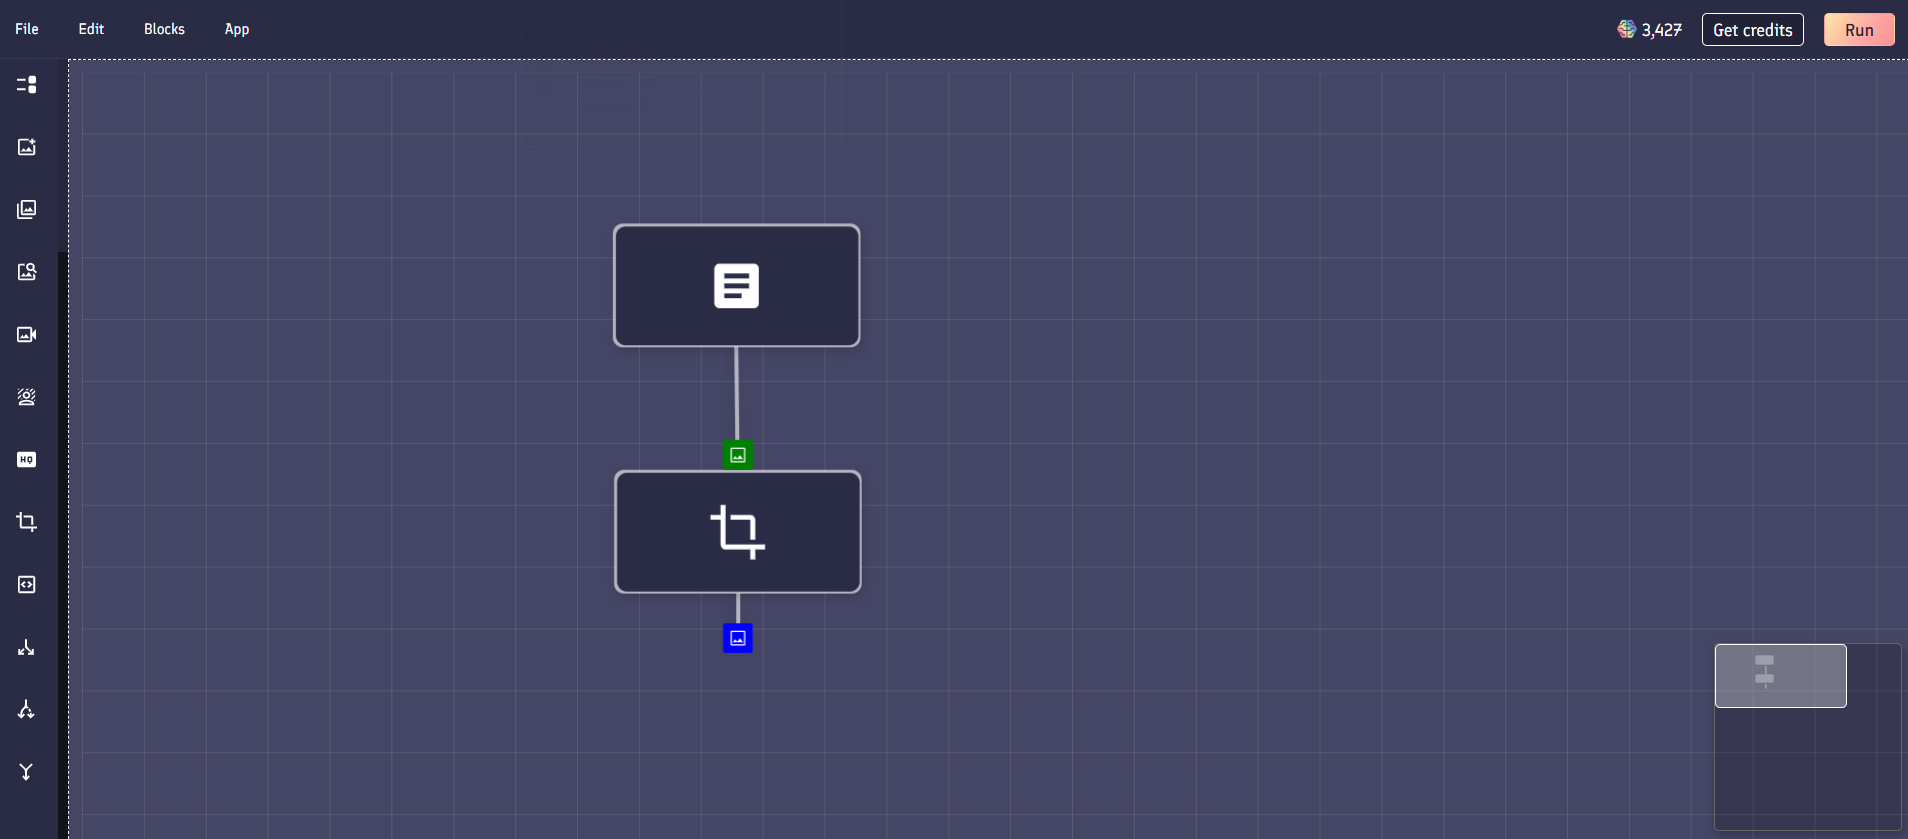
If you release the click and drag, the nodes will connect together and turn green.
If you need to disconnect two app blocks, you can hover over the connection line until it turns red, and then click the line to break the connection.

Any output connections that do not connect to another block within your app will be classified as a final output of the entire app, and is what will be displayed to the user after your app has finished running. An app can have multiple outputs after running, for example a Tweet generator app might output both an image and a piece of text.
Credits
Because each app requires compute power to run behind the scenes, we use a credit based system for running all apps. Each block has a certain credit cost associated with it. A general rule of thumb is that the more intensive a task is, the higher the credit cost of the block. For example, generating a video is more expensive than generating a single image.
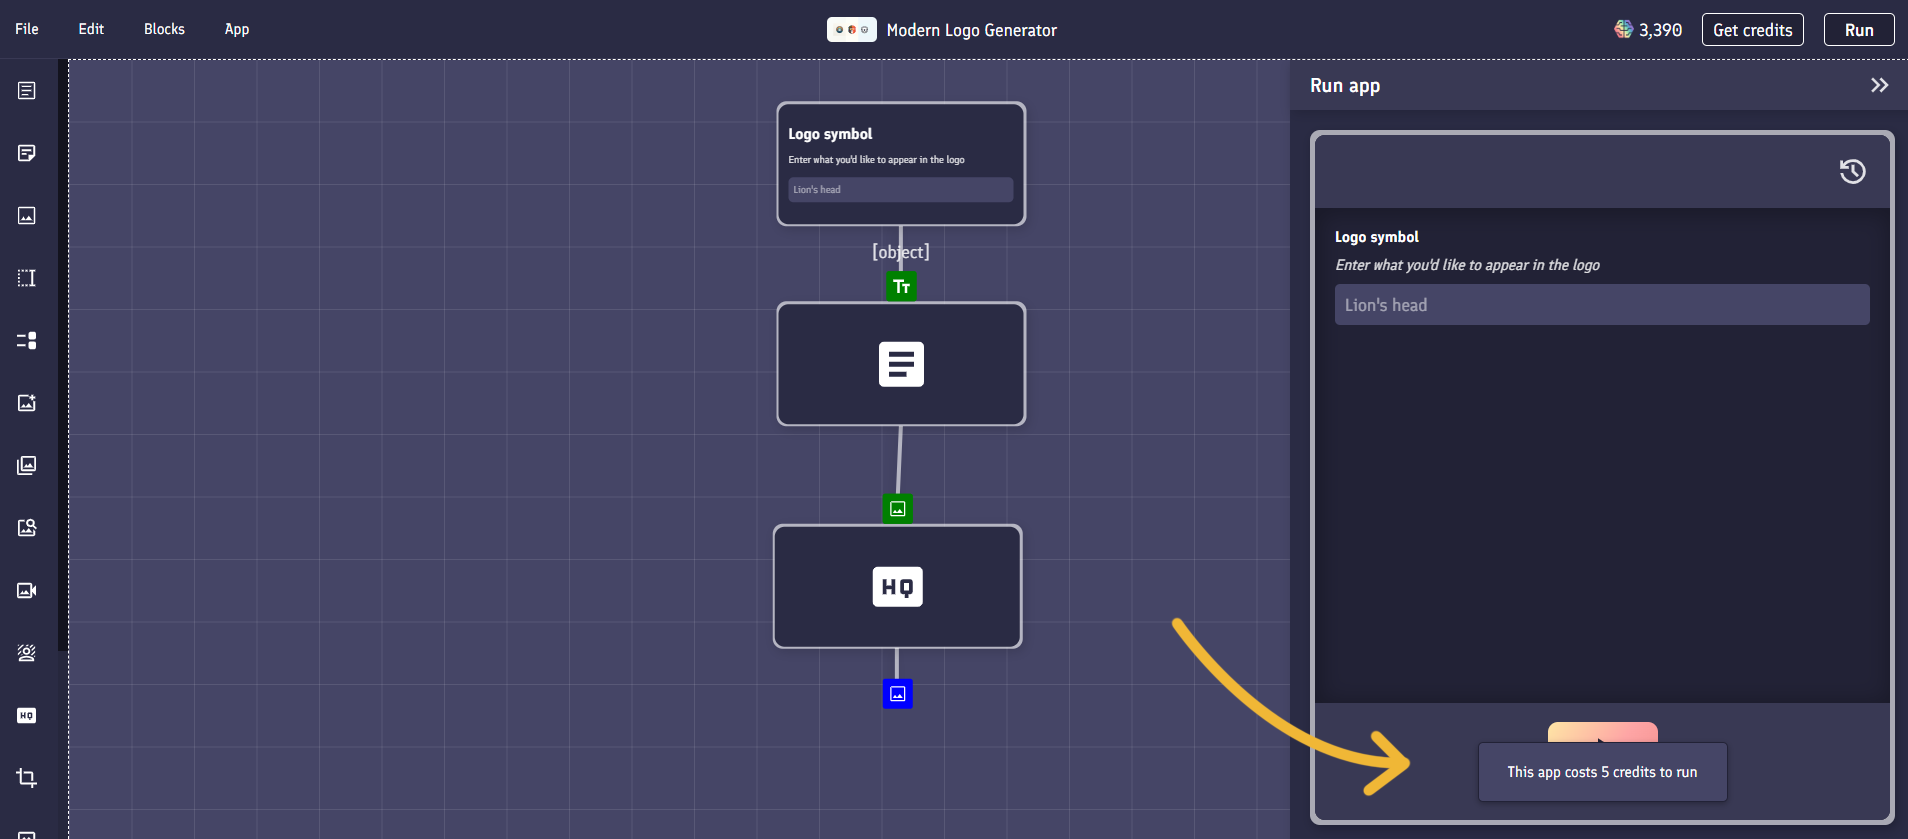
You can view the total cost of running an app from the value shown beneath the app's play button, or from within the App > Cost breakdown menu from the toolbar.
You can purchase credits by clicking the "Get credits" button on any app in the marketplace, or from within the app builder. There are options to either subscribe monthly to get credits, or to do one off credit top ups.
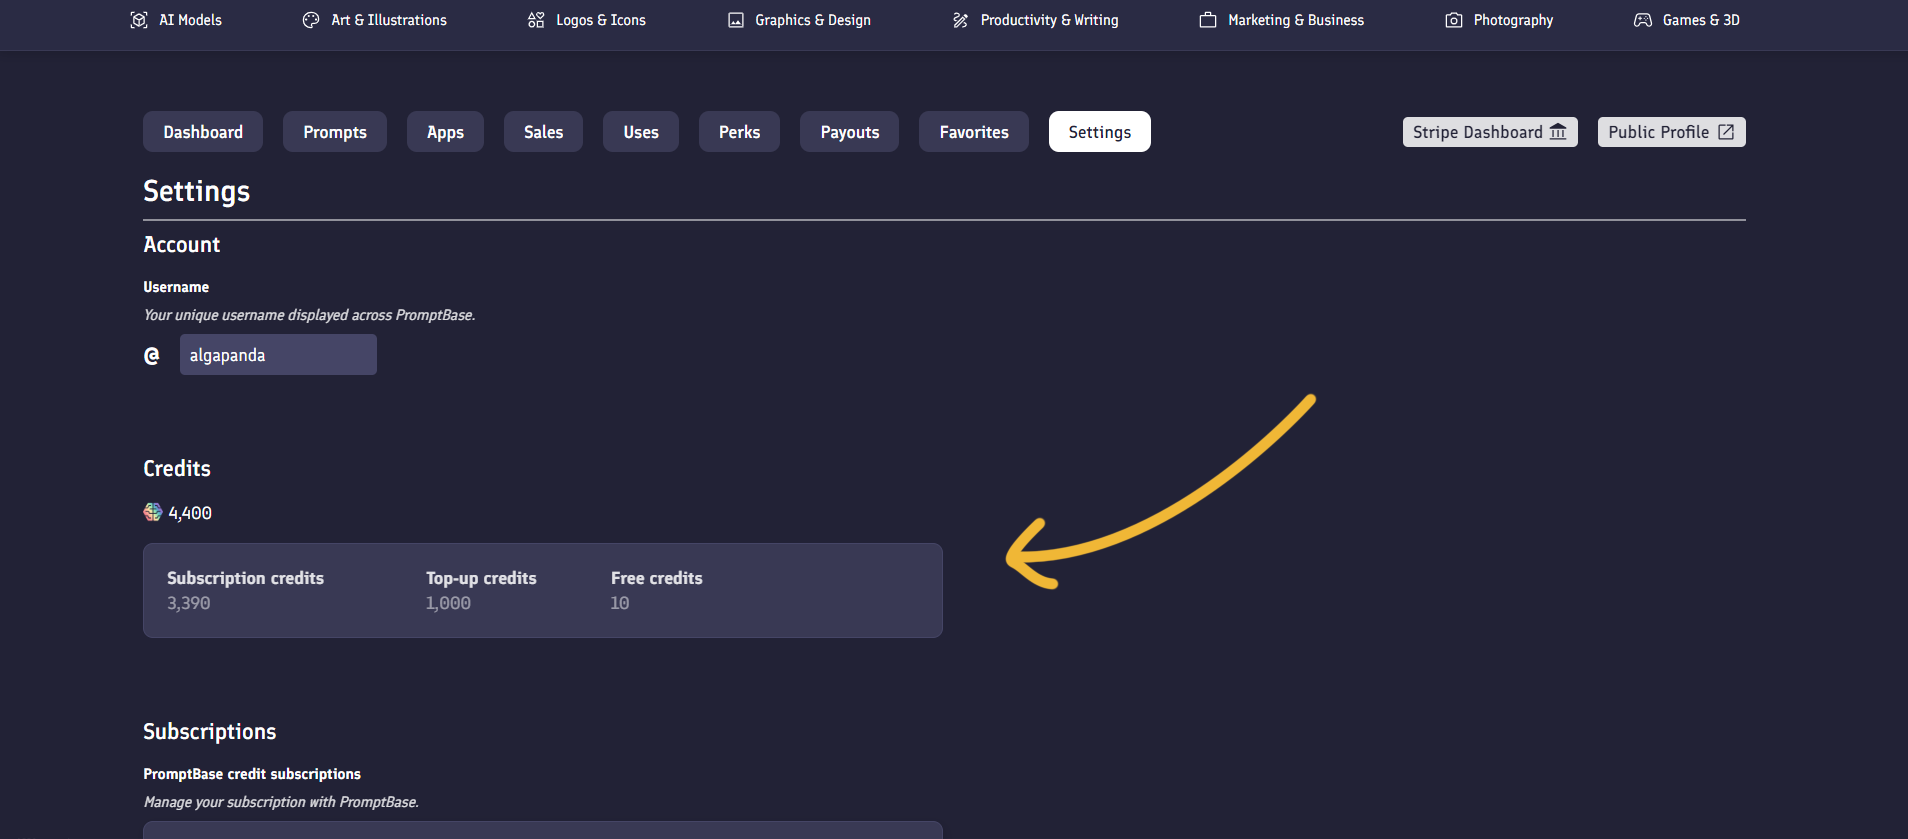
There are three different types of credits on PromptBase:
- Free credits are given out daily to users on the site, and rewarded for certain actions like purchasing or selling a prompt.
- Top up credits are from purchasing a top up credit pack. These will stay in your PromptBase account and have no expiry date.
- Subscription credits (just referred to as credits) are from purchasing a credit subscription plan. They are cheaper than top up credits, but refresh each month. Any unused credits at the end of the month are not carried forward.
You can view how many of each type of credit you have from your account settings, or by hovering over your total number of credits on any app.
If you have multiple different types of credits in your balance they are spent in the following order:
- Free credits
- Subscription credits
- Top-up credits
There are several ways to earn credits on PromptBase without purchasing them:
- We currently award 10 free credits each month to all users who have less than 10 free credits.
- We currently award 5 free credits to a seller whenever they sell a prompt
- We currently award 20 free credits to a buyer whenever they buy a prompt
- You can choose to earn credits whenever your app has a valid use.
- We award 0 free credit whenever your prompt within another app has a valid use.
- If we approve an app you decide to publish, we will refund 50% of the credits you spent to create your app example generations. This only applies to the first version of your app that's approved.
Publishing an app
Publishing an app to the PromptBase marketplace allows any other user on PromptBase to interact with your app through the simple interface. They will not be able to see how the app is built, or any of the prompts within it.
To publish your first app, you first need to have payouts enabled with PromptBase by connecting a bank account via Stripe.
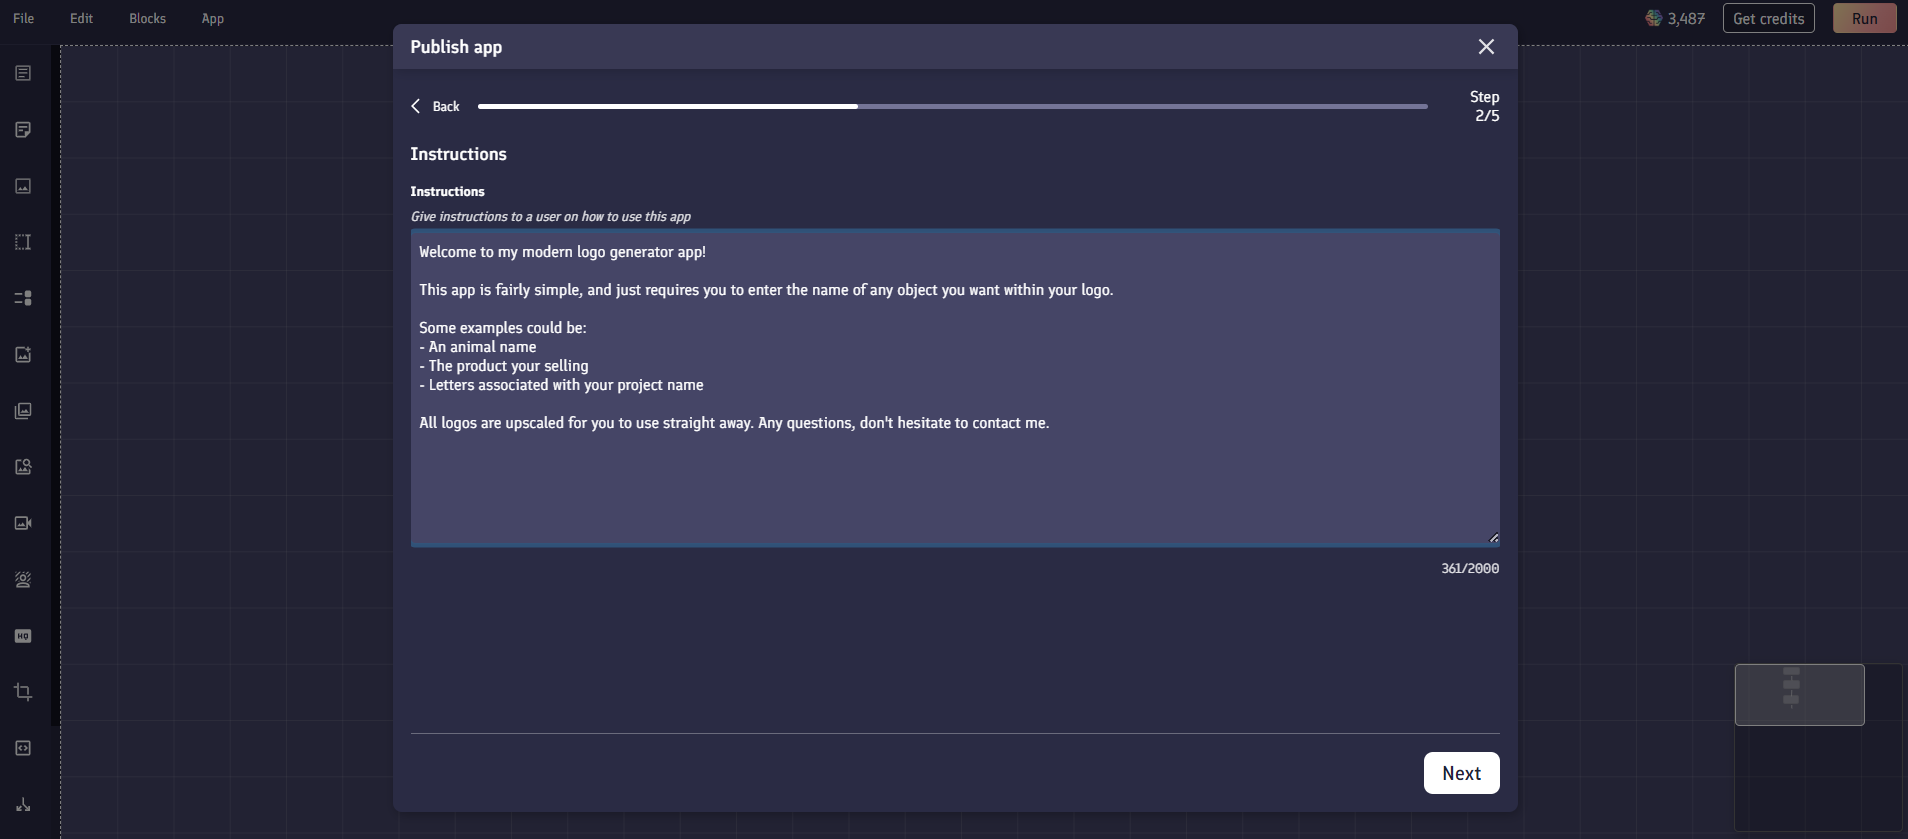
The process of publishing an app requires you to give your app a title, description, and a guide on how to use the app.

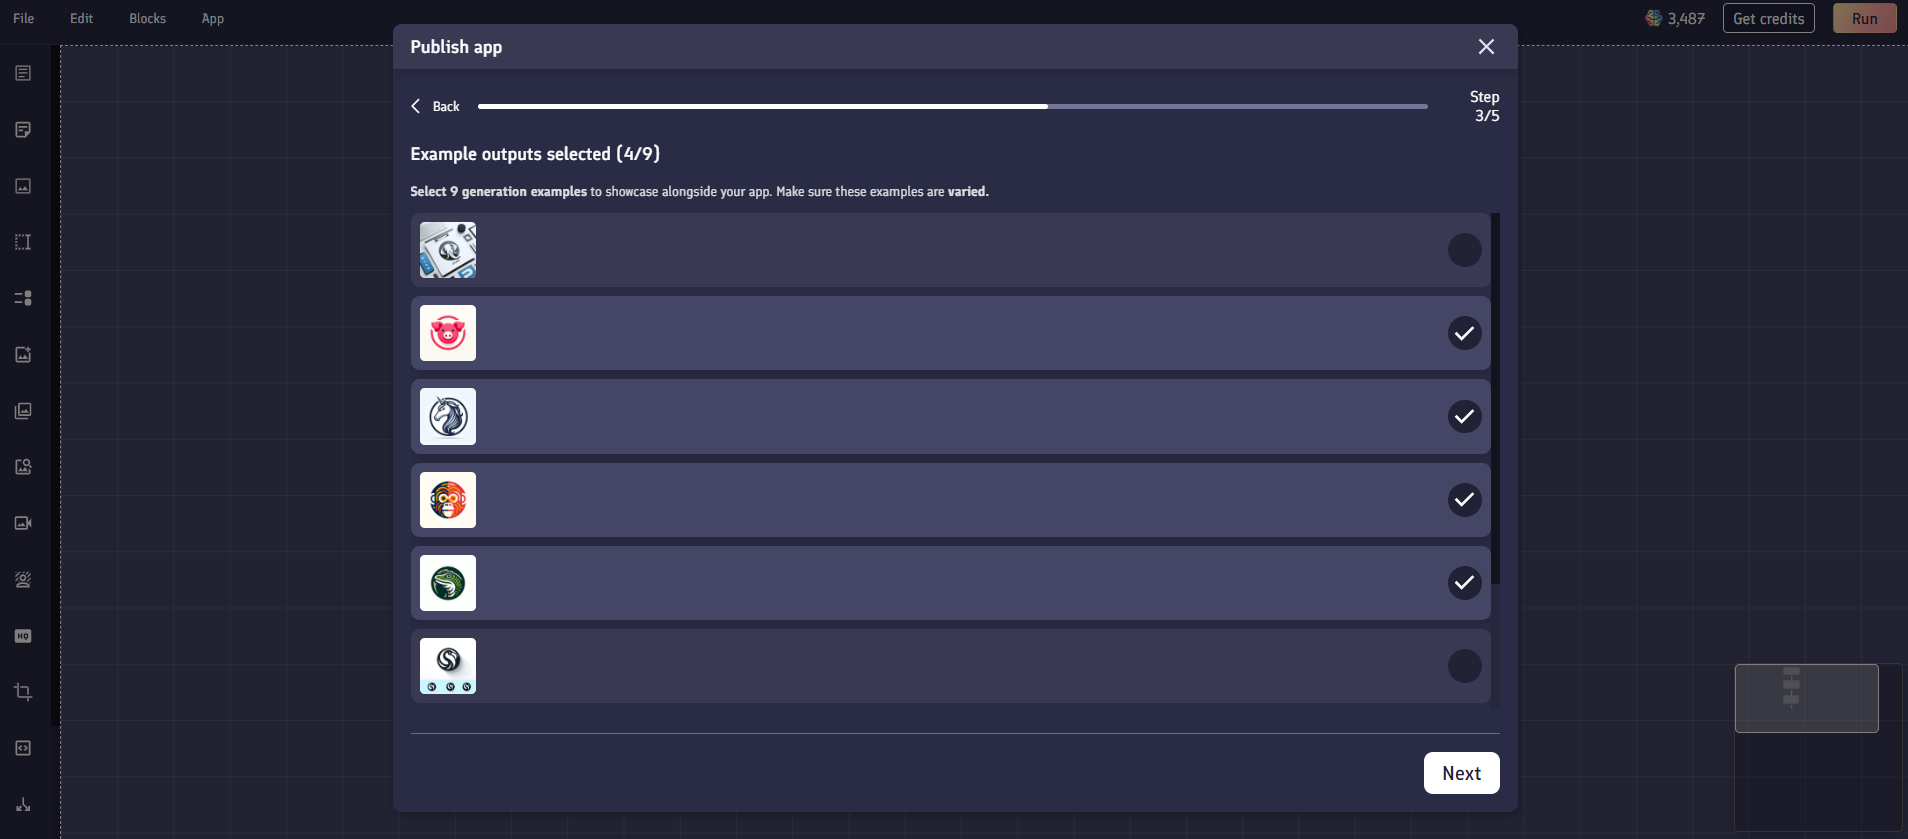
We also require at least 4 example generations from your app, which you can select from your recent generations using the app. These examples will also be displayed on the PromptBase marketplace to give a user an idea of what the app can achieve.
If your app is approved, we will refund 50% of the credits you spent to create your app example generations.
If your app generates images, then you can use these example images to create a thumbnail for your app via the thumbnail editor in your account page.
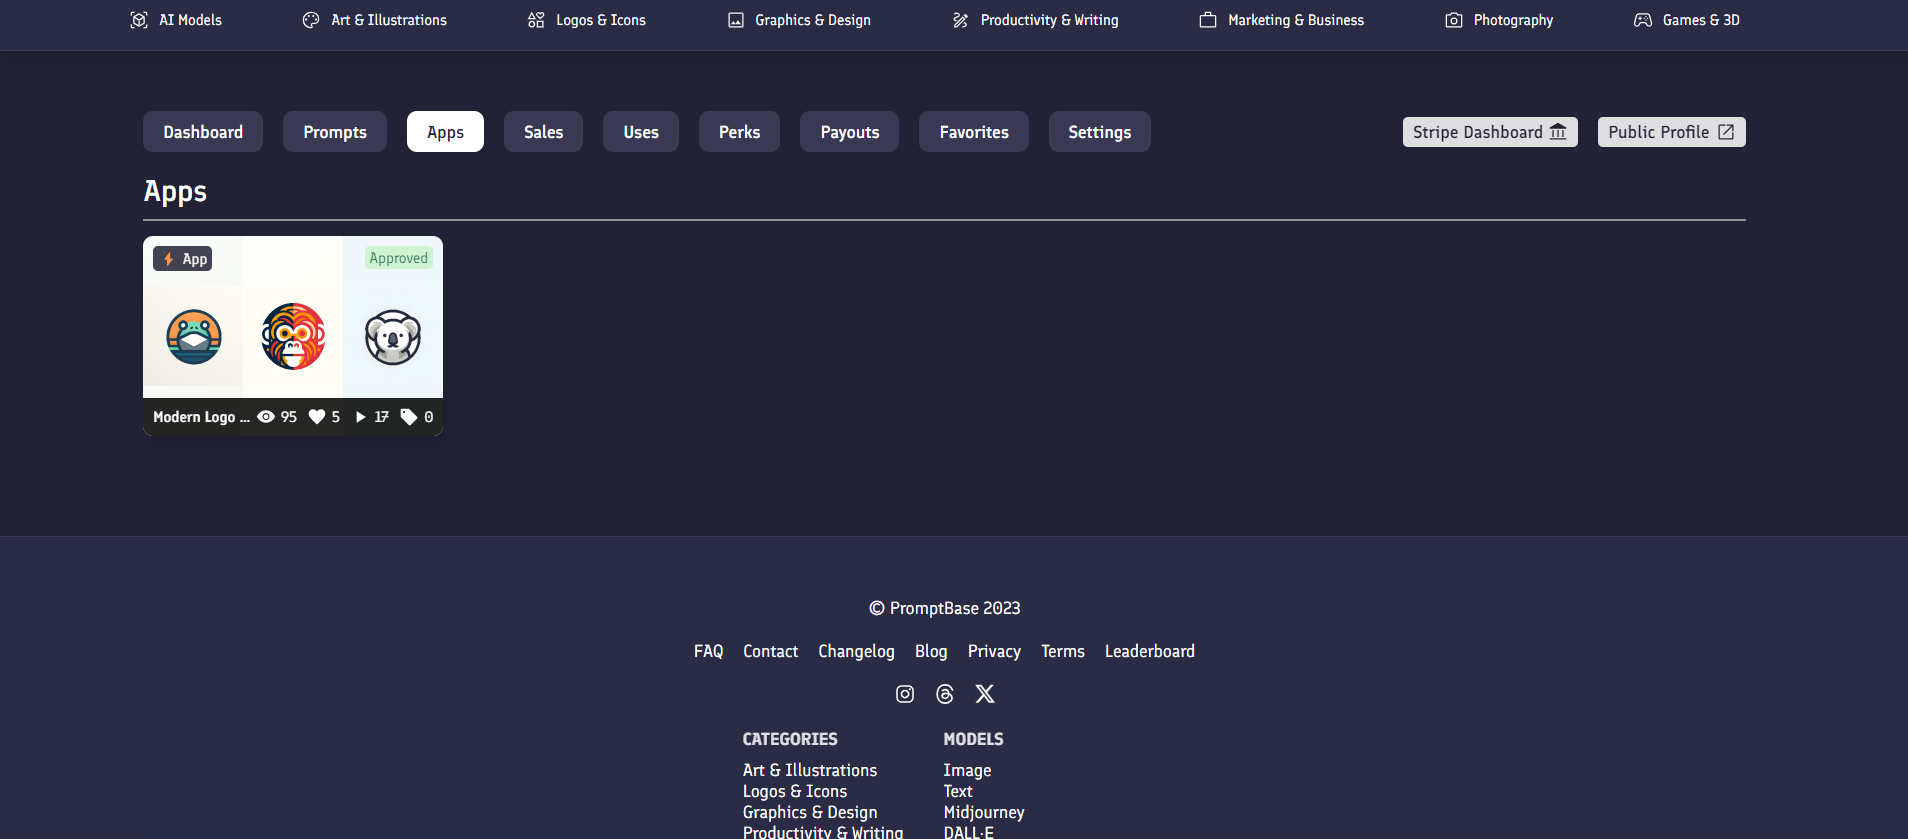
Publishing your app project into an app will create a new app item that appears in your account page. Your project is bound to this app, meaning that you couldn't use the same app project to publish a different app.
Apps go through a short review process before going live on the marketplace. We'll keep you updated about the status of the review through notifications and emails.
Making edits to your app will require you to submit a new version of it through the app review process.
If you do not wish to let other users publish apps containing your prompts, then you can set this preference from your account settings.
Monetization
App uses
Publishing an app allows you to earn revenue whenever your app is used on the app store. For every credit spent on your app, we'll pay out 25% of our pro-tier yearly plan credit cost (currently: $0.0010) or 1 free credit. A valid app use is when the following conditions are met:
- The app runs successfully to completion
- The credits used to run the app are not entirely made up of daily free credits
- The app is run on the marketplace (not the editor)
- Another account other than your own runs the app
As a creator, you can choose the number of credits your app costs (above the base cost of your app), and choose the allocation of cash or credits you'd like to receive.
For example If your app costs 50 credits to run, you could choose to earn:
- 50% in credits, and 50% in cash (25 credits + 25*$0.0010 = $0.025)
- 100% in credits, 0% in cash (50 credits + $0)
- 0% in credits, 100% in cash (0 credits + 50*$0.0010 = $0.050)
All payouts in cash are rounded to the nearest 10th of a cent.
Prompt uses
Prompt uses in another user's published app
If a prompt you made is used within another user's published app on the app store, then 25% of our pro-tier yearly plan credit cost (currently: $0.0010) plus 0 free credits are paid out per valid prompt use within an app. A valid prompt use is when the following conditions are met:
- The app containing the prompt runs successfully to completion
- The app containing the prompt is not your own app
- The credits used to run the app containing the prompt are not entirely made up of daily free credits
- Another account other than your own runs the app containing the prompt
Prompt uses by another user in the app editor
If a prompt you made is used within the app builder by another user, then 25% of our pro-tier yearly plan credit cost (currently: $0.0010) multiplied by the number of credits it cost to run the prompt are paid out per valid prompt use within the app builder. A valid prompt use is when the following conditions are met:
- The app builder generation runs successfully to completion
- The project containing the prompt is not your own project
- The credits used to run the app containing the prompt are not entirely made up of daily free credits
For example, for example, a DALL-E prompt costs 10 credits to run in the app builder. This means for each prompt use you'd earn 10 x $0.001 = $0.010
Revenue from valid uses of your apps and prompts will be visible in the uses tab of any app or prompt, and will count toward the gross volume number on any statistics page.
When you earn revenue from a valid use, then it will take 72 hours before your earnings are added to your account balance. Read our payouts guide for more information.
Uses
Uses are a metric in PromptBase that tracks the number of times an app has been used, or the number of times a prompt has been used within an app.
The uses statistic is indicated by the triangle play button symbol, and is visible on prompt & app pages, and within the statistics dashboards of your account page.
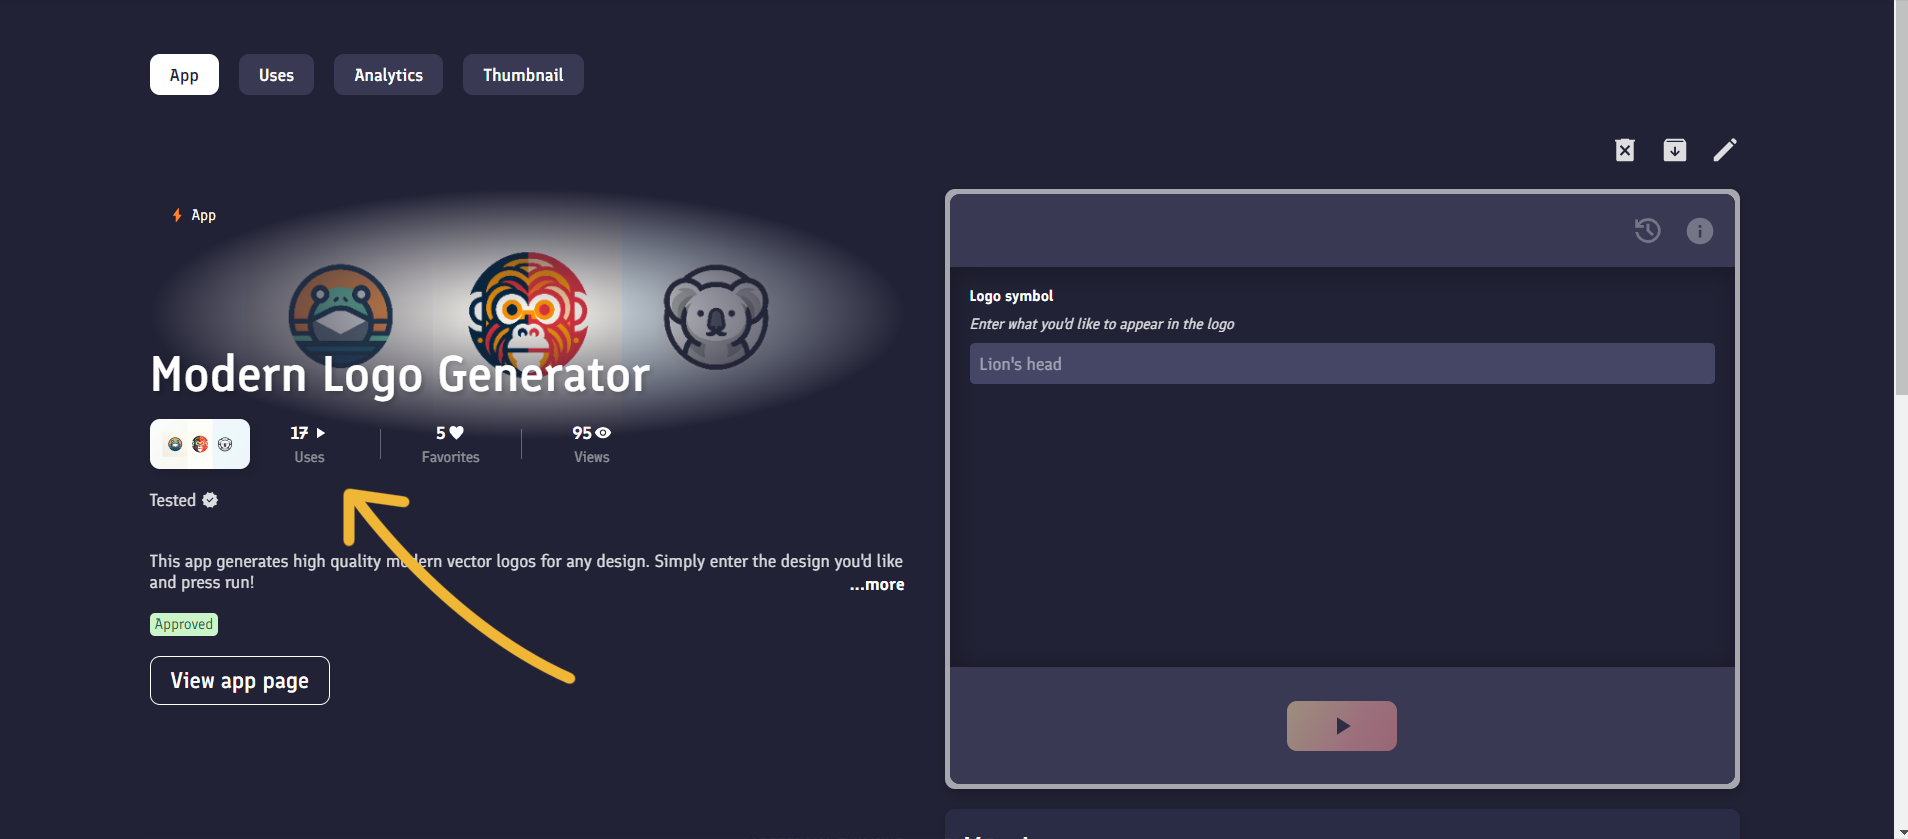
There is a tab within your PromptBase account to get more details on each use of your prompt and app. Every prompt and app also have their own individual uses pages.
Uses count towards the search ranking of a prompt or app within the PromptBase marketplace.
Prompt block
Prompt blocks act as the foundation of all apps within PromptBase. You can use a prompt block to generate text or images. They can be used as inputs to other blocks, and can also accept text inputs through the use of variables in [square brackets].
Adding a prompt block
You can add a prompt block in three different ways:

Custom prompts: Selecting a custom prompt will add a blank editable prompt to your app.
Personal prompts: If you sell prompts on PromptBase, you can add one of your prompts to your project from the "My prompts" tab.
Purchased prompts: If you've purchased a prompt on PromptBase, you can add it to your project from the "Purchased prompts" tab.
Editing
You are currently unable to edit prompts you've created or purchased within the app editor. However, for custom prompts, you are free to edit all aspects of the prompt.
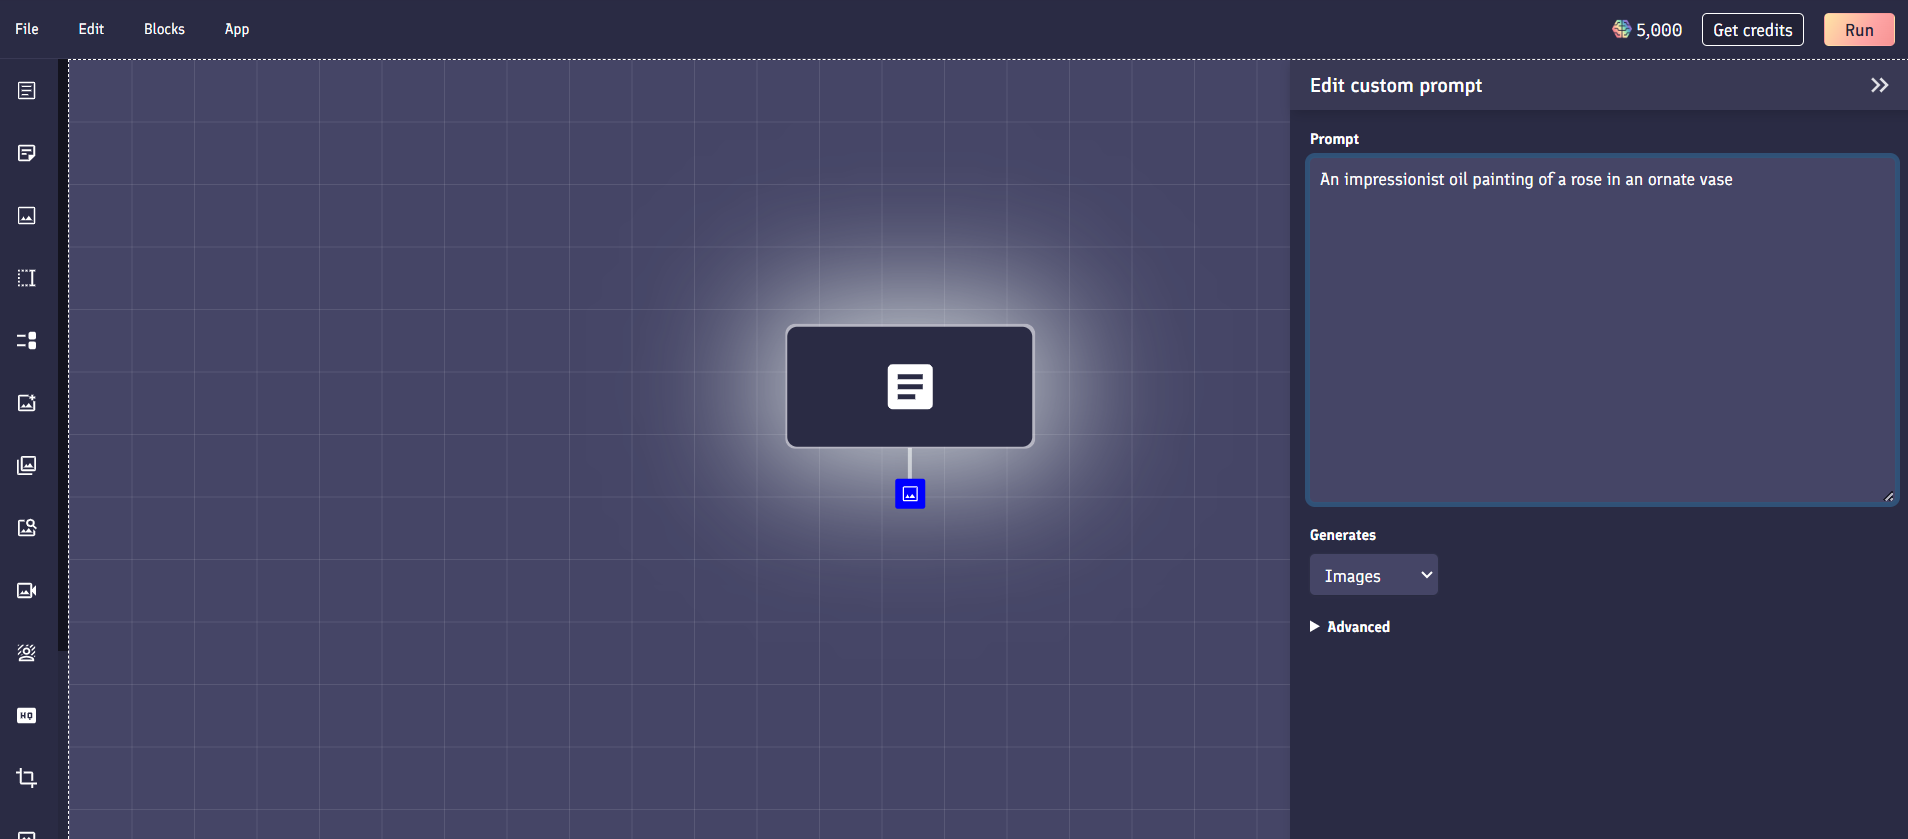
Prompt: The prompt field lets you edit the actual content of the prompt. This is what instructs an AI model to generate text, images and more.
Generation type: The "generates" select option allows you to choose what media the prompt generates. Currently you can select between either text or images.
Advanced: The advanced menu for prompt blocks allows you to alter various parameters associated with the prompt, for example the underlying model it uses.

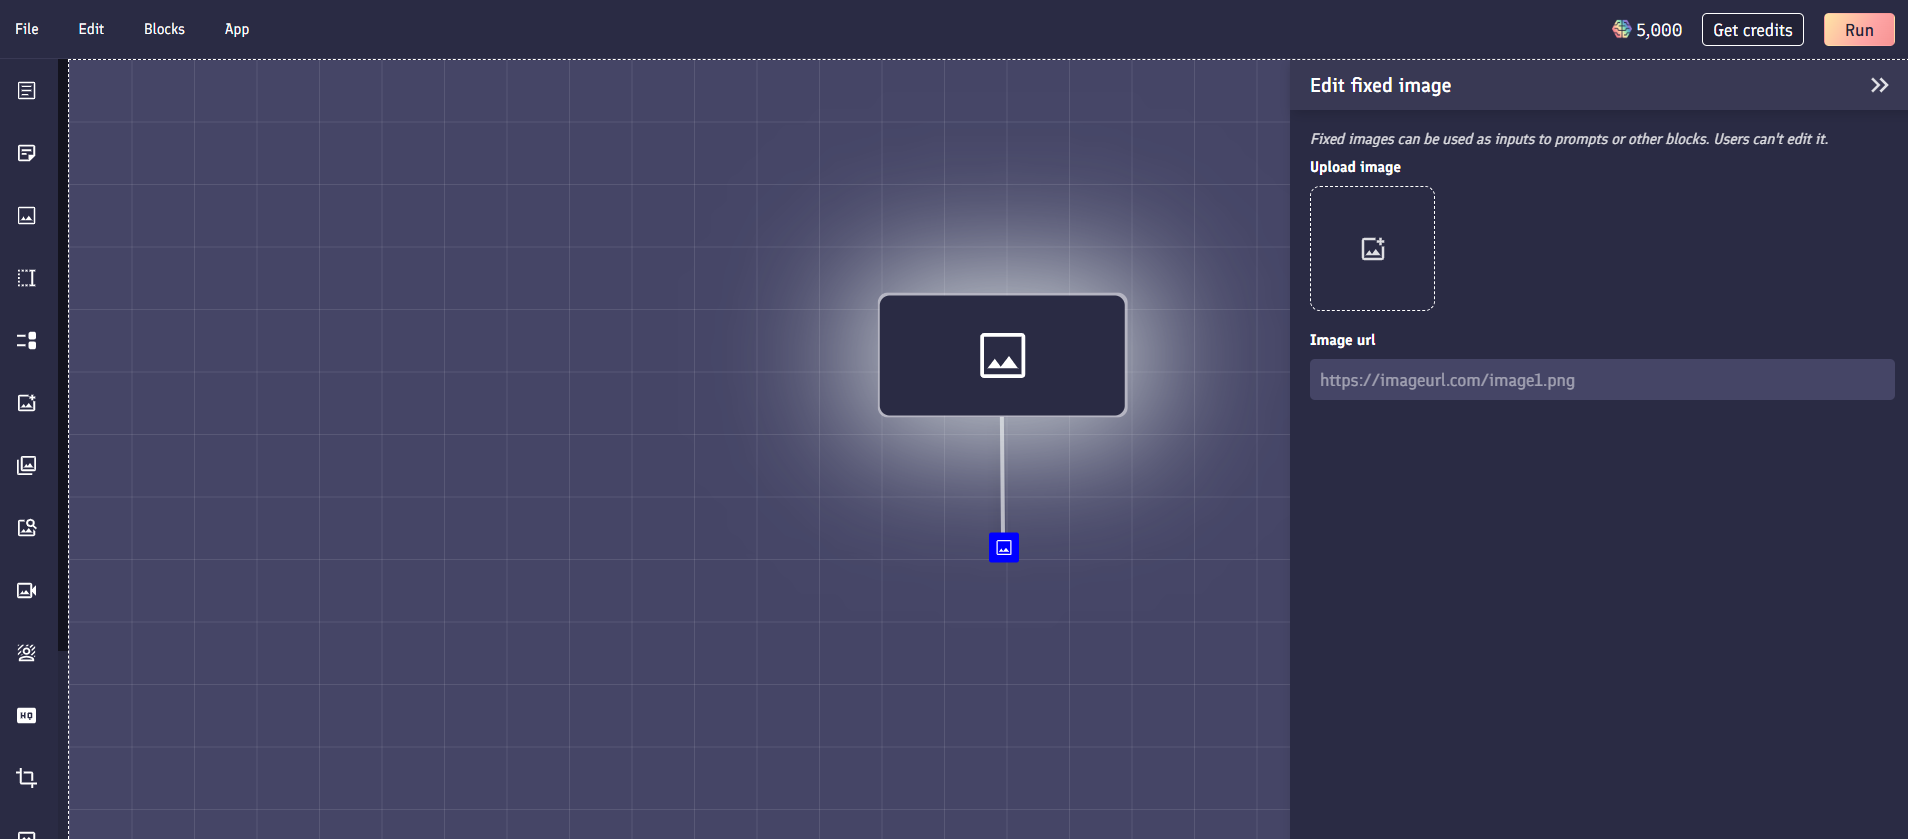
Input variables
If you want to add inputs into your prompt, you can include [square brackets] within the text. For example, a prompt block with the following text:
Studio photograph of an [animal] on a [color] background
would make the [animal] and [color] variables become available as inputs. You could then connect other blocks into these inputs to substitute values into these variables.

Mockup creator
Mockup creator blocks allow you to render images within a mockup template. This allows you to preview AI generated designs on real-world products. For example, you could preview what an AI-generated poster design would look like on the wall of a room using a mockup template.

You can use a mockup creator block by selecting a pre-set template from the template library, or uploading your own custom .psd file to use as a custom template. Mockup templates have the option to change one or multiple images or texts within the template.
Template library
PromptBase offers a library of several thousand free mockup templates from the internet. You can search, filter and browse the most popular templates used by other users within their apps. Hovering over a template will give you a preview as to which areas within the template are editable.
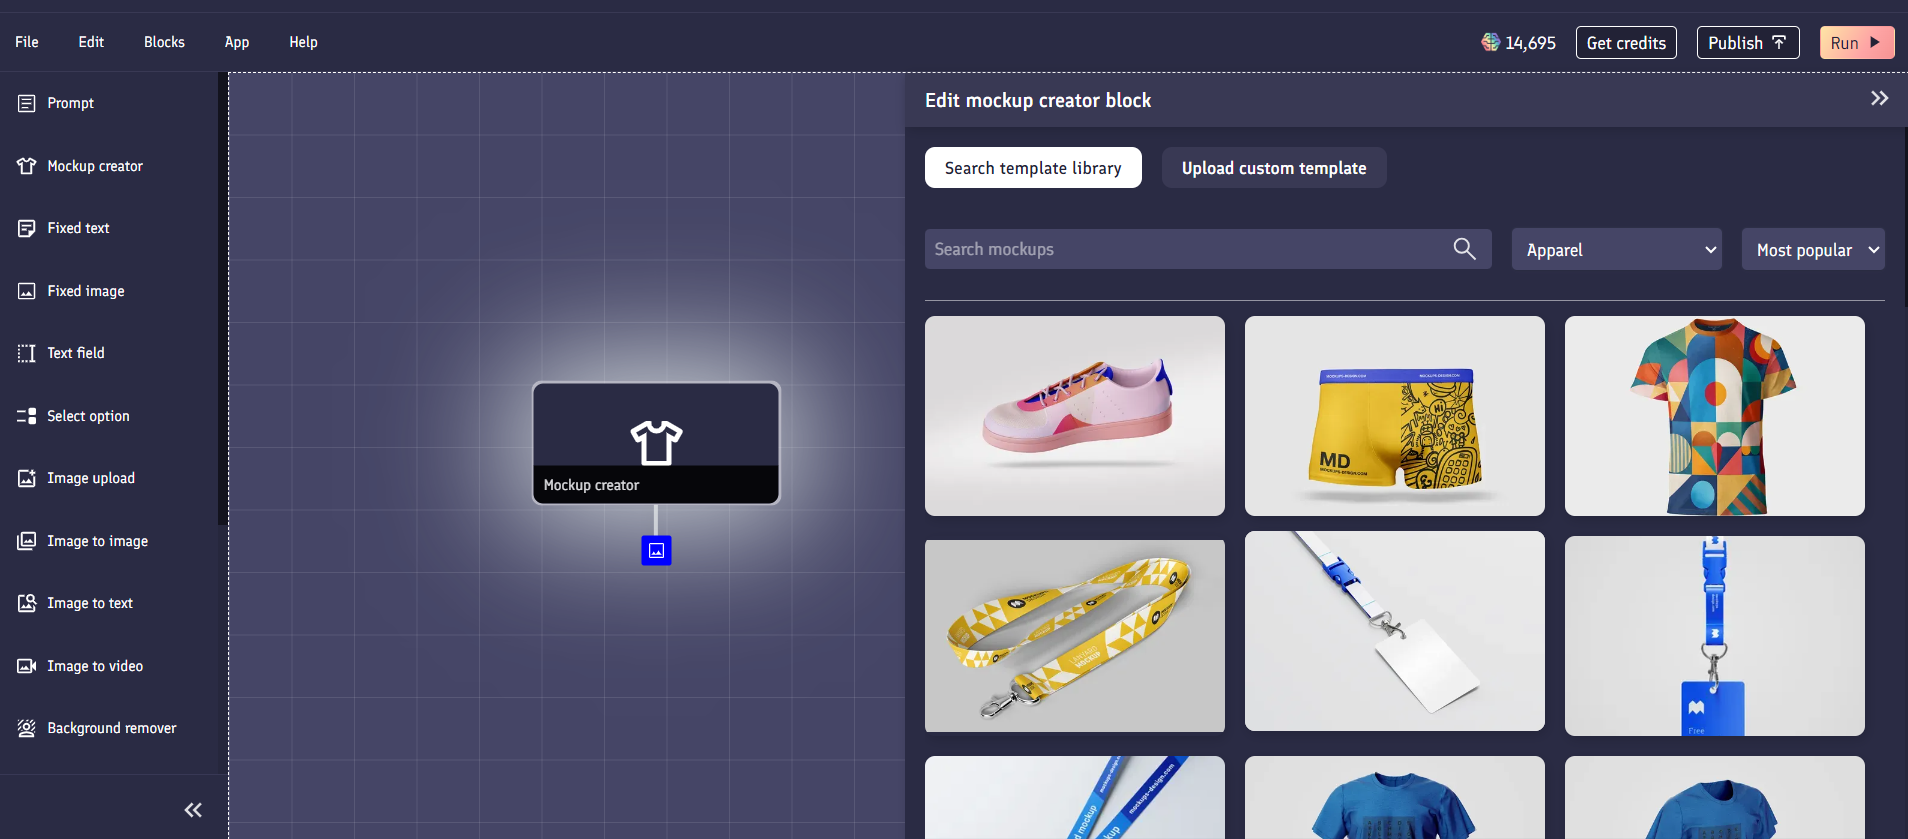
When you find a template you'd like to use, simply click the template to load it into the block.
Uploading custom templates
If you are on the creator or pro subscription plans, you'll have the ability to upload your own mockup templates to use within the app builder.
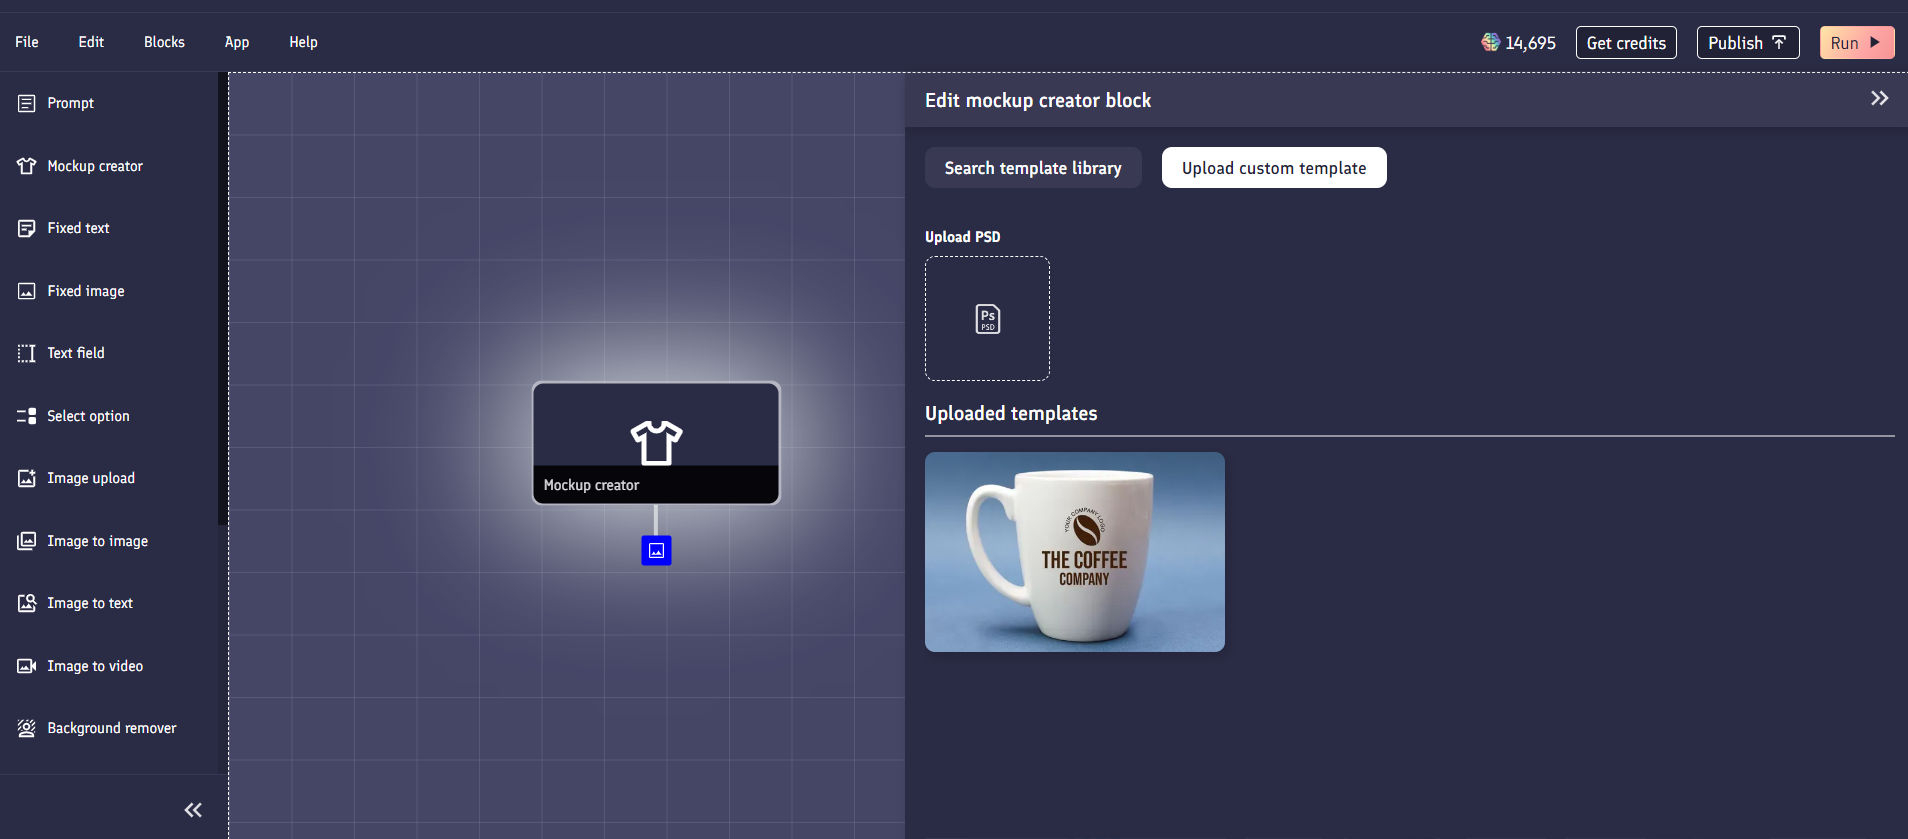
In order to do this, click the "Upload custom template" tab within the block's edit menu, then click the "Upload PSD" area and select your .psd file to use. You can select a file of up to 200MB in size.
Any smart layers within your PSD file will appear as image inputs into the block, allowing you to substitute in images from the app builder into these areas within your template. Similarly, any text layers within your file will appear as text inputs. If you do not want a certain layer to appear as an input, make sure it is rasterized.
Templates you upload will be saved for future use in your own personal template library. You can delete a template from your library by selecting it, scrolling to the bottom of the mockup template settings, and clicking the "Delete template" button.
Configuring mockup templates
Once a mockup template has loaded in, the app block will become populated with inputs relating to the areas within the mockup template that are editable.
Hovering over an input will display a red rectangle on the preview image which indicates roughly what within the image will be changed. The associated input on the app block will also be highlighted in a yellow color.
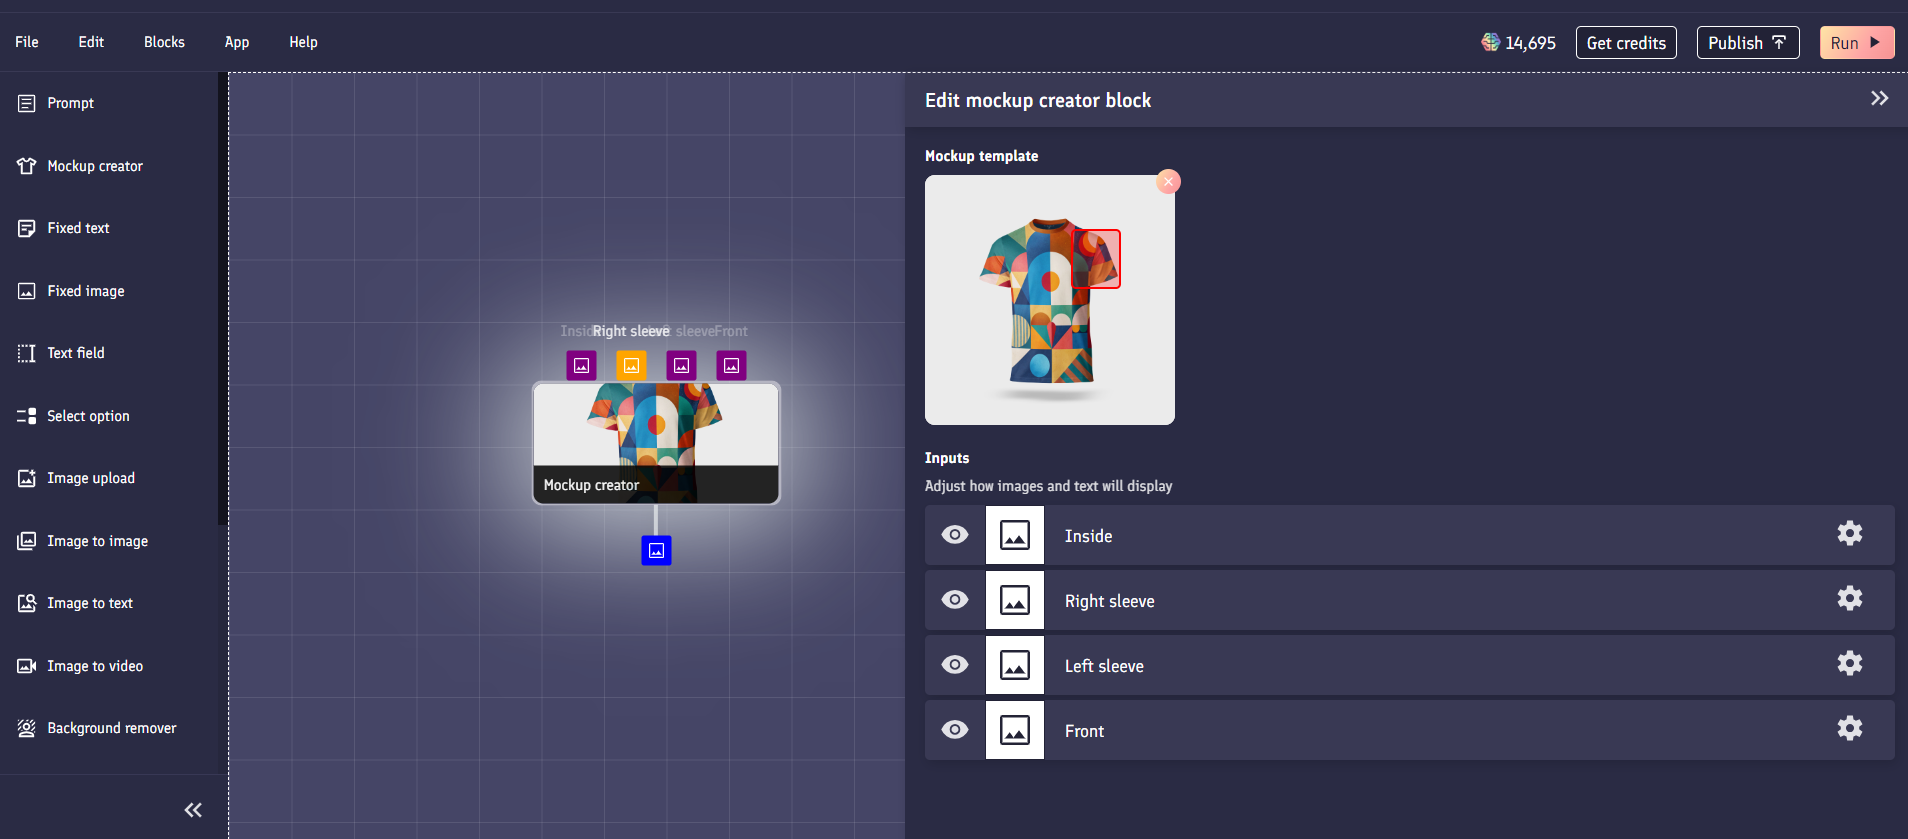
Clicking the eye icon next to an input will disable the input. This removes the input from the app block, and will ensure the area it relates to within the image will remain blank.
Clicking the cog icon will open the settings menu for the input.
Image resizing settings
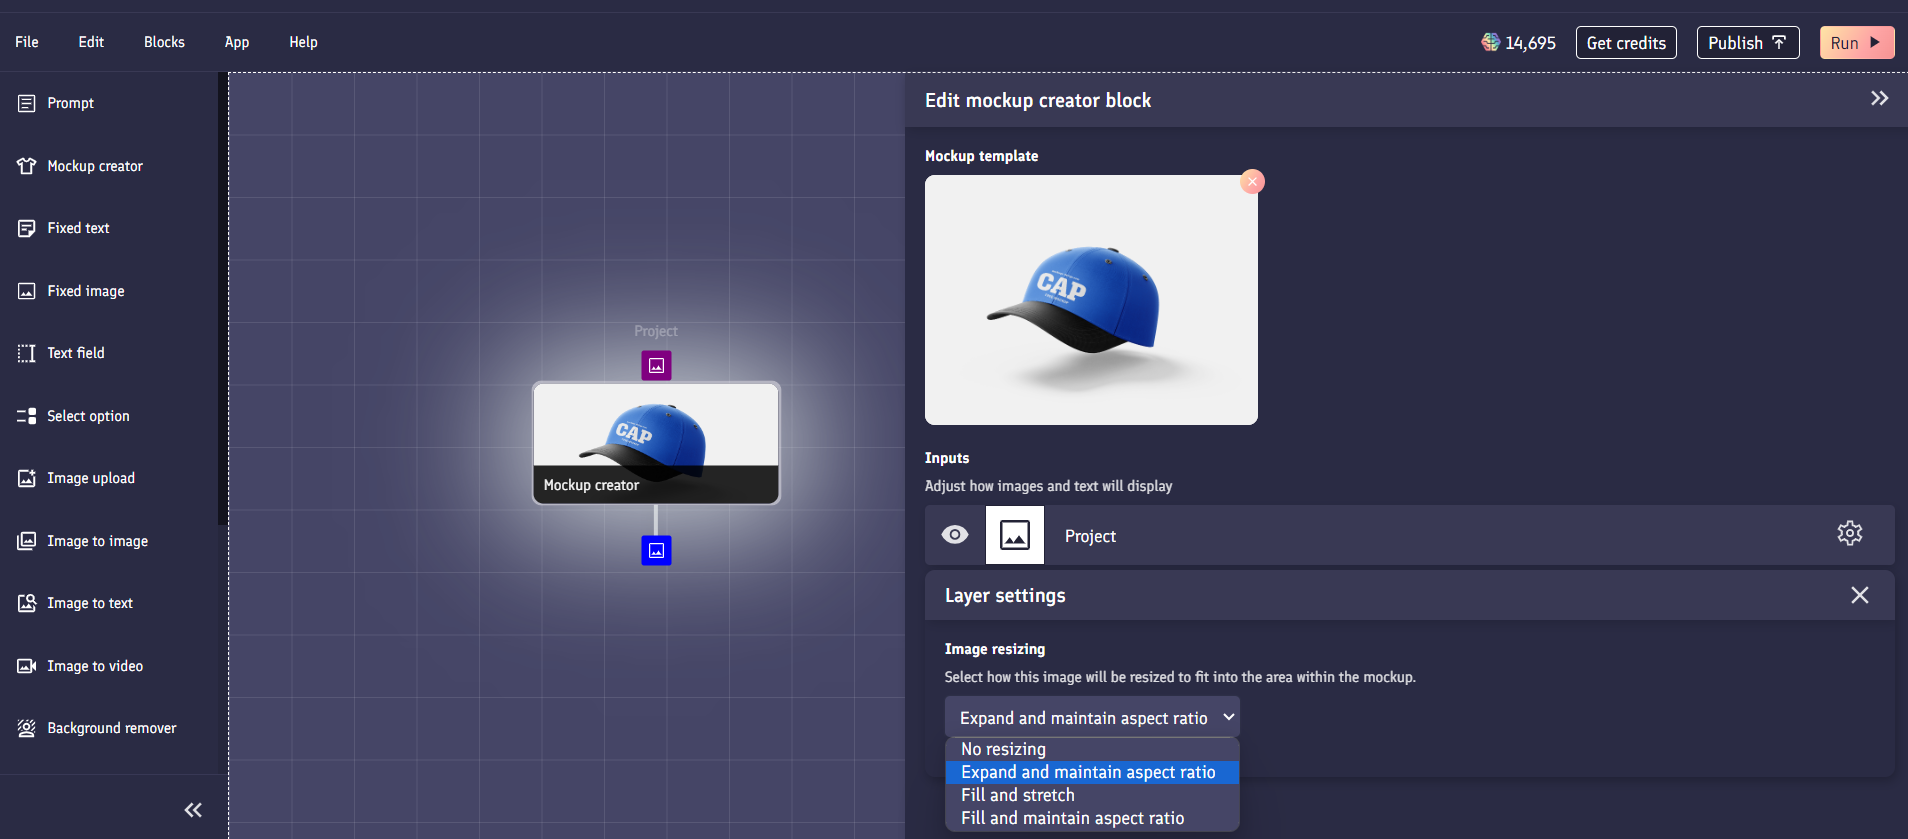
For image inputs, you have the option to change how the image will be resized to fit into area/ smart layer within the mockup image. There are currently four options:
No resizing will mean that the image will remain the same size, and no resizing will take place.

Expand and maintain aspect ratio will mean that the image will expand to the size of the area it's being subsituted into, but it will maintain its aspect ratio.

Fill and stretch will mean that the image will stretch to fill the area.

Fill and maintain aspect ratio will mean that the image will fill the area whilst maintining its aspect ratio. This might mean that the image will overflow outside of the area.

The option you select will depend largely on the mockup template. For example, if your input is a pattern, you'll likely want the pattern to Fill and maintain aspect ratio so that the whole area is replaced. However, for something like a t-shirt print or a logo, its probably best to Expand and maintain aspect ratio, so that the design resizes correctly but doesn't overflow and get cut off.
Fixed text block
Fixed text blocks allow you to use a piece of text as an input to another block within your app. They are one of the simplest blocks you can use when building apps.
Editing
Within the edit menu, you can change the text contained within the block. This text will flow into the block its output is connected to.
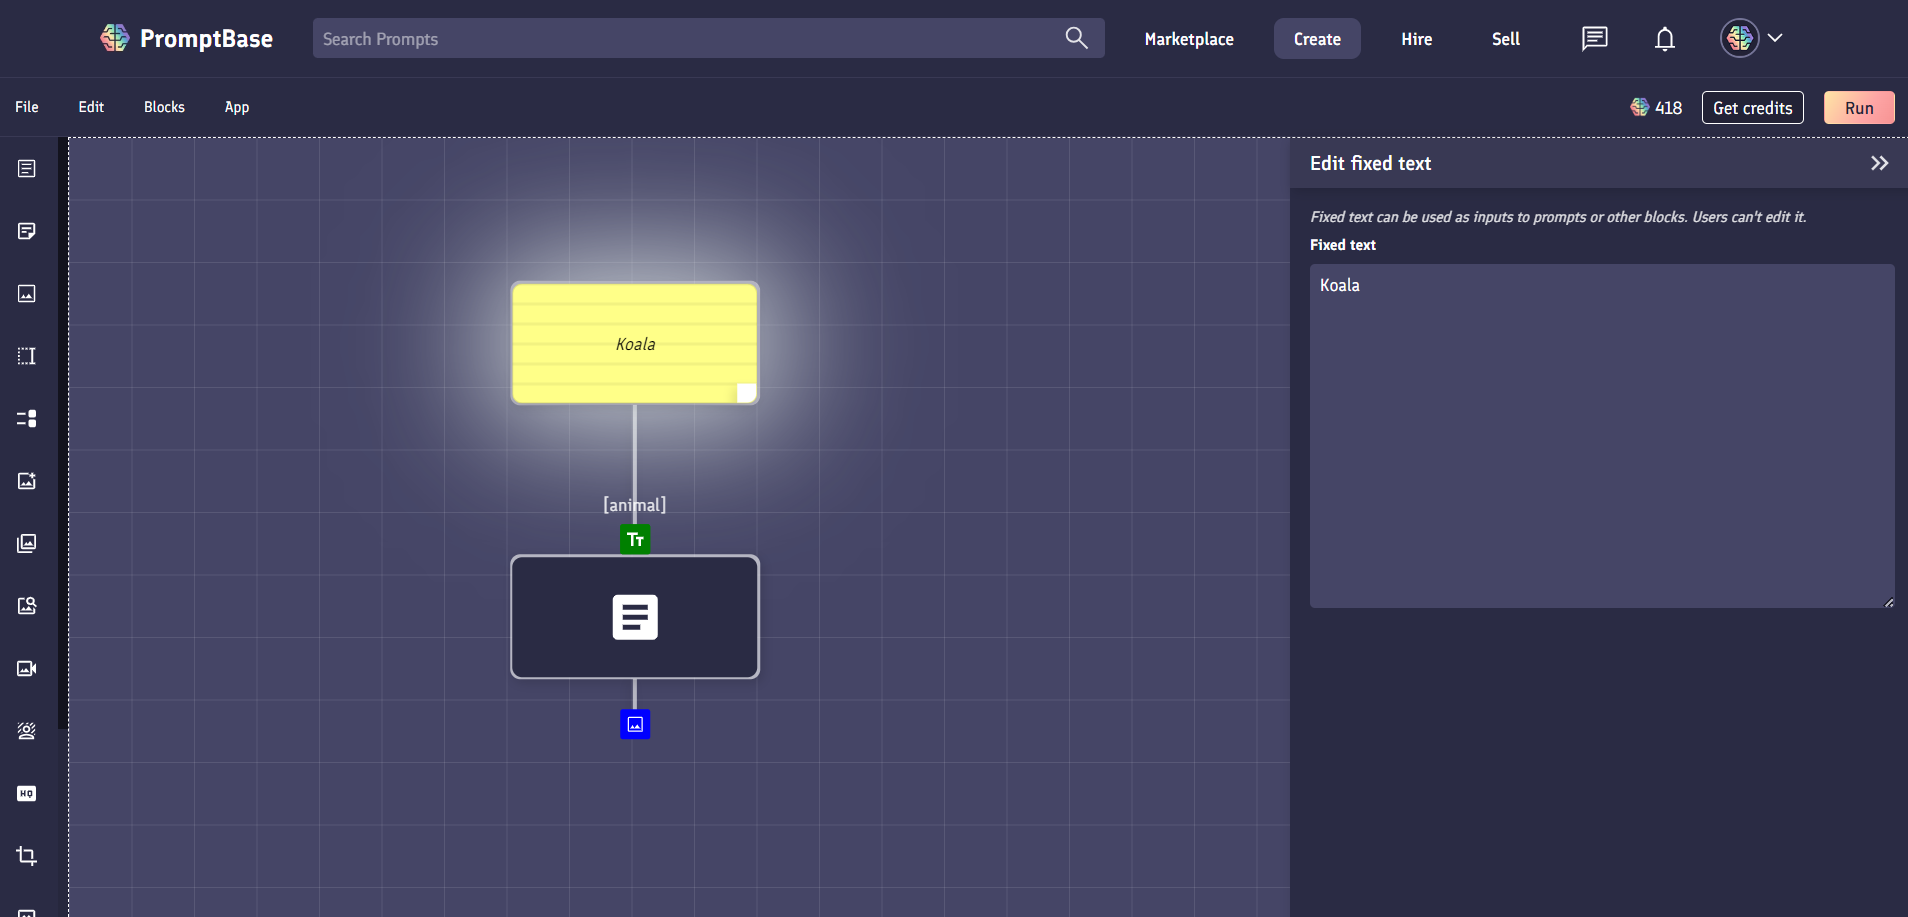
Input variables
If you want to add inputs into your fixed text block, you can include [square brackets] within the text. For example, a fixed text block with the following text:
Photograph of [color] flowers on a table
would make the [color] variable become available as an input. You could then connect another block to this input to substitute in a value for the word color.
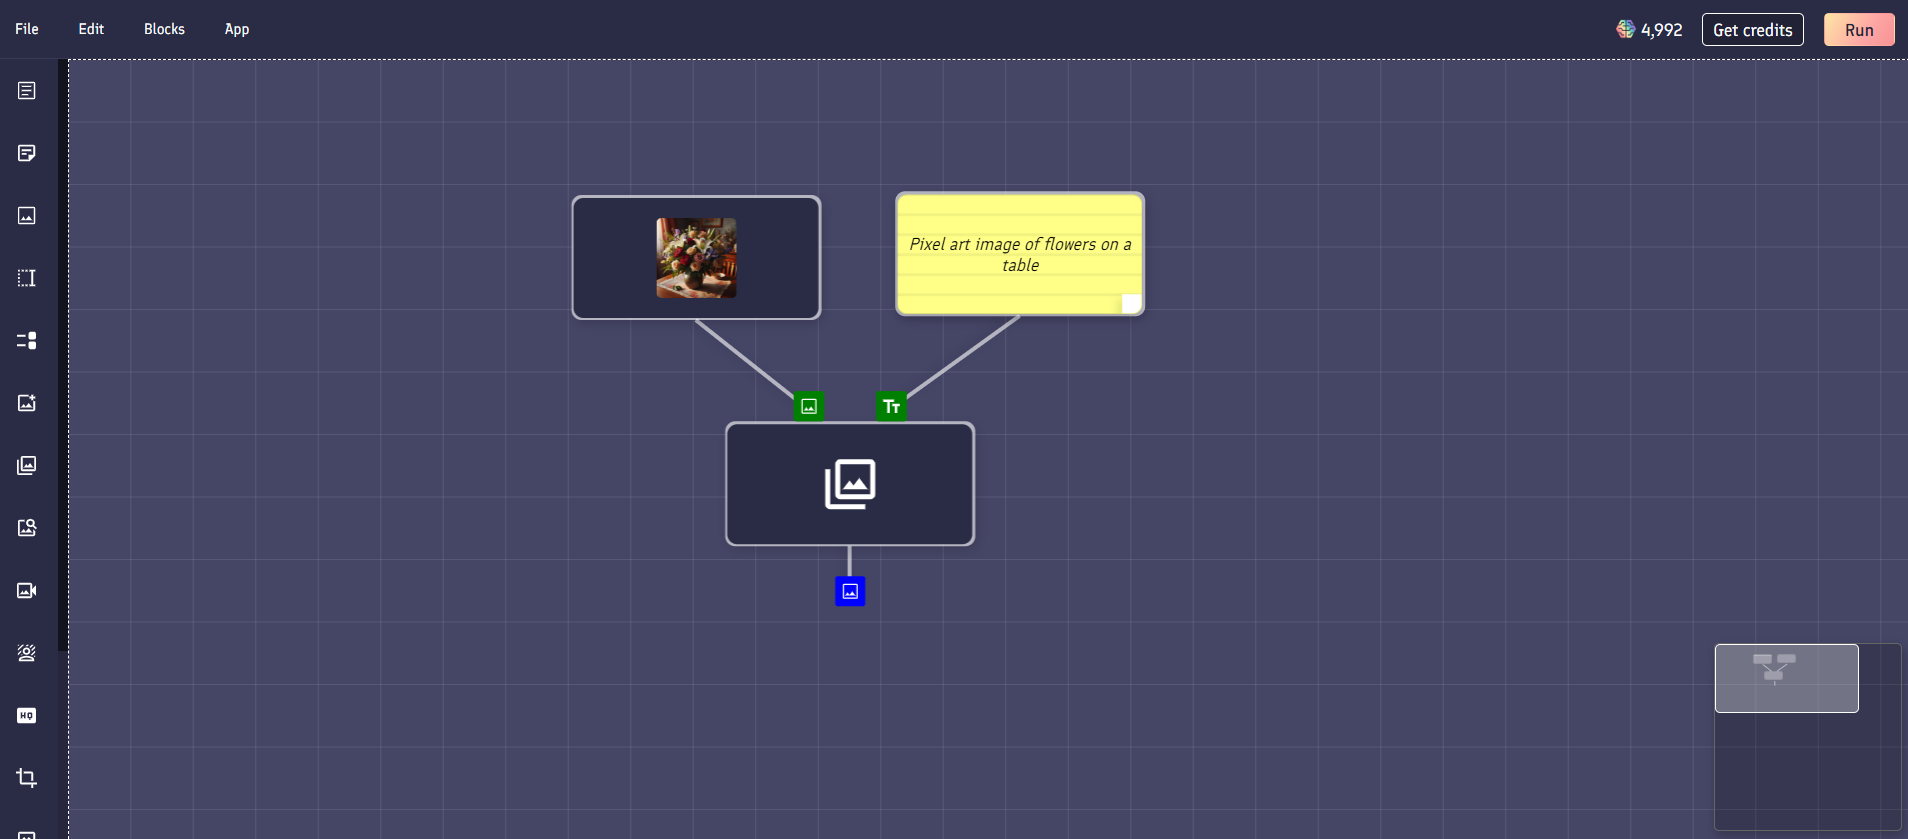
Fixed image block
Fixed image blocks let you use an image as an input to another block. This image cannot be edited by users of your app.
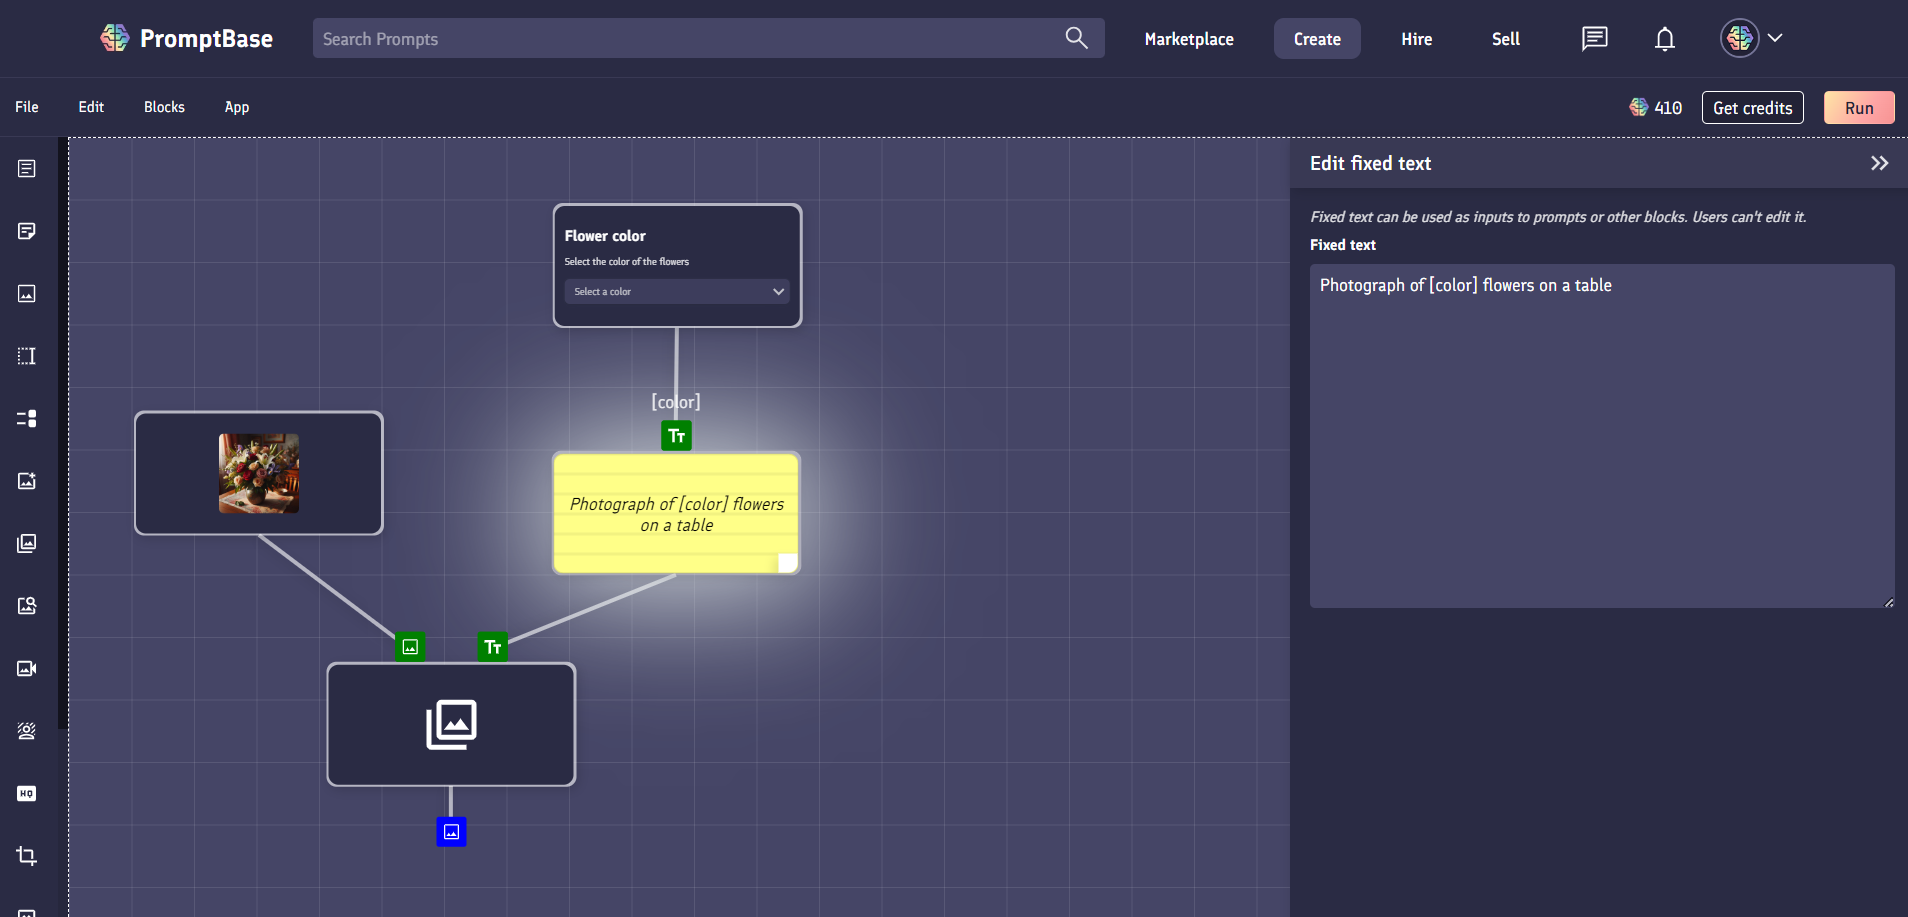
Editing
When editing a fixed image block, you can choose to either upload an image from your device, or use a link to an image on the internet.
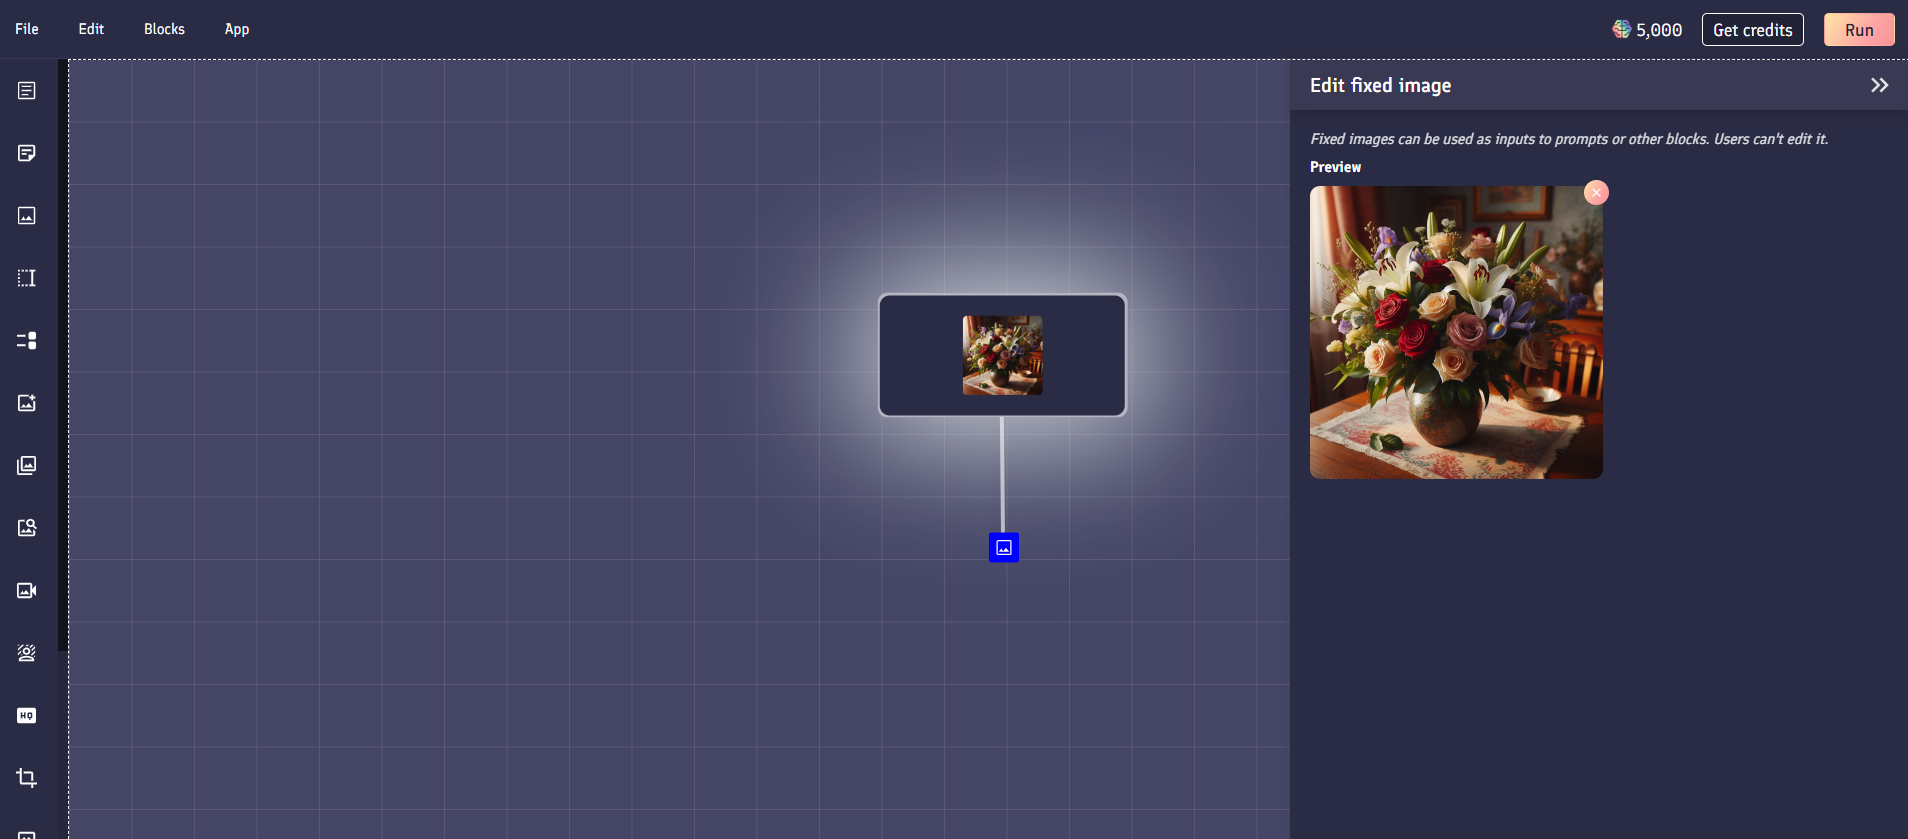
An example use case for a fixed image block could be as a reference image into an image to image block. For example in the below example, we can change the photographic image of some flowers on a table into a pixel art version of the same image.

Text field block
Text field blocks allow you to create a text input field that a user can enter text into to feed into your app.
You can connect text field blocks to any block that accepts text as an input, for example a variable within a prompt.
Editing
Within the edit menu, you can specify different aspects of the text input field to make it more user friendly.
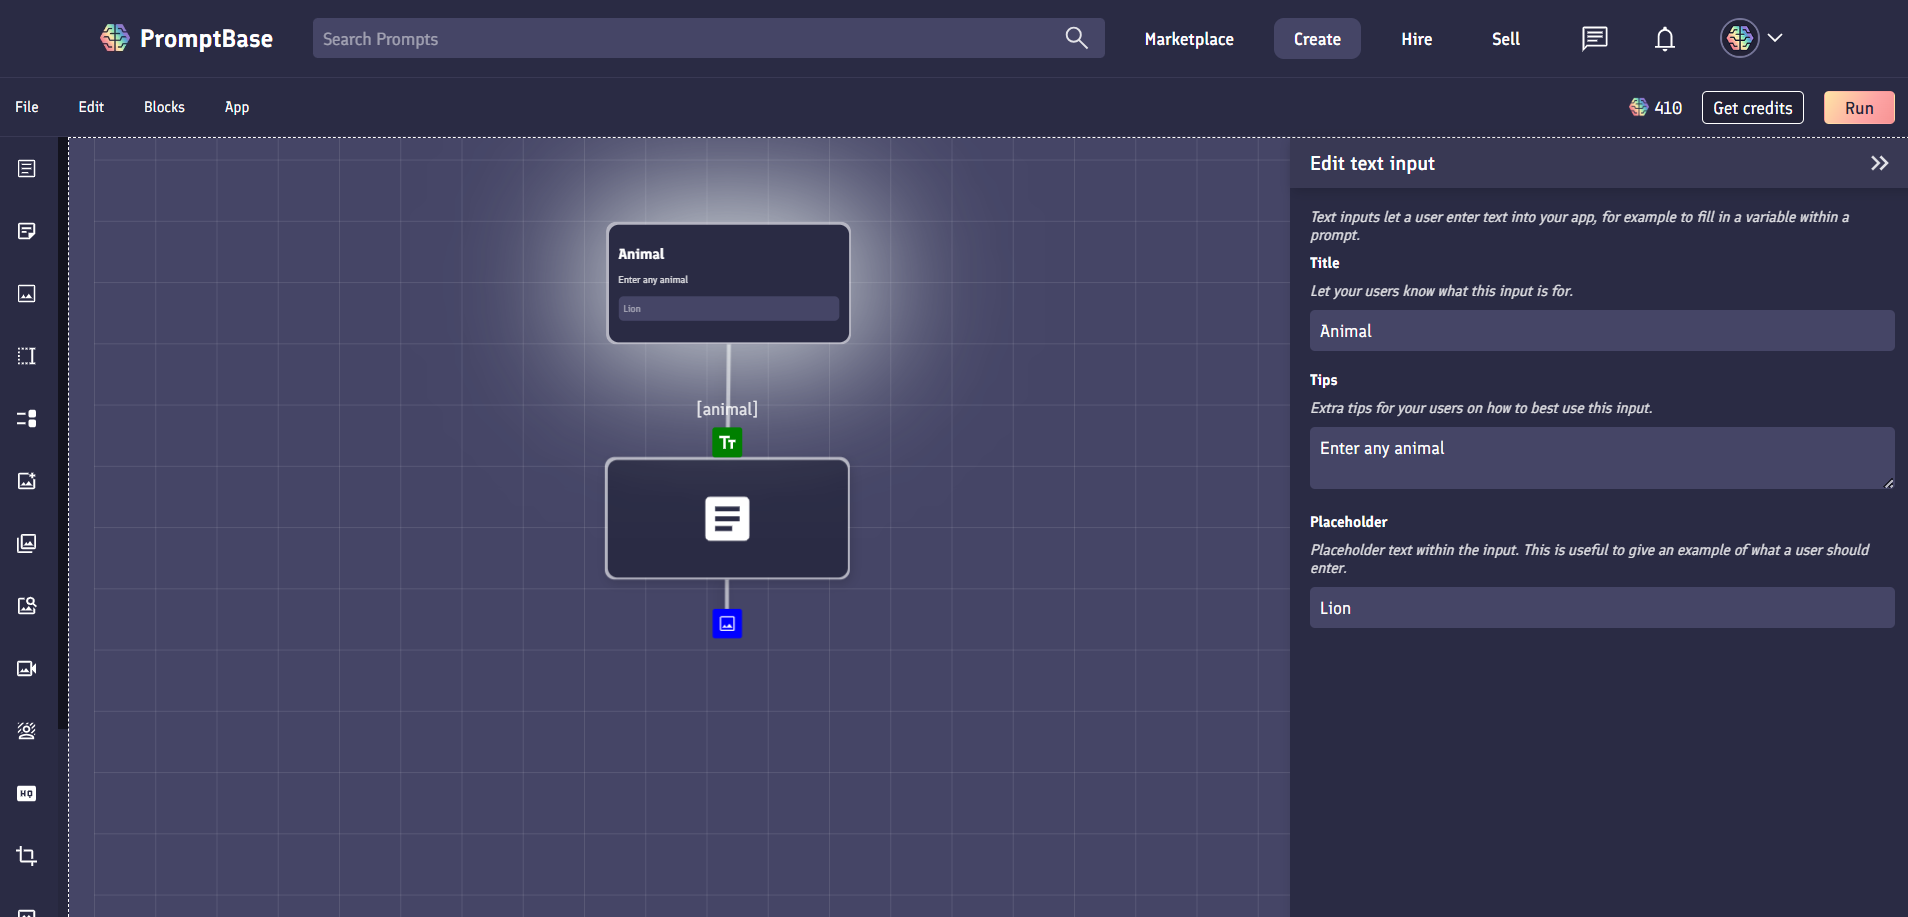
Title: The title of the field states what the field is for. For example, the title could be "Animal" if the field is for entering an animal name.
Tips: You can enter tips to describe to a user what the field is for, or provide more guidance as to what they should enter into the field. Tips will appear below the title of the field in smaller text.
Placeholder: The field placeholder appears within the text input box. You might wish to use this to provide an example value to be entered into the field. For example, if your text input was for the name of an animal, your placeholder might be "Lion".
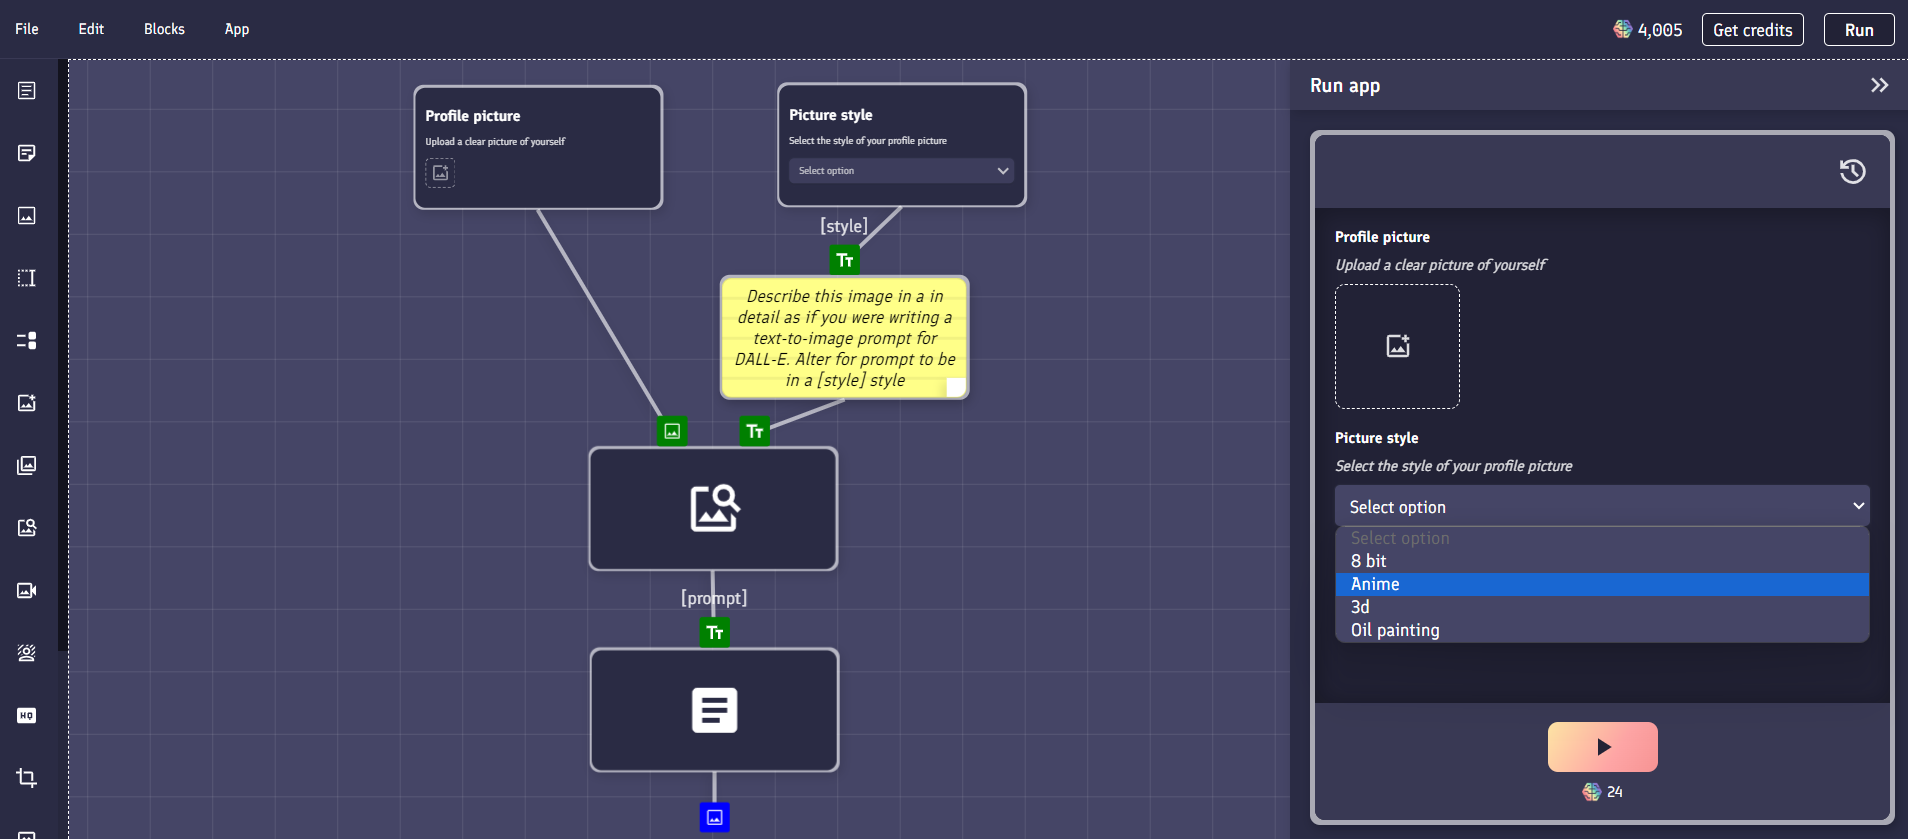
Select block
Select blocks let you specify a preset list of text options for a user to choose from to enter into your app. The options can then flow into text inputs of other blocks, such as a variable within a prompt.
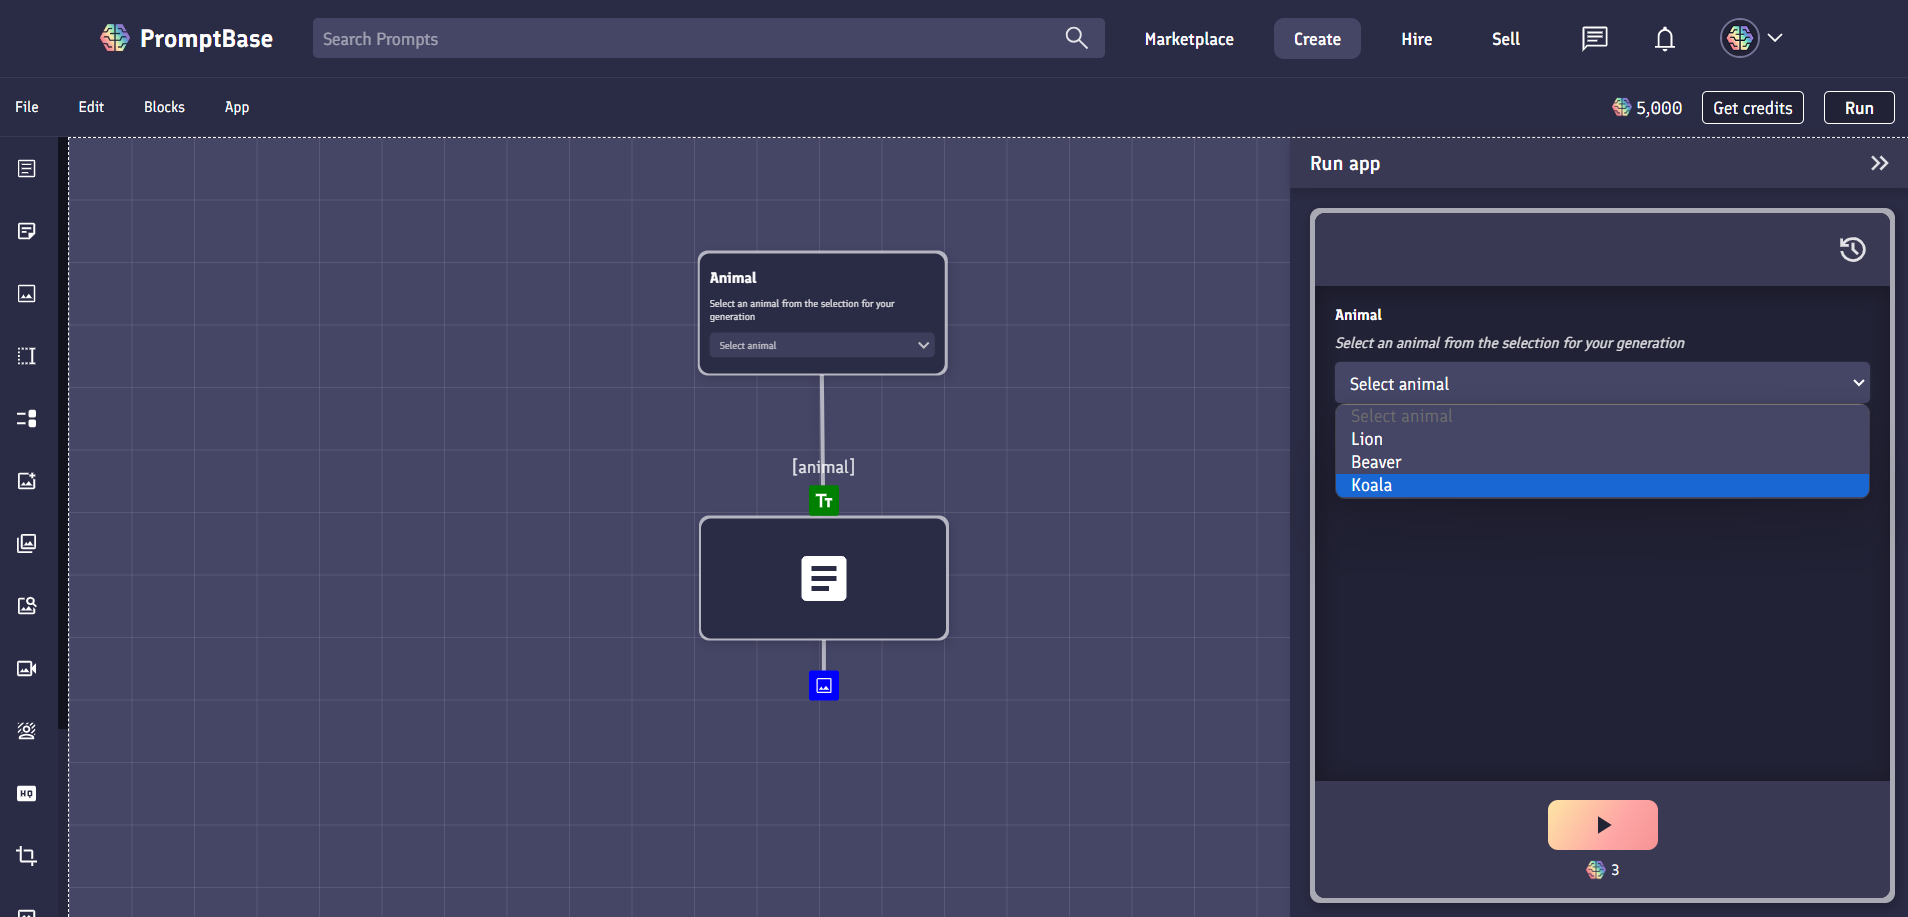
Editing
Within the edit menu for a select block, you can specify different aspects to make the select option more user friendly.
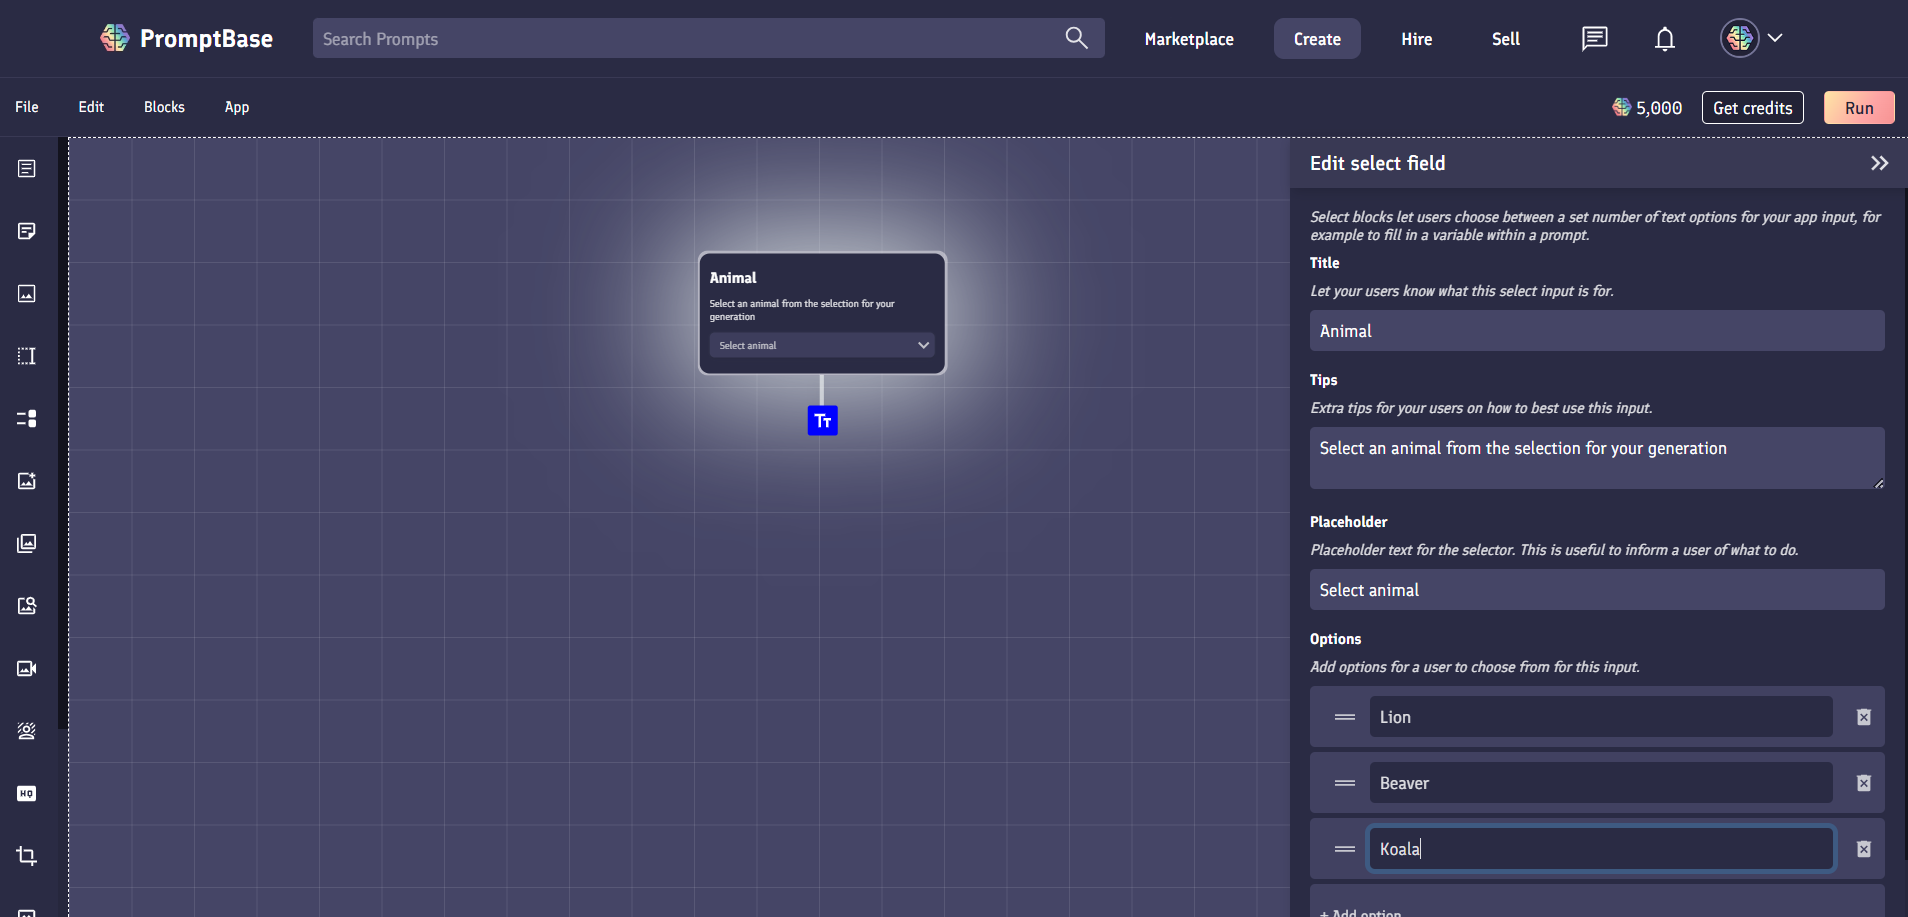
Title: By specifying a title for your select field, you can clearly indicate to a user what the input is for. For example, your title might be "Animal" if the field is for choosing an animal name.
Tips: You can enter tips to describe to a user what the field is for, or provide more guidance as to what they should enter into the field. Tips will appear below the title of the field in smaller text.
Placeholder: Within the placeholder of a select field block you can specify the action you wish a user to perform. For example "Select animal" if the field is for choosing an animal name.
Options: You can add options that you would like a user to select from by clicking the + Add option button and entering a text value into the input field that appears. If selected, this value is what will be outputted from the select block. There is no limit to the number of options you can add. To delete an option, click the trash icon. You can reorder options by dragging them.
Image upload block
Image upload blocks allow you to let users of your app provide their own images as an input.
For example, you could let a user upload a picture of themselves for an app that generates avatars.
Editing
You can edit an image upload block to make it more user friendly. There are two fields you can edit.
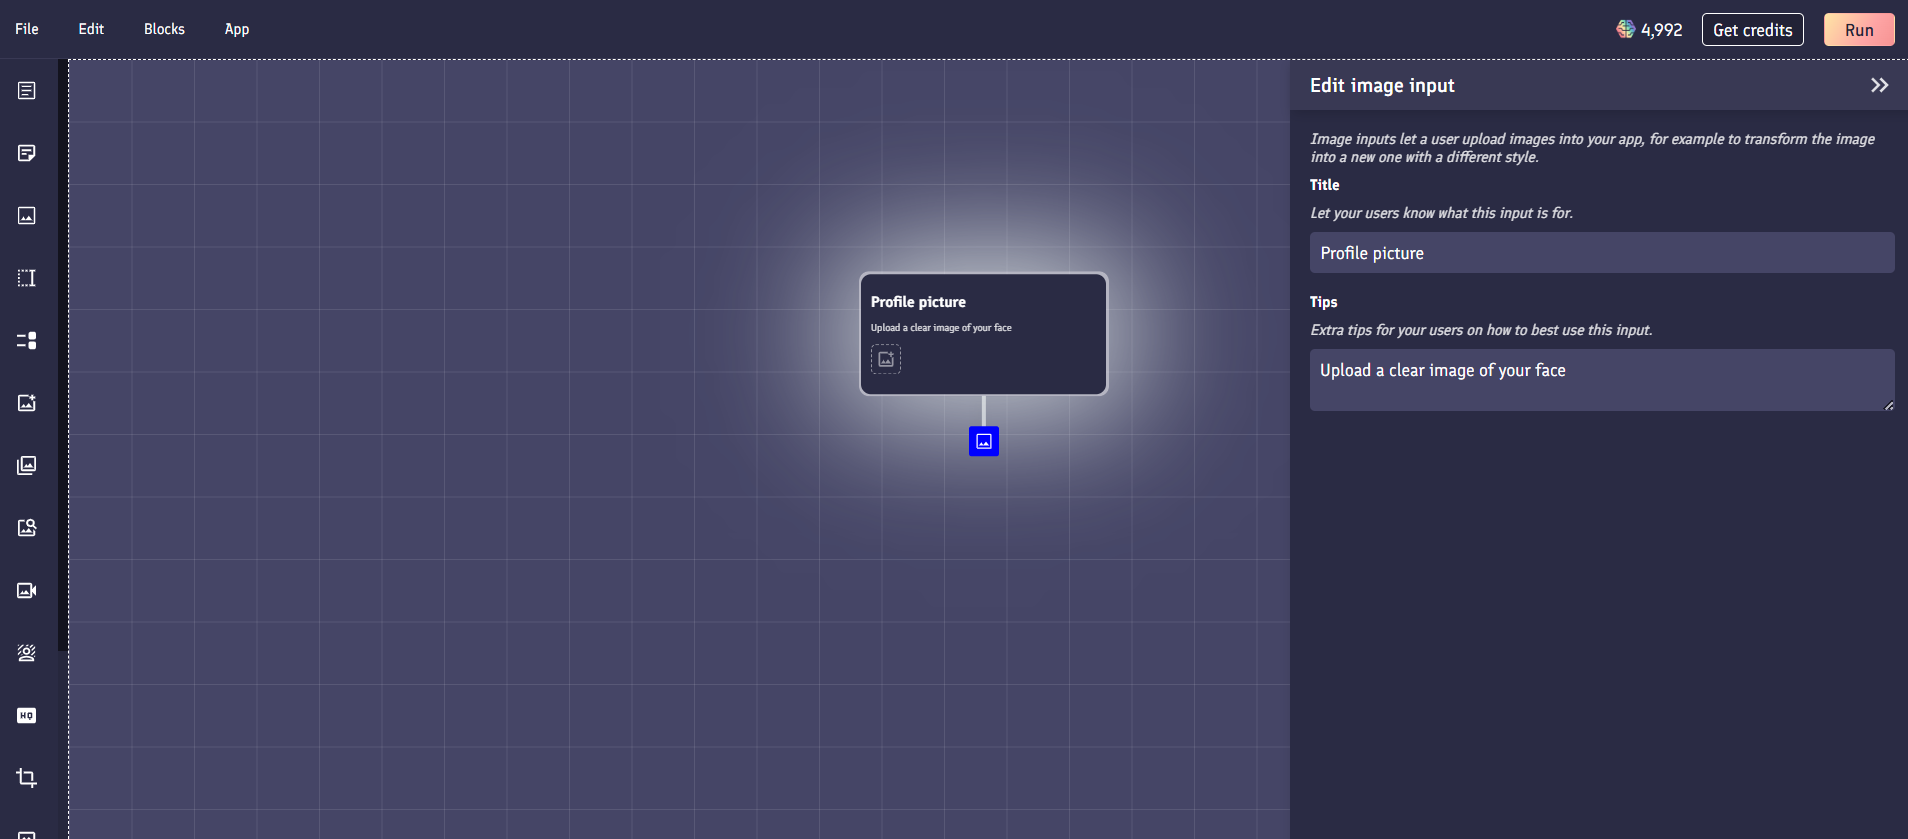
Title: The title allows you to specify to a user what the field is for.
Tips: Tips allow you to provide extra guidance about the image you want a user to upload. They appear below the title of the field.
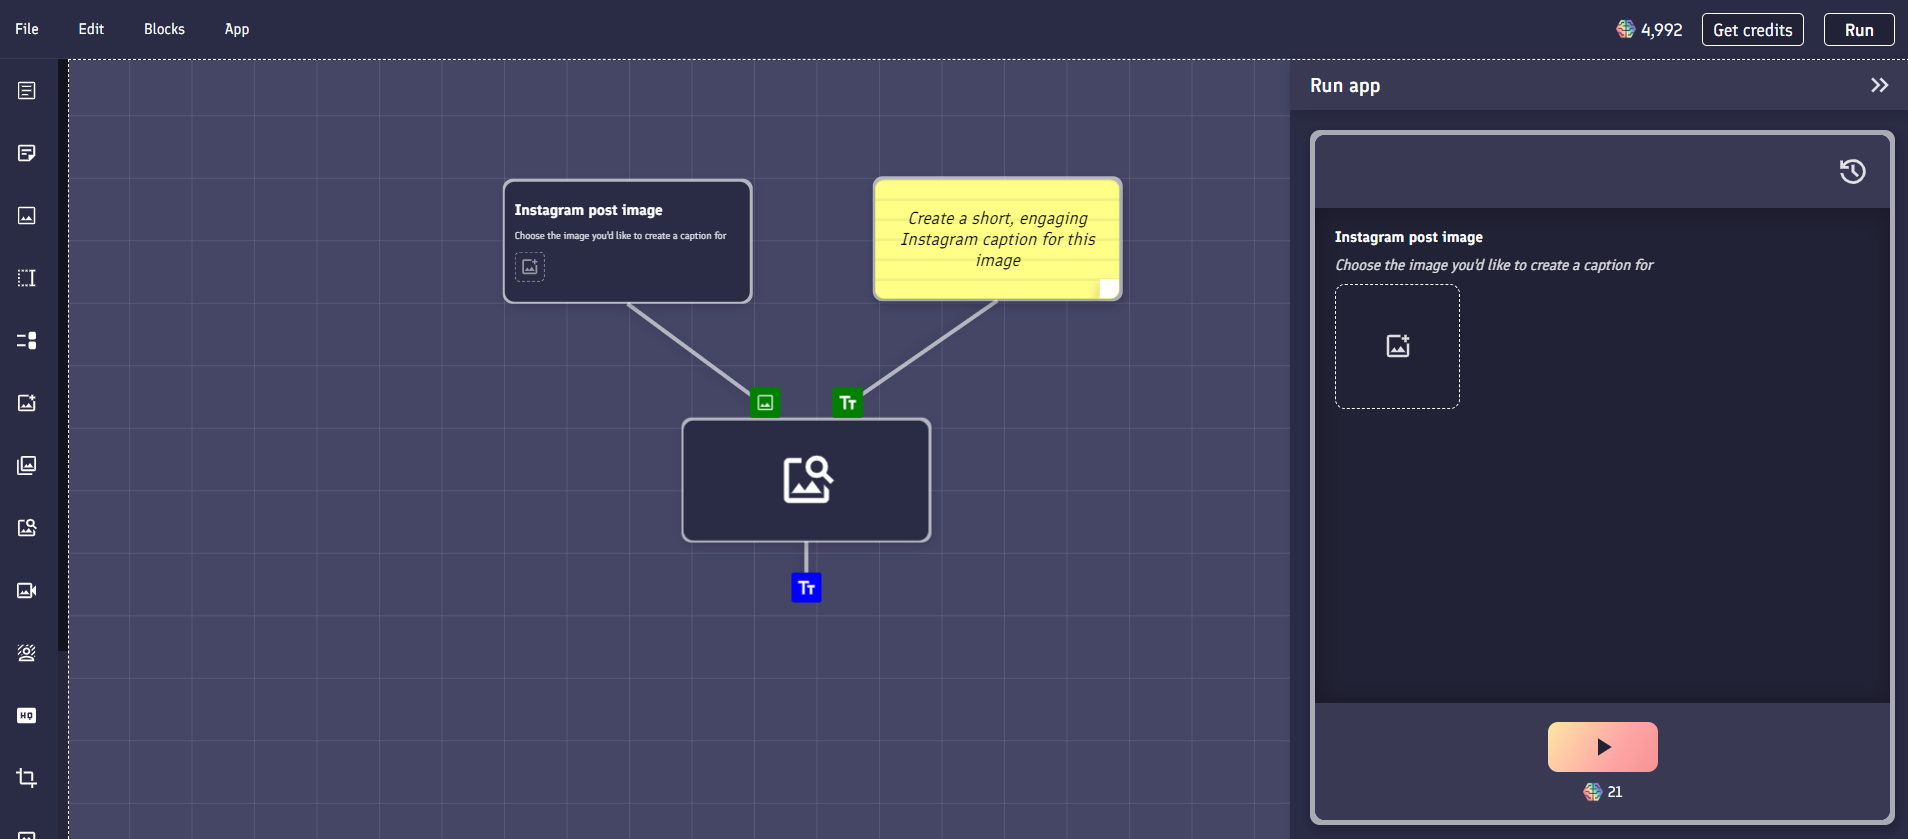
Image to image block
Image to image blocks allow you to transform an image into another image. These blocks accept the image that you'd like to transform, and a text prompt to guide the transformation.
For example, in the below example, the image to image block is used to transform a photograph of some flowers on a table, into a pixel art version of the same image.
Editing
Editing an image to image block allows you to change the underlying model used to transform the image.

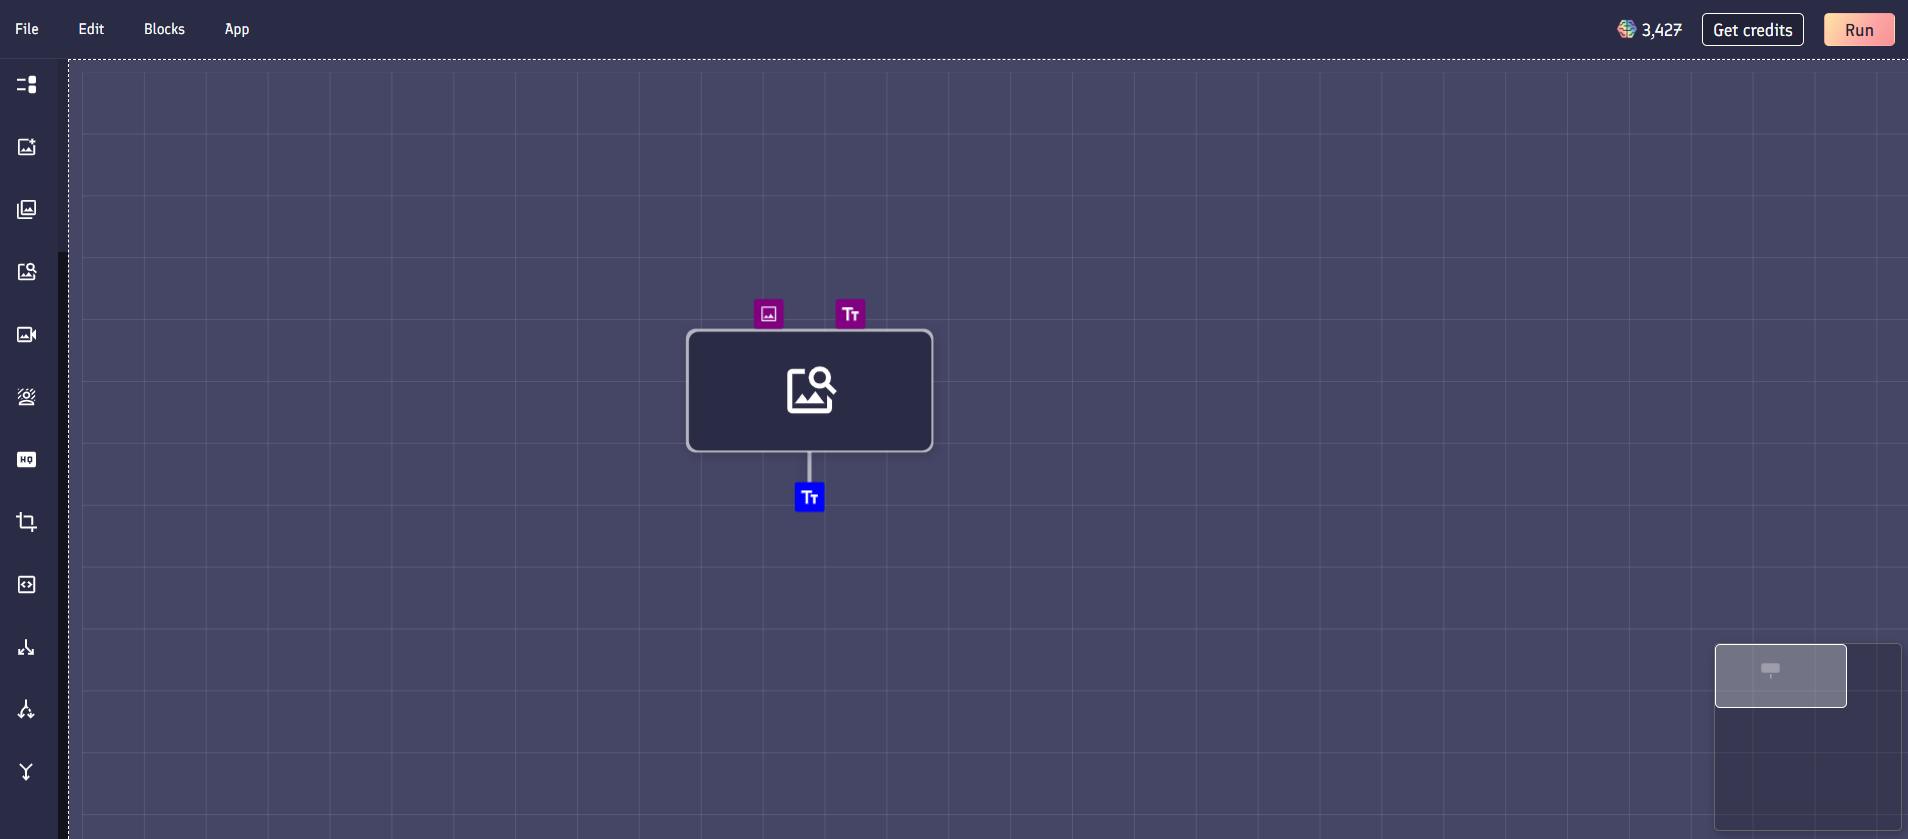
Image to text block
Image to text blocks allow you to ask questions about an image. The blocks accept the image to analyze as input, plus a text prompt that can be used to query the image.
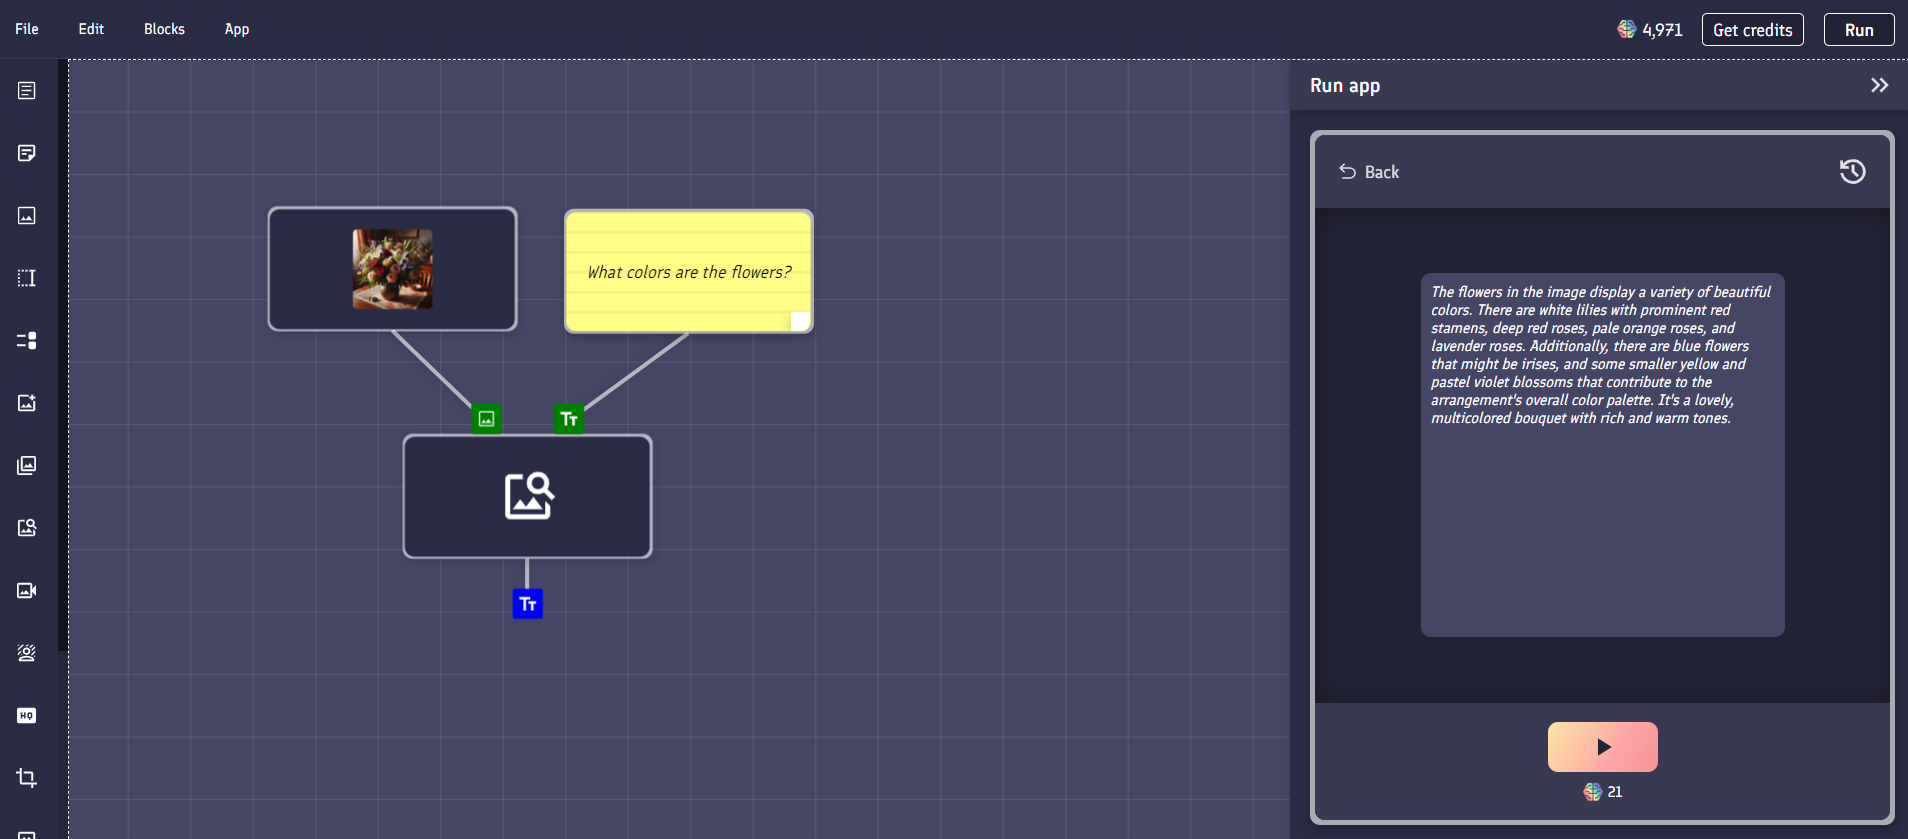
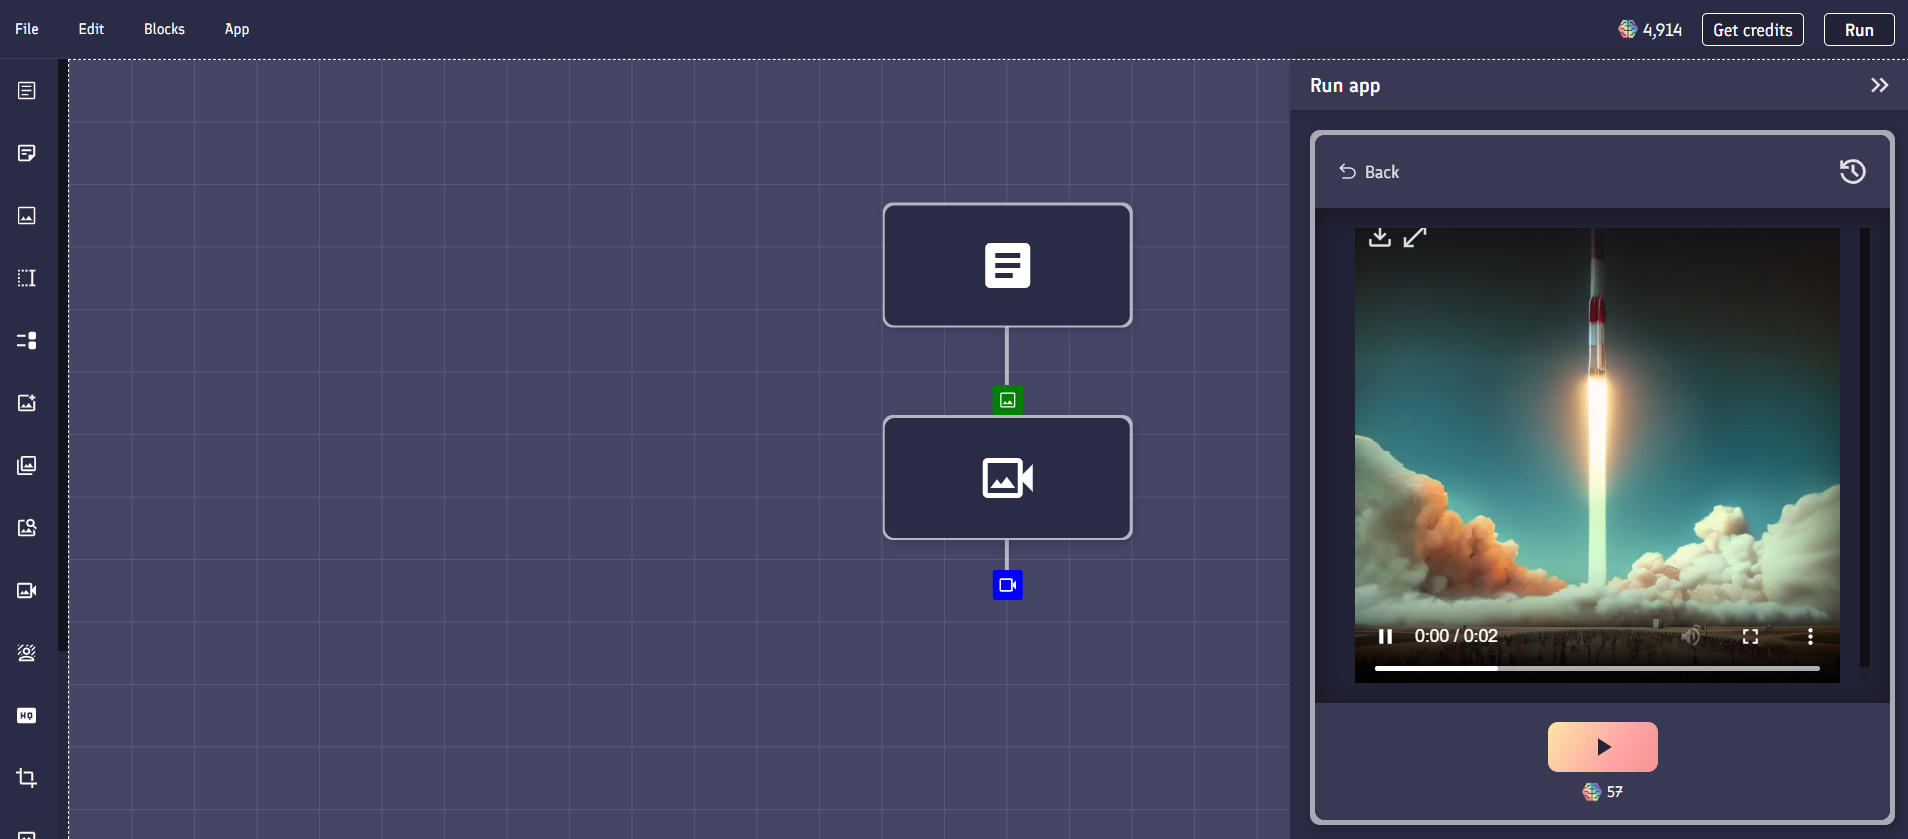
Image to video block
Note: This block has been replaced with image-to-video prompt blocks. You can find more information about these in the Prompt blocks section of the app builder.
Image to video blocks allow you to convert a static image into a short moving video. They have one image input, and one video output.
For example, in the below example, an image prompt "photograph of a rocket taking off" generates an image, which is then converted into a short video.
Editing
There are 4 elements that you can edit within an image to video block.

Number of frames: You can select to either make your video 14 frames long, or 25 frames long.
Output aspect ratio: You can choose to create a video with the same aspect ratio as the input image, or a 16:9 aspect ratio.
Frames per second: Selecting a higher number of frames per second will make your video smoother, but shorter in length.
Seed: If you wish, you can specify a seed value to keep the image to video generation consistent. Otherwise, you can leave this field blank to make it random each time.
Background remover block
Background remover blocks take an image as an input, and then use AI to try and automatically remove the background of the image.
This is useful for creating assets such as logos and icons that can instantly be used in other programs like Photoshop.
The below example uses an image generator prompt "Studio photograph of a male model on a white background" to create an image, and then use a background remover block to remove its background.
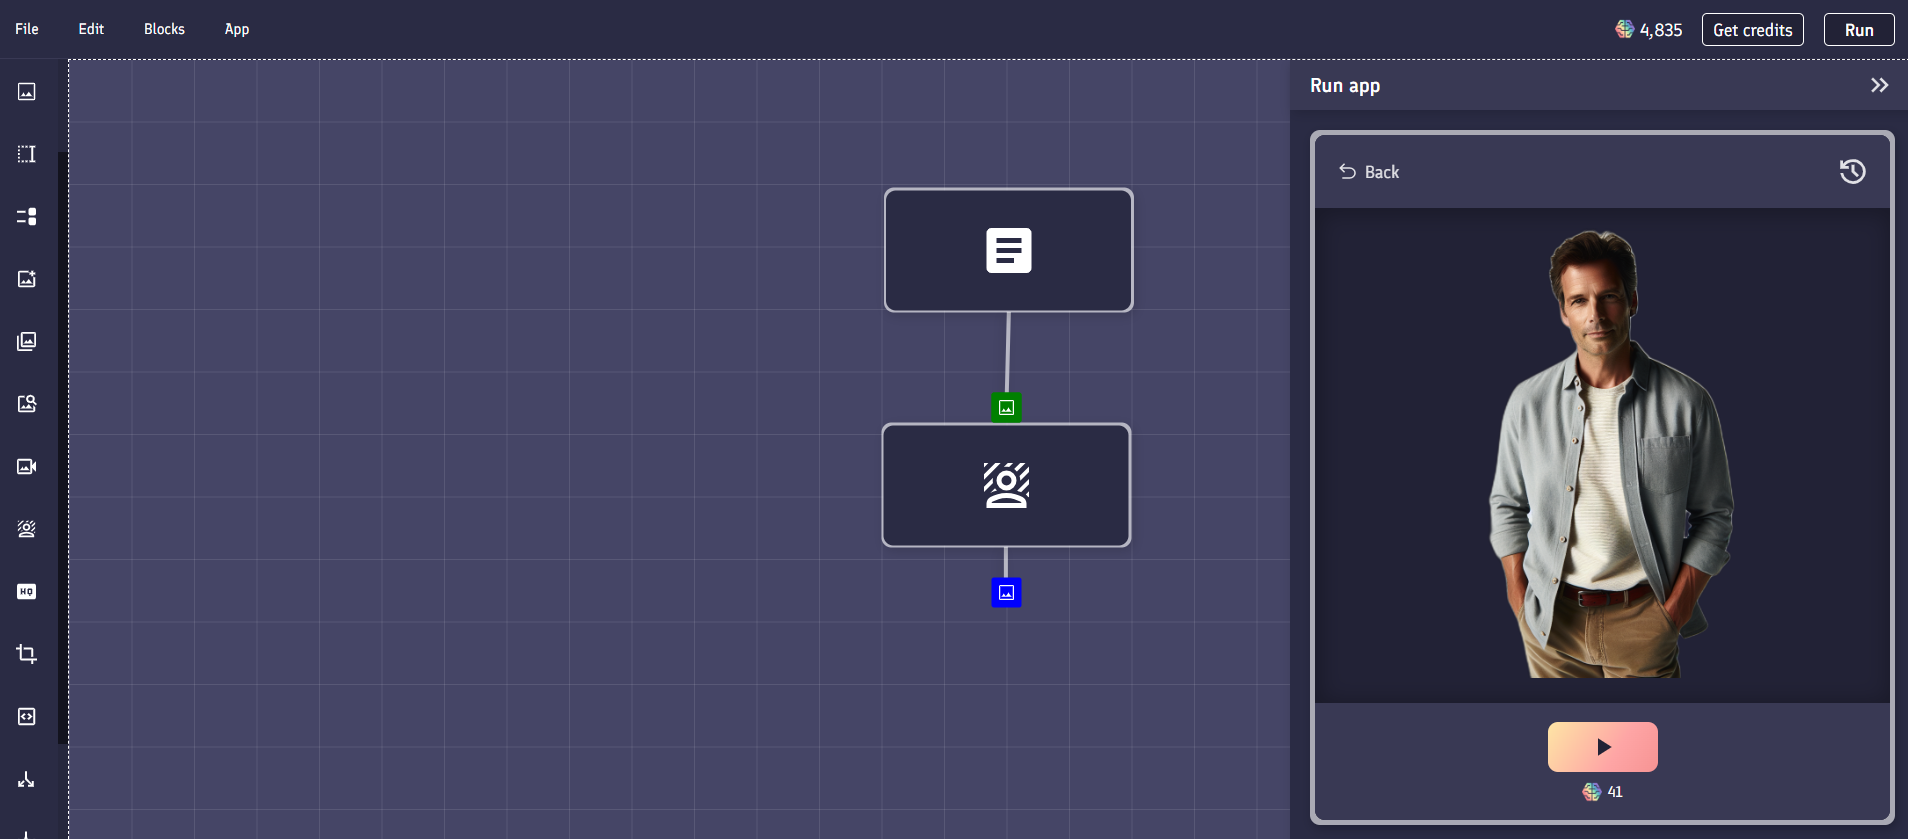
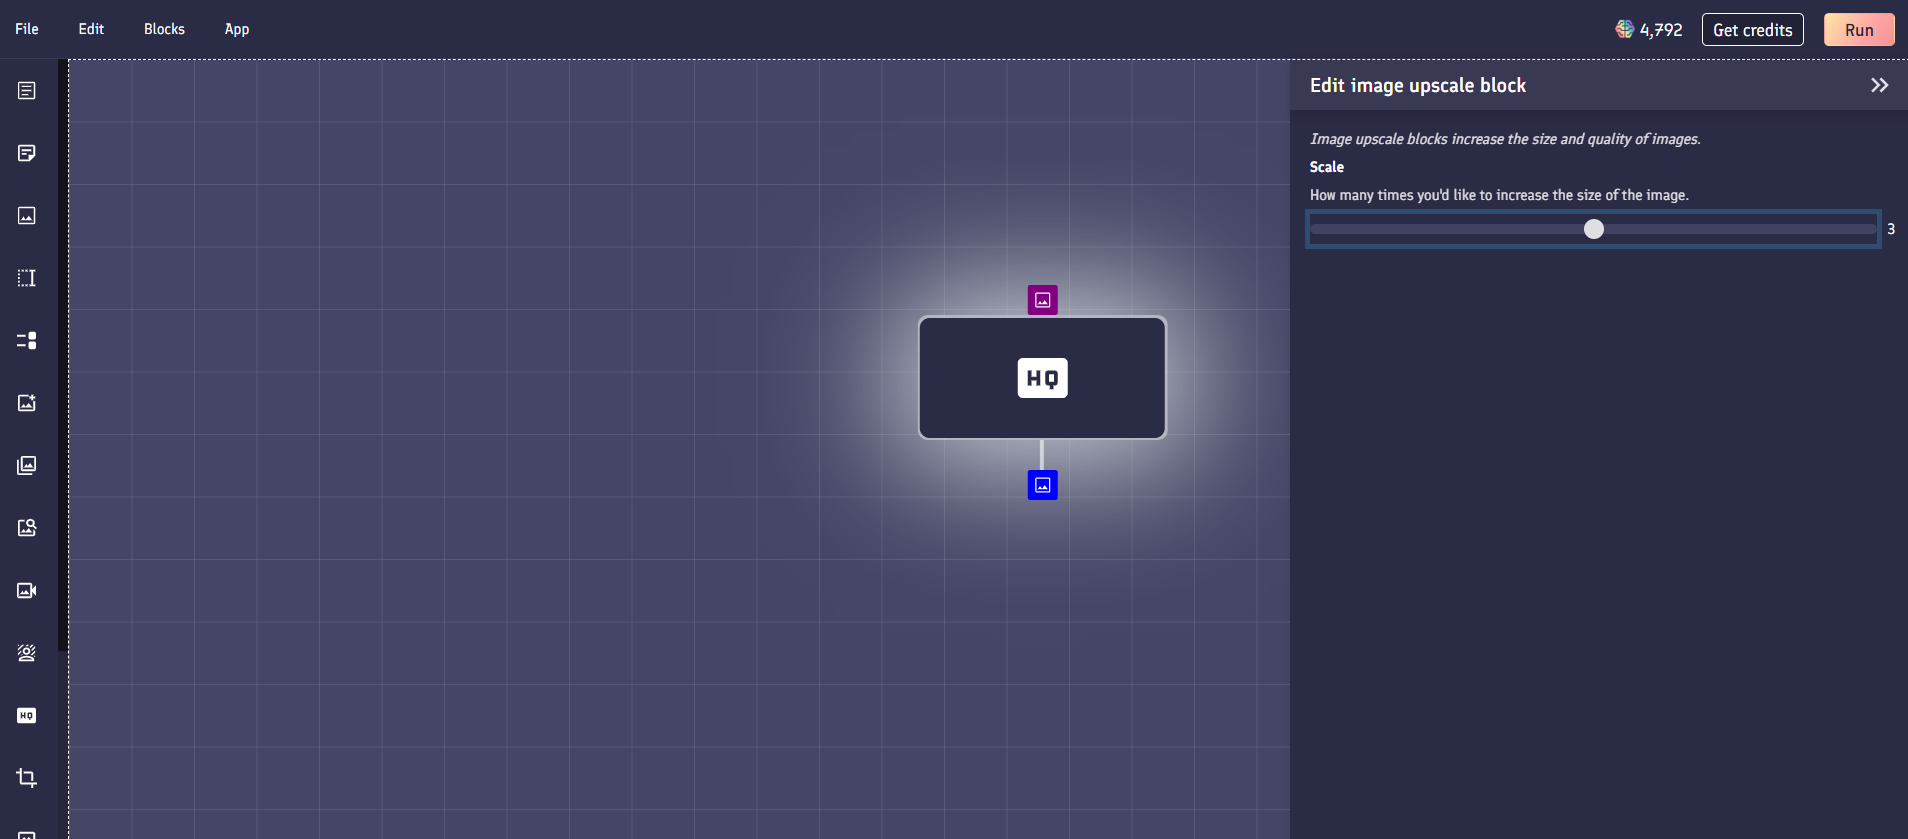
Image upscale block
Image upscale blocks use AI to increase the size and quality of any image.
They take one image as an input, and have one image output (the upscaled image).
If your app generates posters, or similar assets that need to be higher resolution, then you might consider using an image upscale block within your app.

Editing
Within the edit menu for an image upscale block, you can set the scale of the upscale. For example, if you set this value to 3, the input image would be upscaled three times.
Crop image block
Crop image blocks allow you to resize an image by cropping its size.
Editing
There are several options you can choose from when using a crop image block.
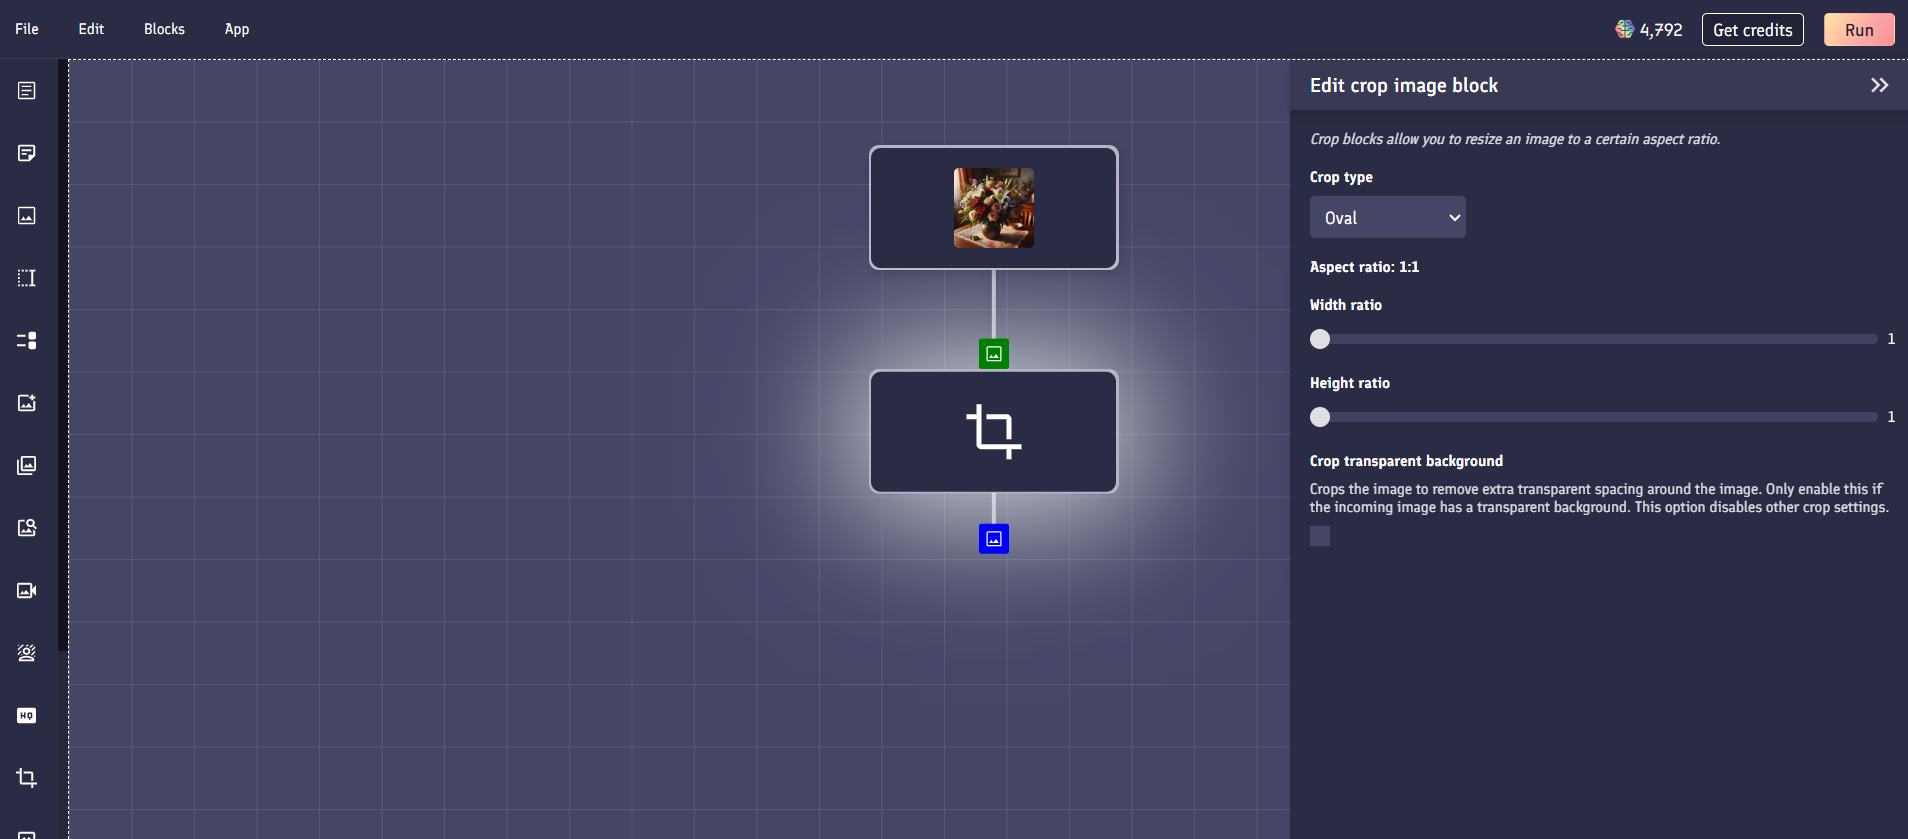
Crop type: The crop type specifies the shape of the image crop. You can choose from a rectangular/square shaped crop, or an oval/circle shaped crop.
Aspect ratio: The aspect ratio sliders allow you to set the width to height ratio of the cropped area. For example, a 2:3 aspect ratio with a rectangular crop would cut your image into a poster shape.
Crop transparent image: If you have an image with a transparent background, you can select this option to crop the image to the content within the image. With this option set, you cannot set the shape or aspect ratio of the crop.
Text to code block
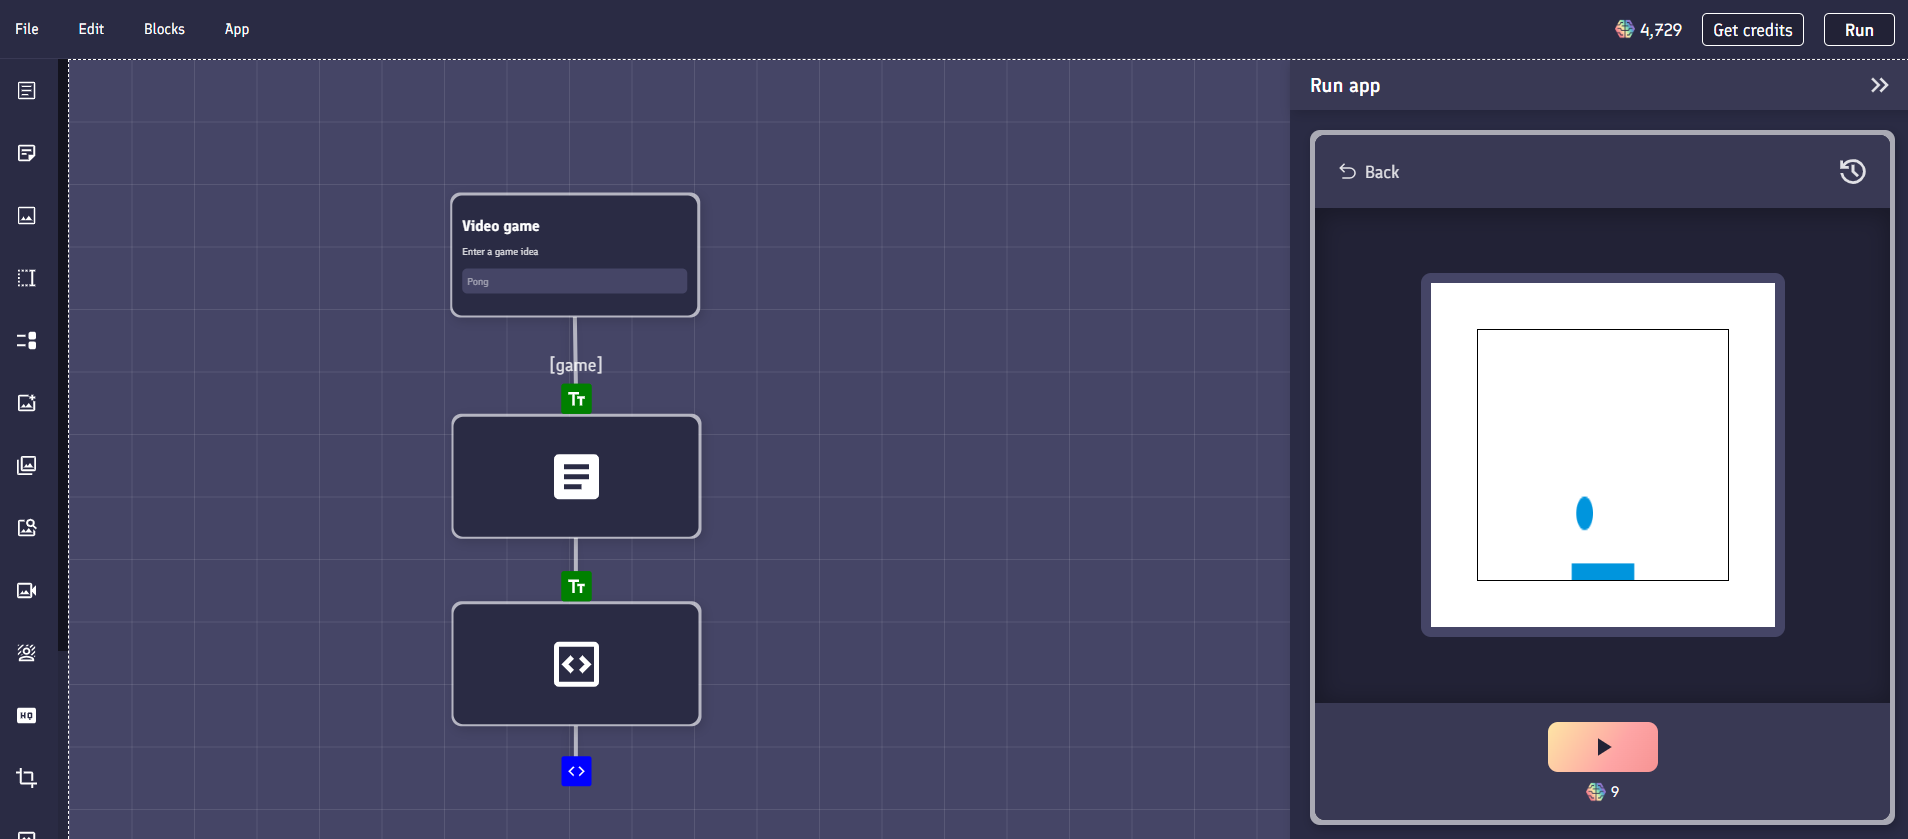
Text to code blocks allow you to render HTML code as a tiny website within your app. They take a single text input, and have a single code output.

Rendered HTML outputs can utilize CSS, and also run JavaScript.
This means you can do things like asking a text generator to output HTML code for a simple video game and play it.
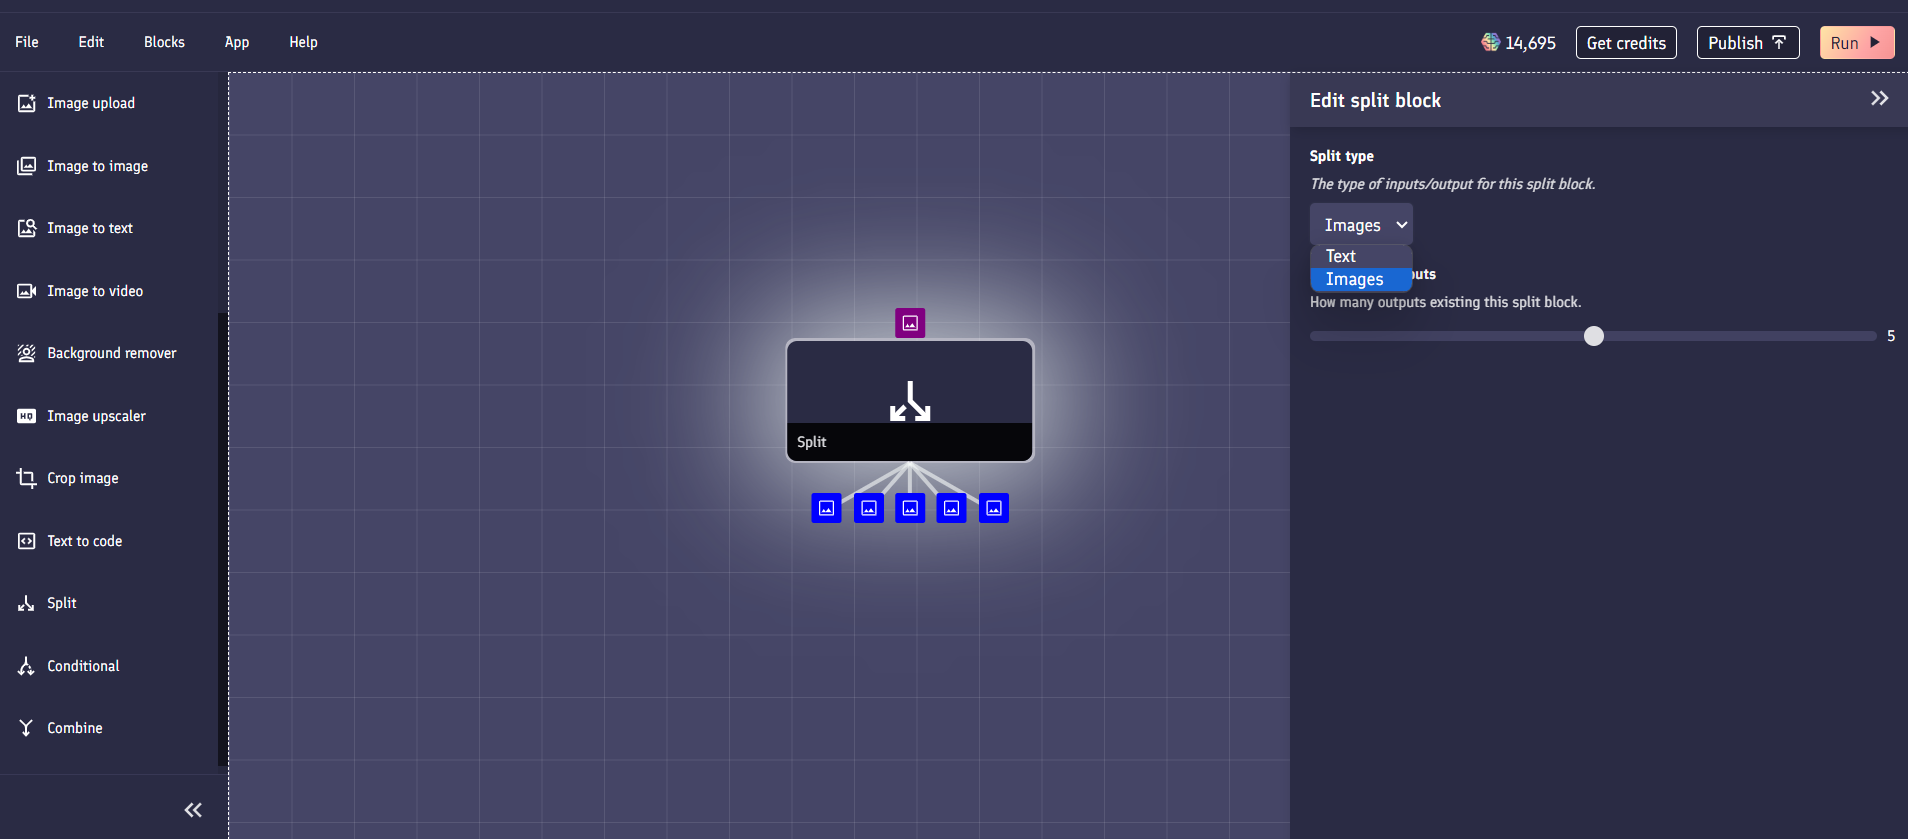
Split block
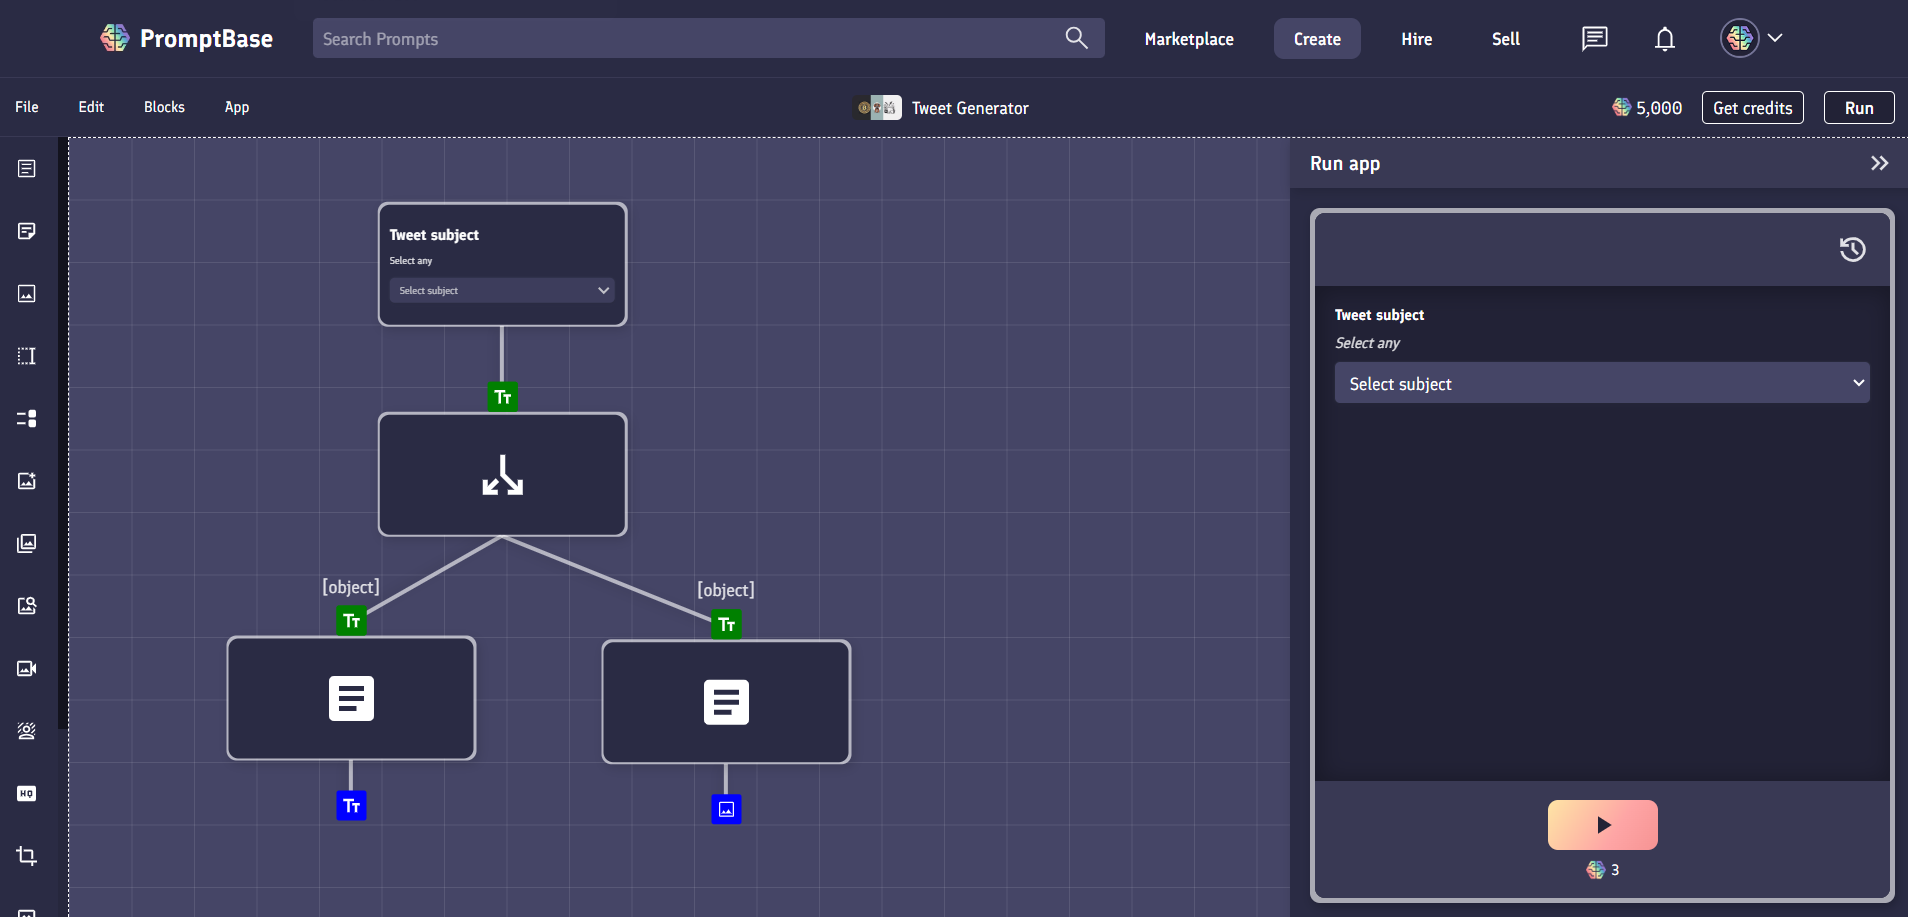
Split blocks will make multiple copies of any image or text that goes into it. For example, if the text "Hello" flowed into a Split block's input, then two copies of text "Hello" would flow out of the output.

Split blocks can be useful when linked to Text input or Select blocks, allowing you to take a single text value chosen by a user and use it for multiple things.
The below example shows a simple app that generates tweets. There is a single text input "Tweet subject" which, using a split block, gets fed into a text generator and an image generator prompt at the same time to create a tweet and an image.
Editing
Editing a split block will allow you to change the type of data that is being replicated, and the number of times (outputs) you'd like to replicate it. Currently you can select up to 8 outputs for a split block. If you need more outputs, you can connect multiple split blocks together.
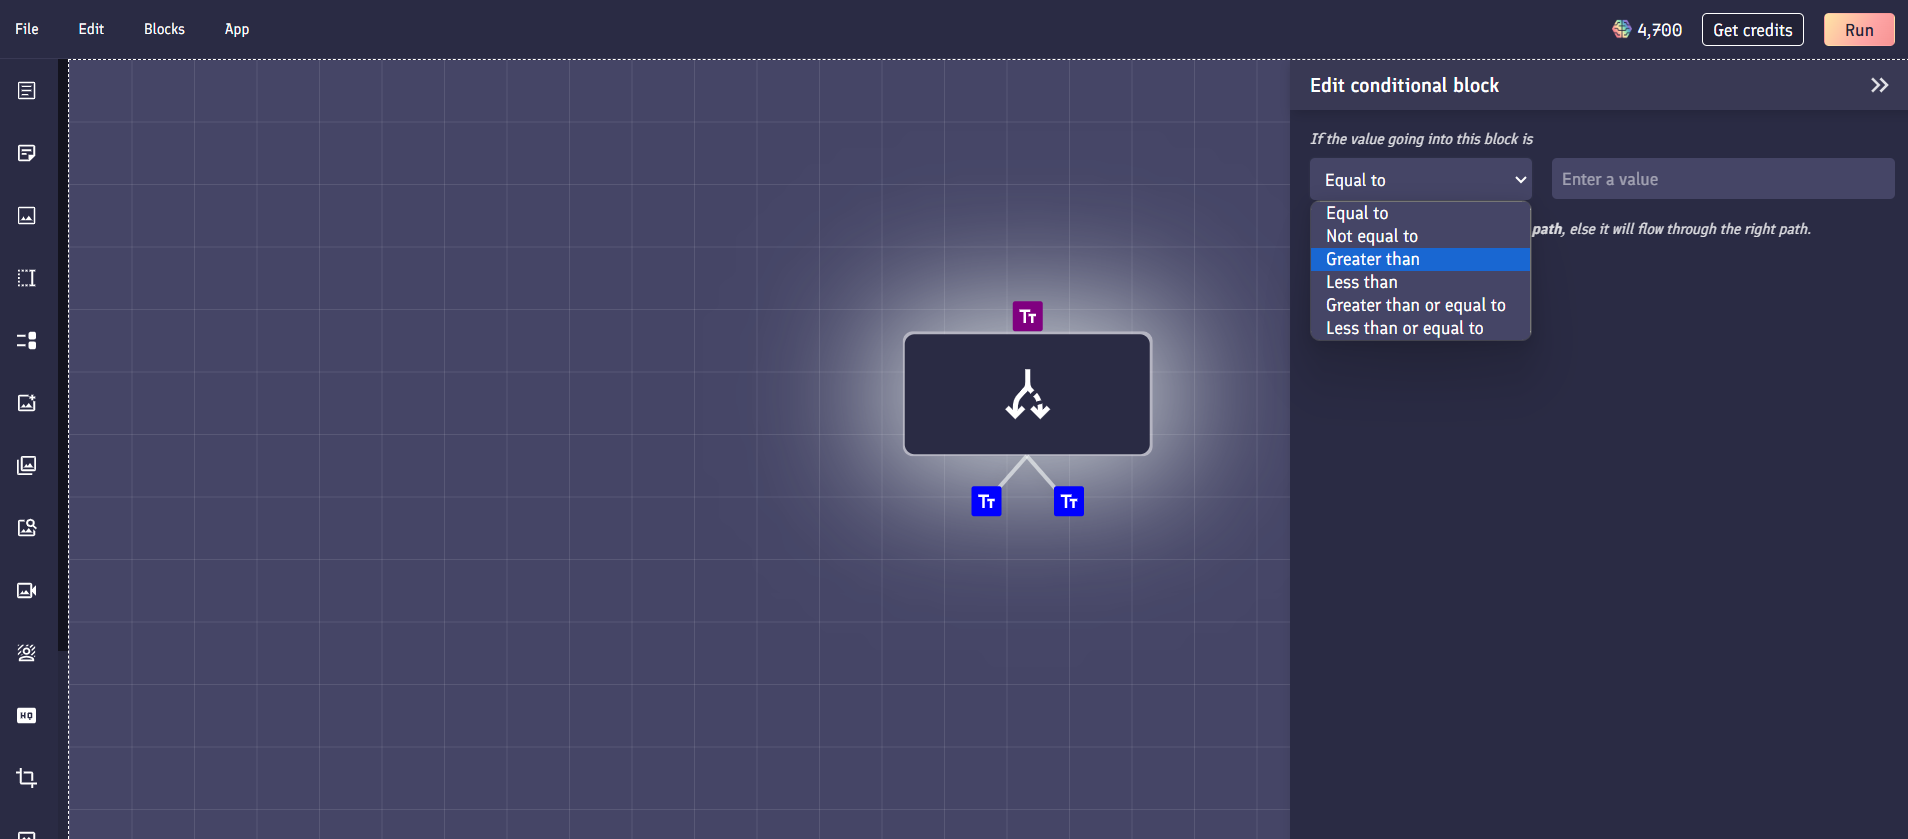
Conditional block
Conditional blocks allow you to route the flow of text data through your app based on a condition that you set.
These blocks take one text input. If that text satisfies the condition you set within the block, then it will flow down the left path, else it will flow down the right path.
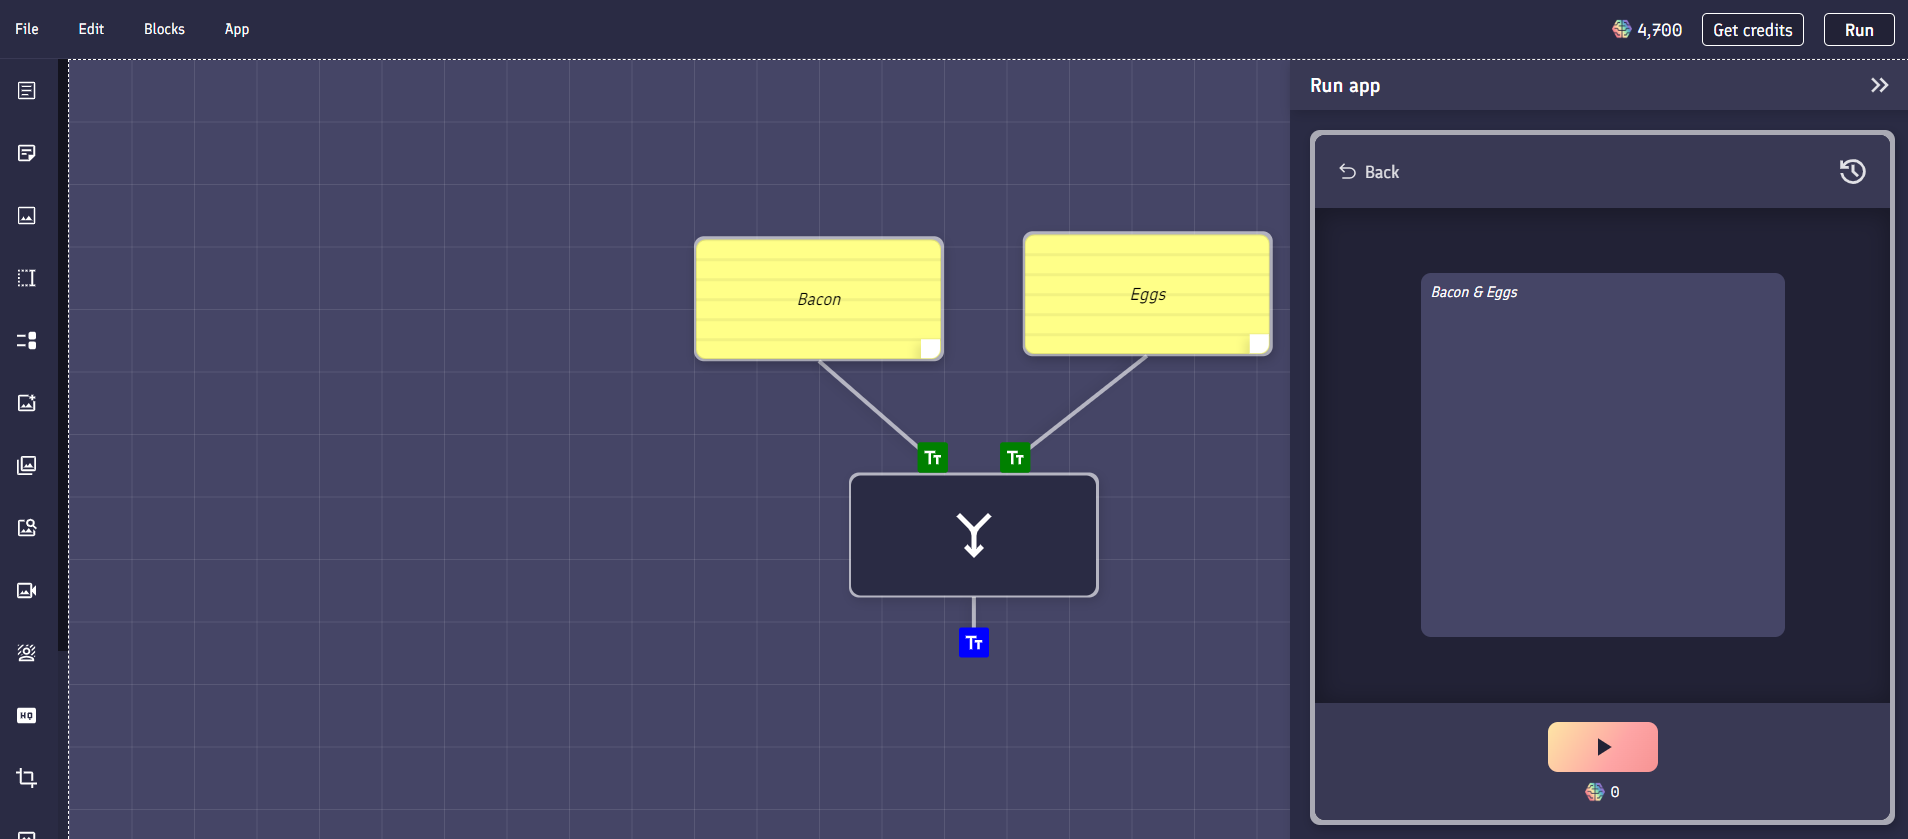
Combine block
Combine blocks allow you to combine two pieces of text with a joining phrase.
They take two text inputs, and output a single text output (the joined text).
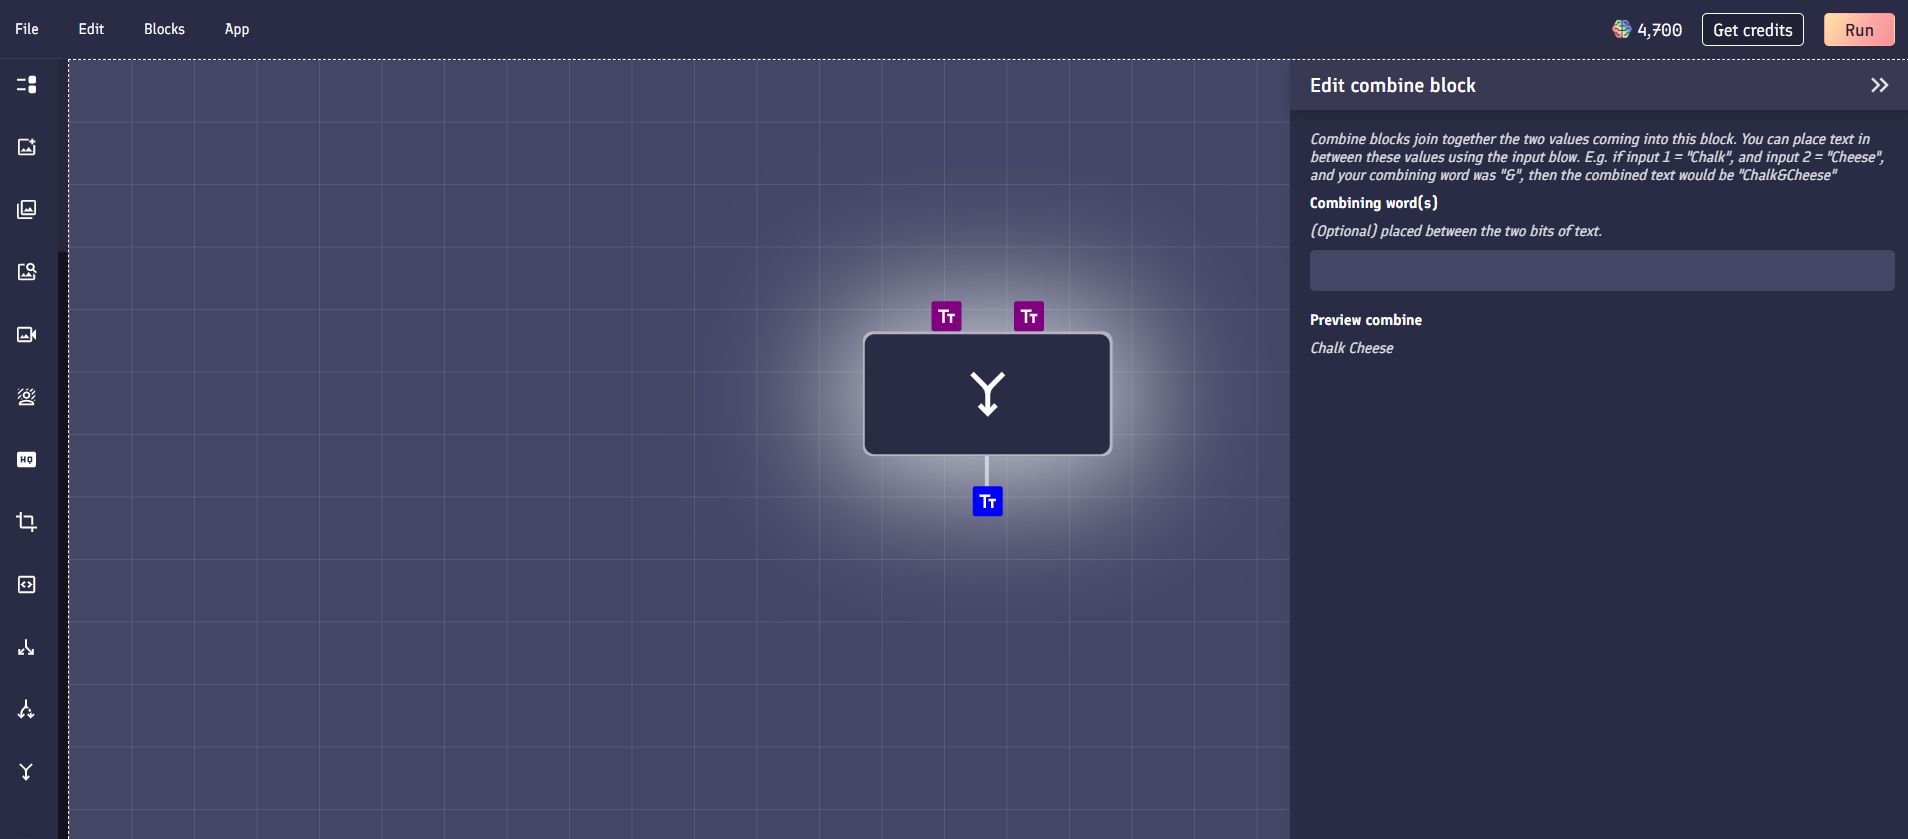
Editing
Within the edit menu you can specify the phrase you'd like to use in order to join the two pieces of text together. In the below example the symbol & is used to join together the words Bacon and Eggs to become Bacon & Eggs.